
Short But Stunning: These Easy Oahu Hikes Have Views Worth a Million Bucks
Oahu has plenty of famous, jaw dropping hikes. While Kauai usually gets the buzz for being the hiker’s paradise, most of those epic drone shots you see plastered on social media by YouTubers and influencers are actually on Oahu.
But…more than half of them are flat out illegal or genuinely described as “extremely dangerous” by people that have hiked them.
Well, I specialize in a different niche of hikes…I like to call them “breathtakingly beautiful but very low risk of death” hikes ; )
My Favorite Hikes on Oahu
This post may contain some affiliate links, which means I’ll make a little money on anything you choose to purchase. But of course, I only recommend my absolute favorites to you. Thank you for supporting the brands that make HulaLand possible.
Some of these hikes are “easy,” some are physically challenging but very straightforward (well maintained trail, sometimes completely paved), some may require a bit of scrambling around, and one is 1000 stairs straight up the side of a mountain ; )
The common thread…they’re all legal hikes, they’re all relatively short (2ish miles or less), and they all have amazing views.
Here we go!
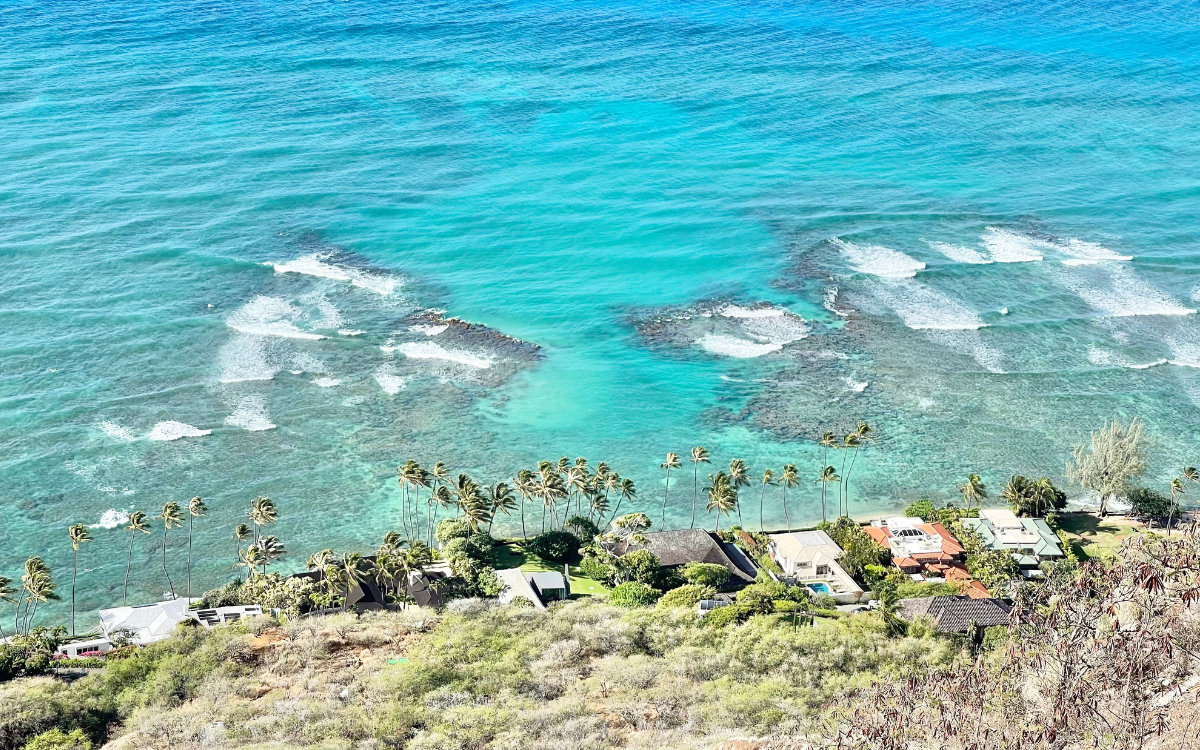
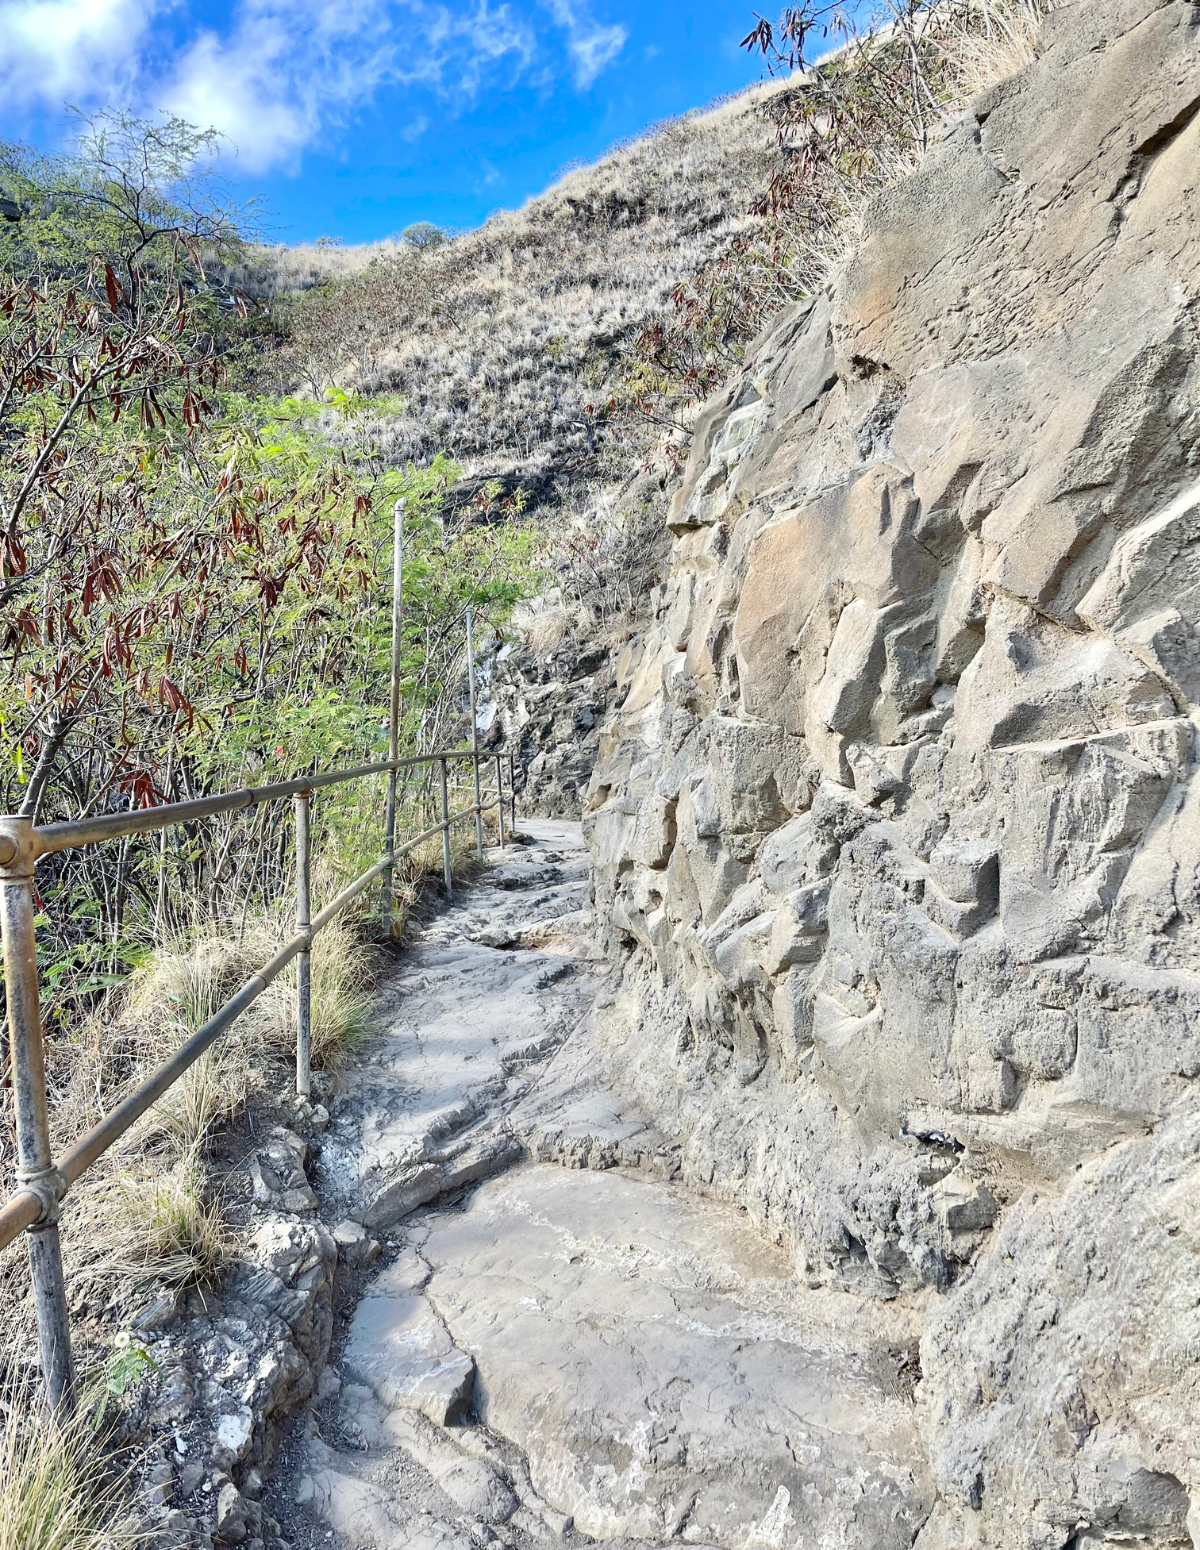
Diamond Head
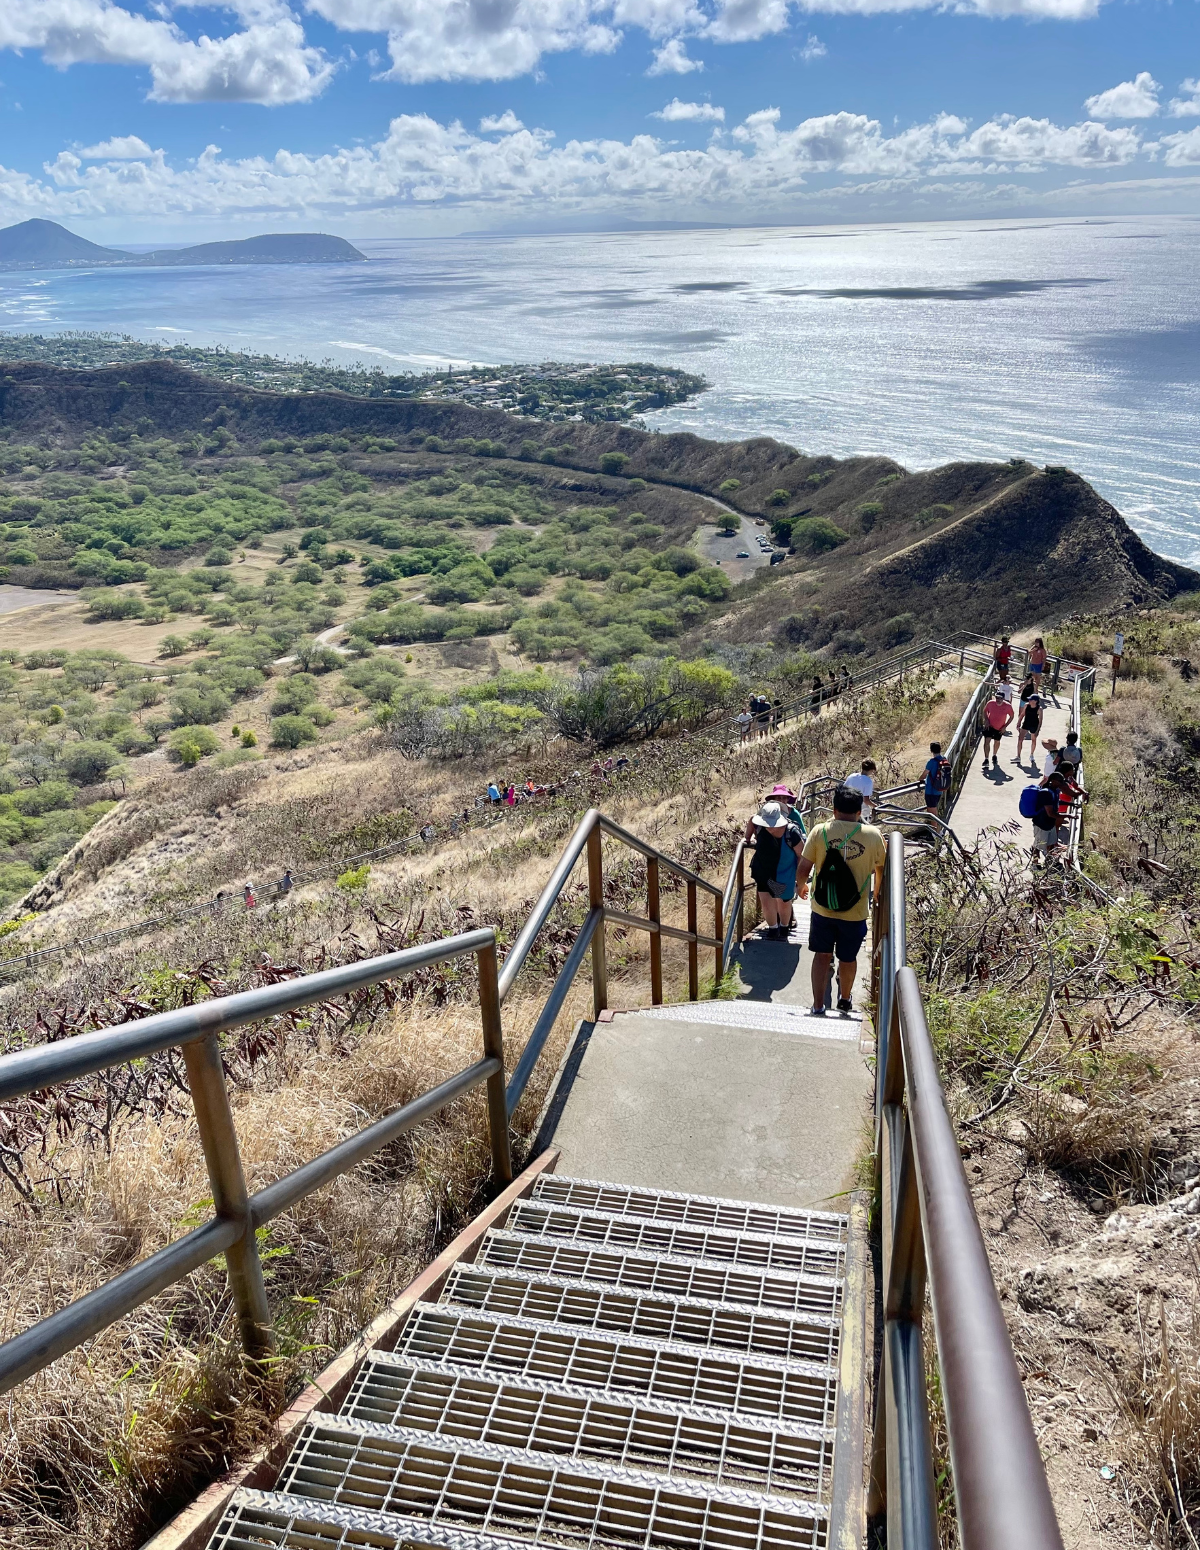
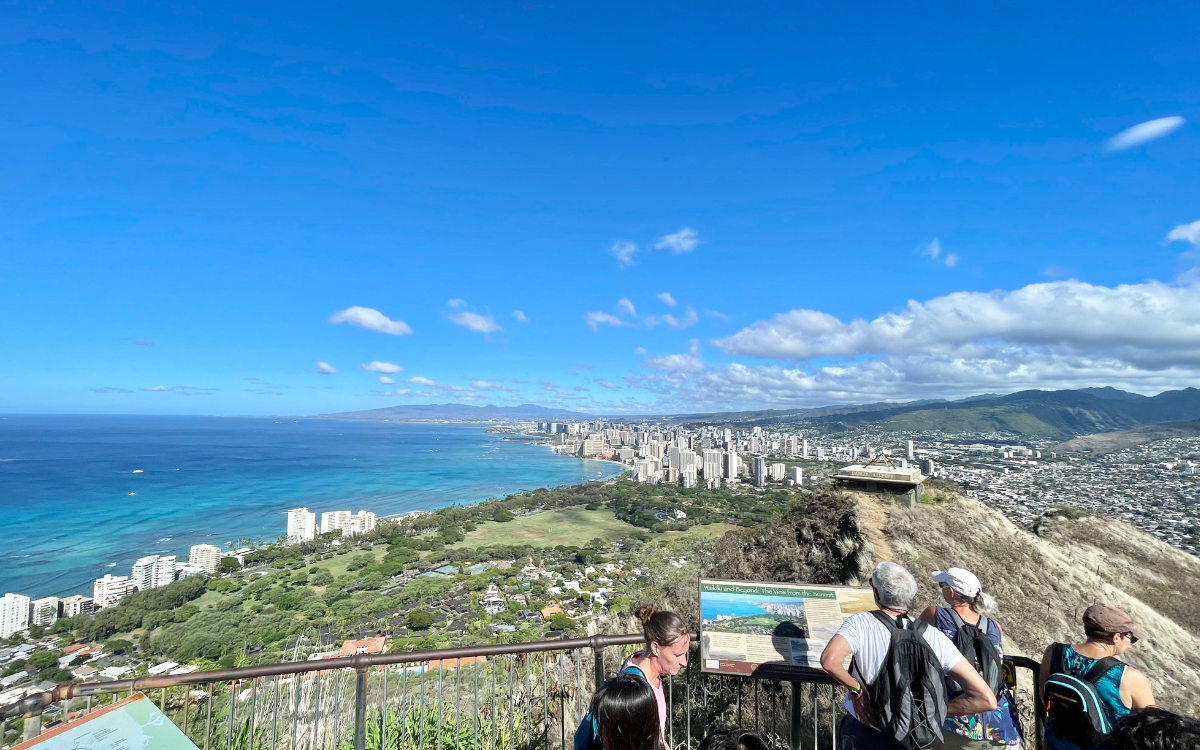
Diamond Head is probably the most iconic hike on Oahu, and that’s partially because of how accessible it is but mostly because of the views.
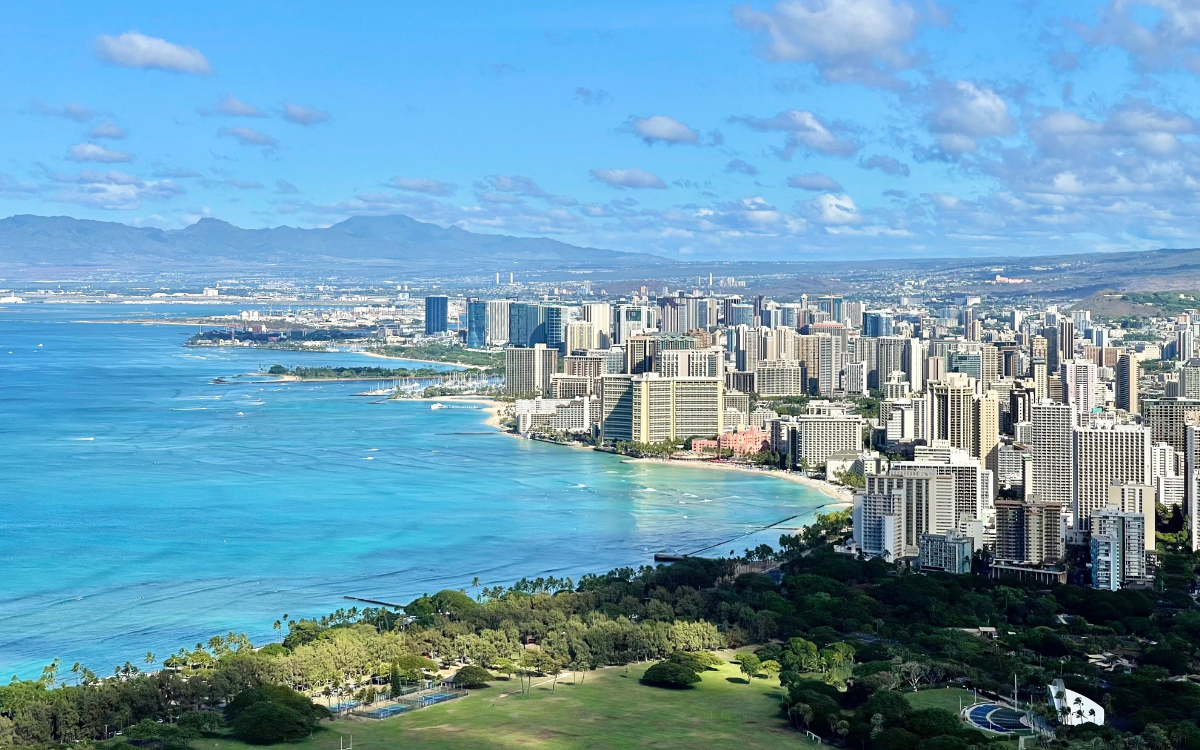
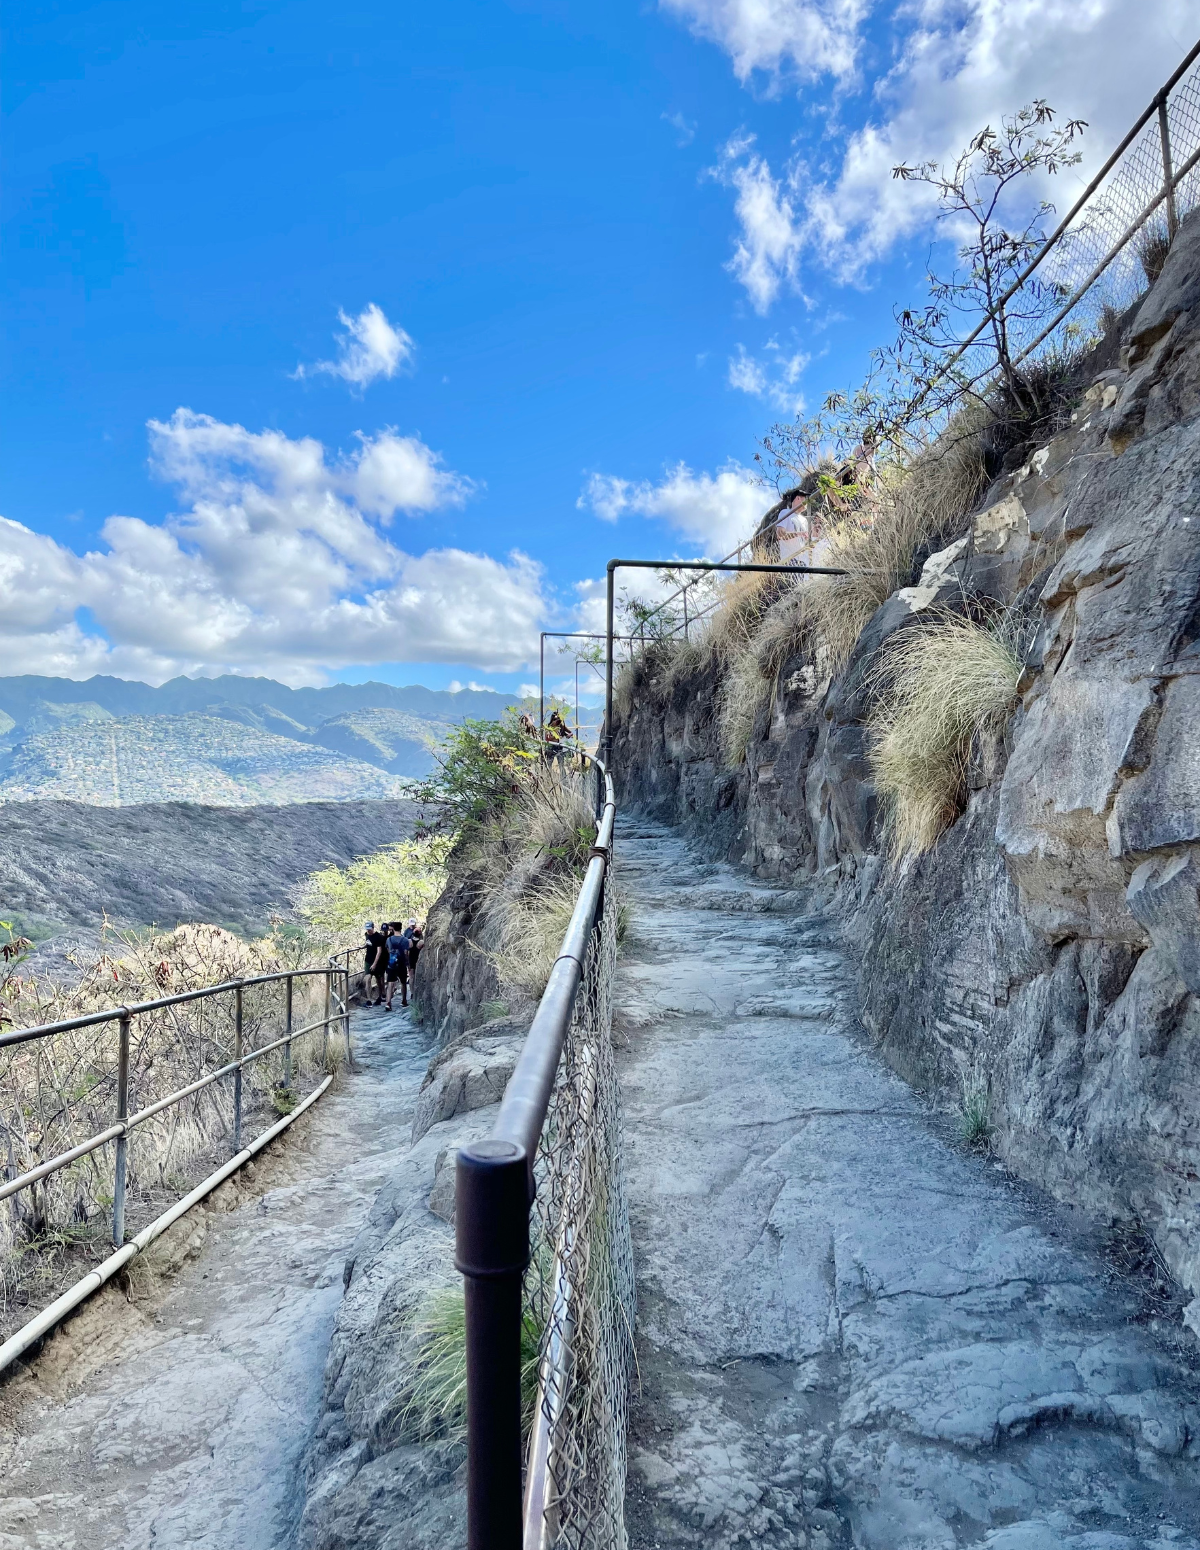
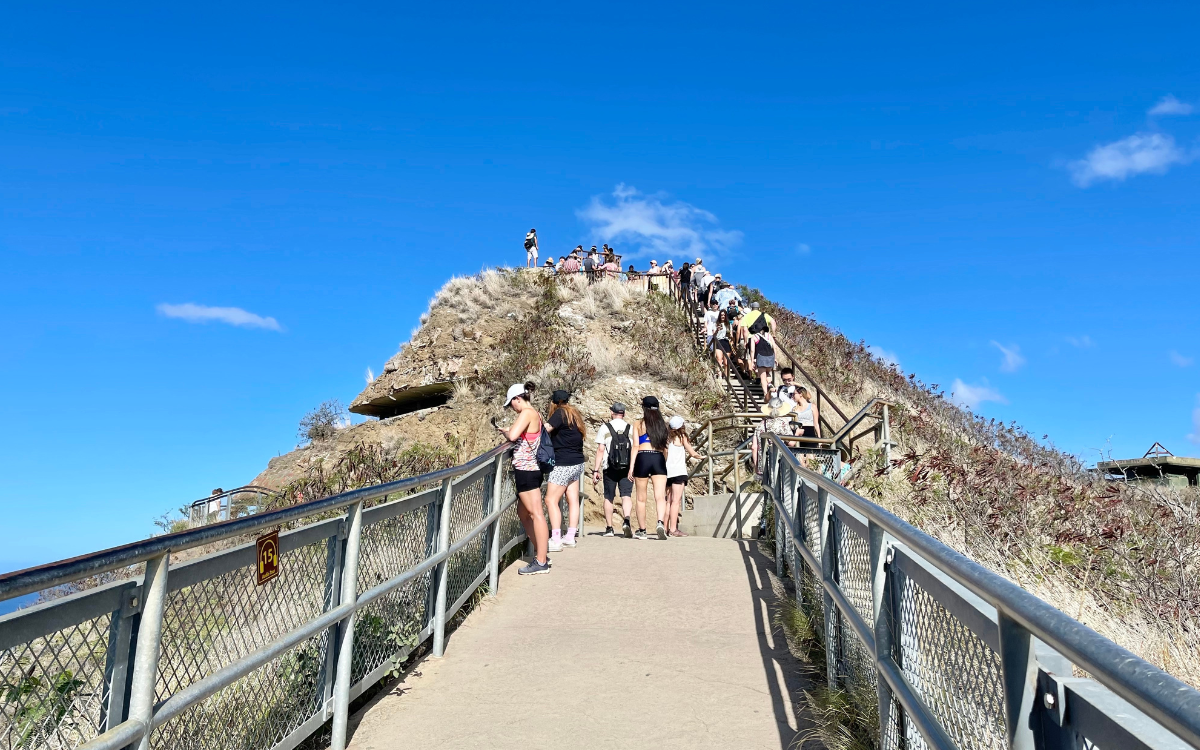
It’s a fairly mild hike for such a big payoff. Yes, it’s all uphill, but it only takes 30-40 minutes to climb to the top and once you do, you’ll have fabulous views of Waikiki and Honolulu.
The entire trail is very well marked, maintained and well traveled so there’s no big “risk” factor.
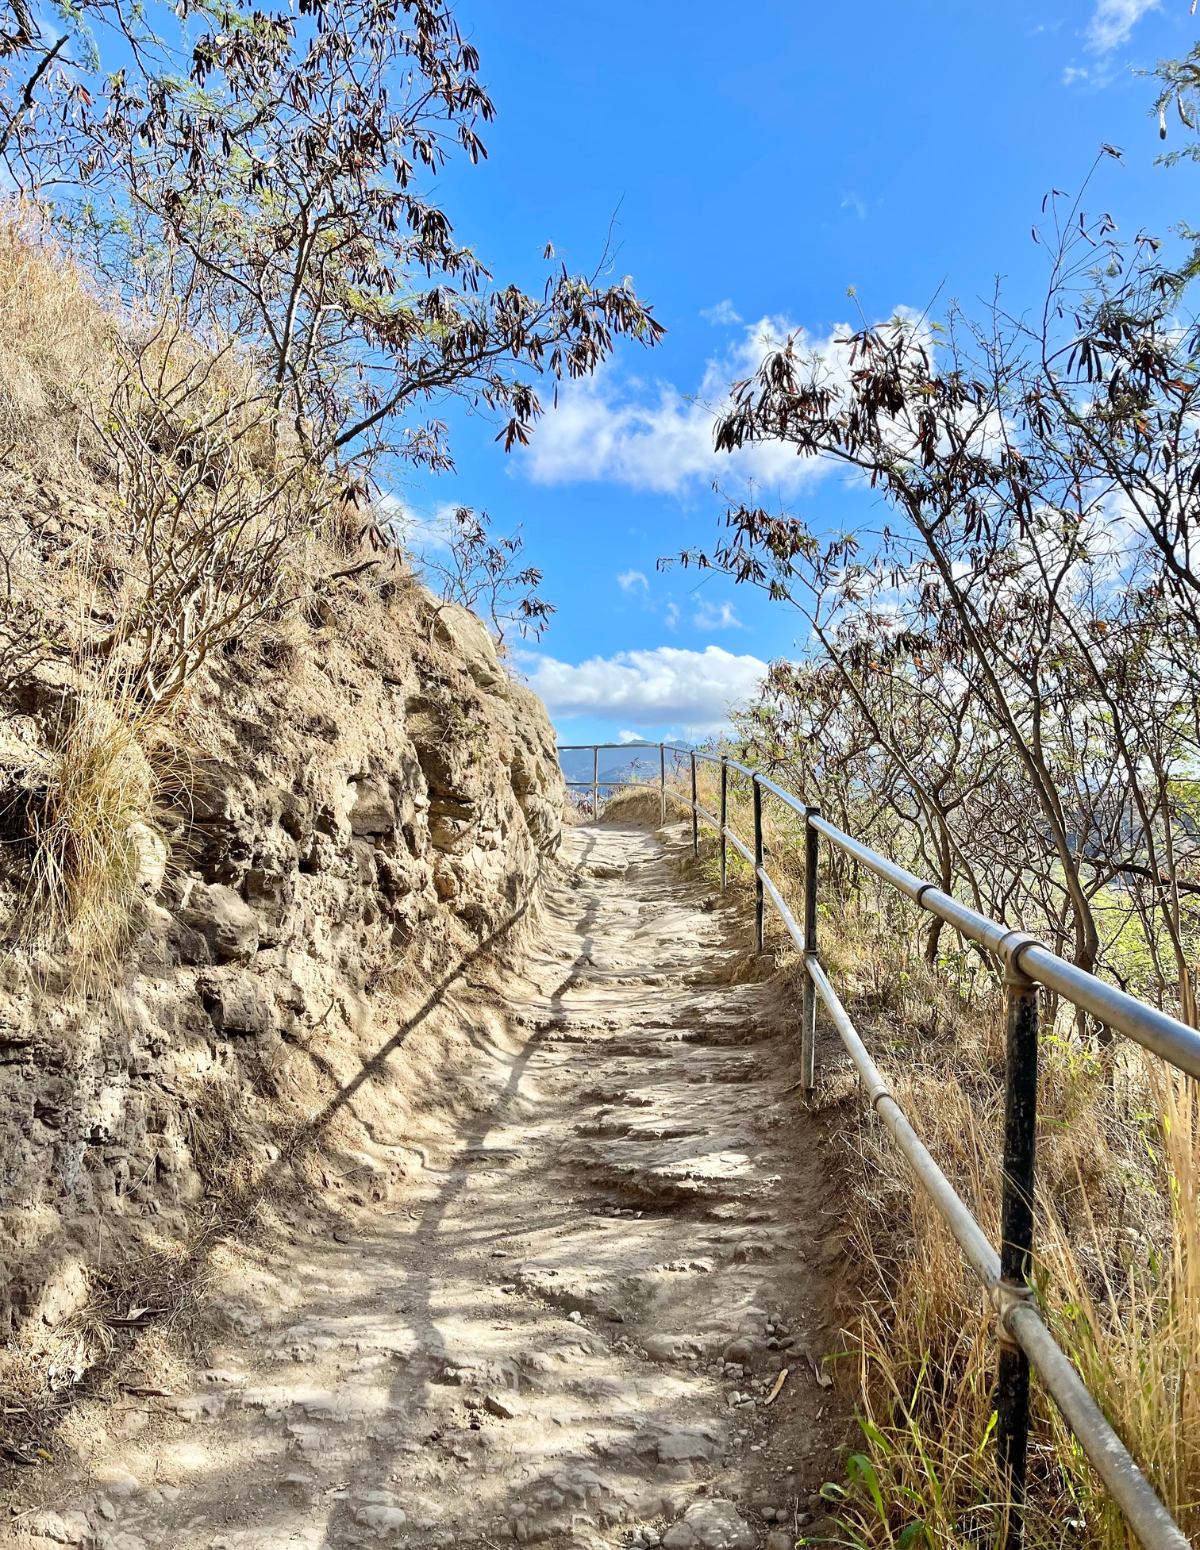
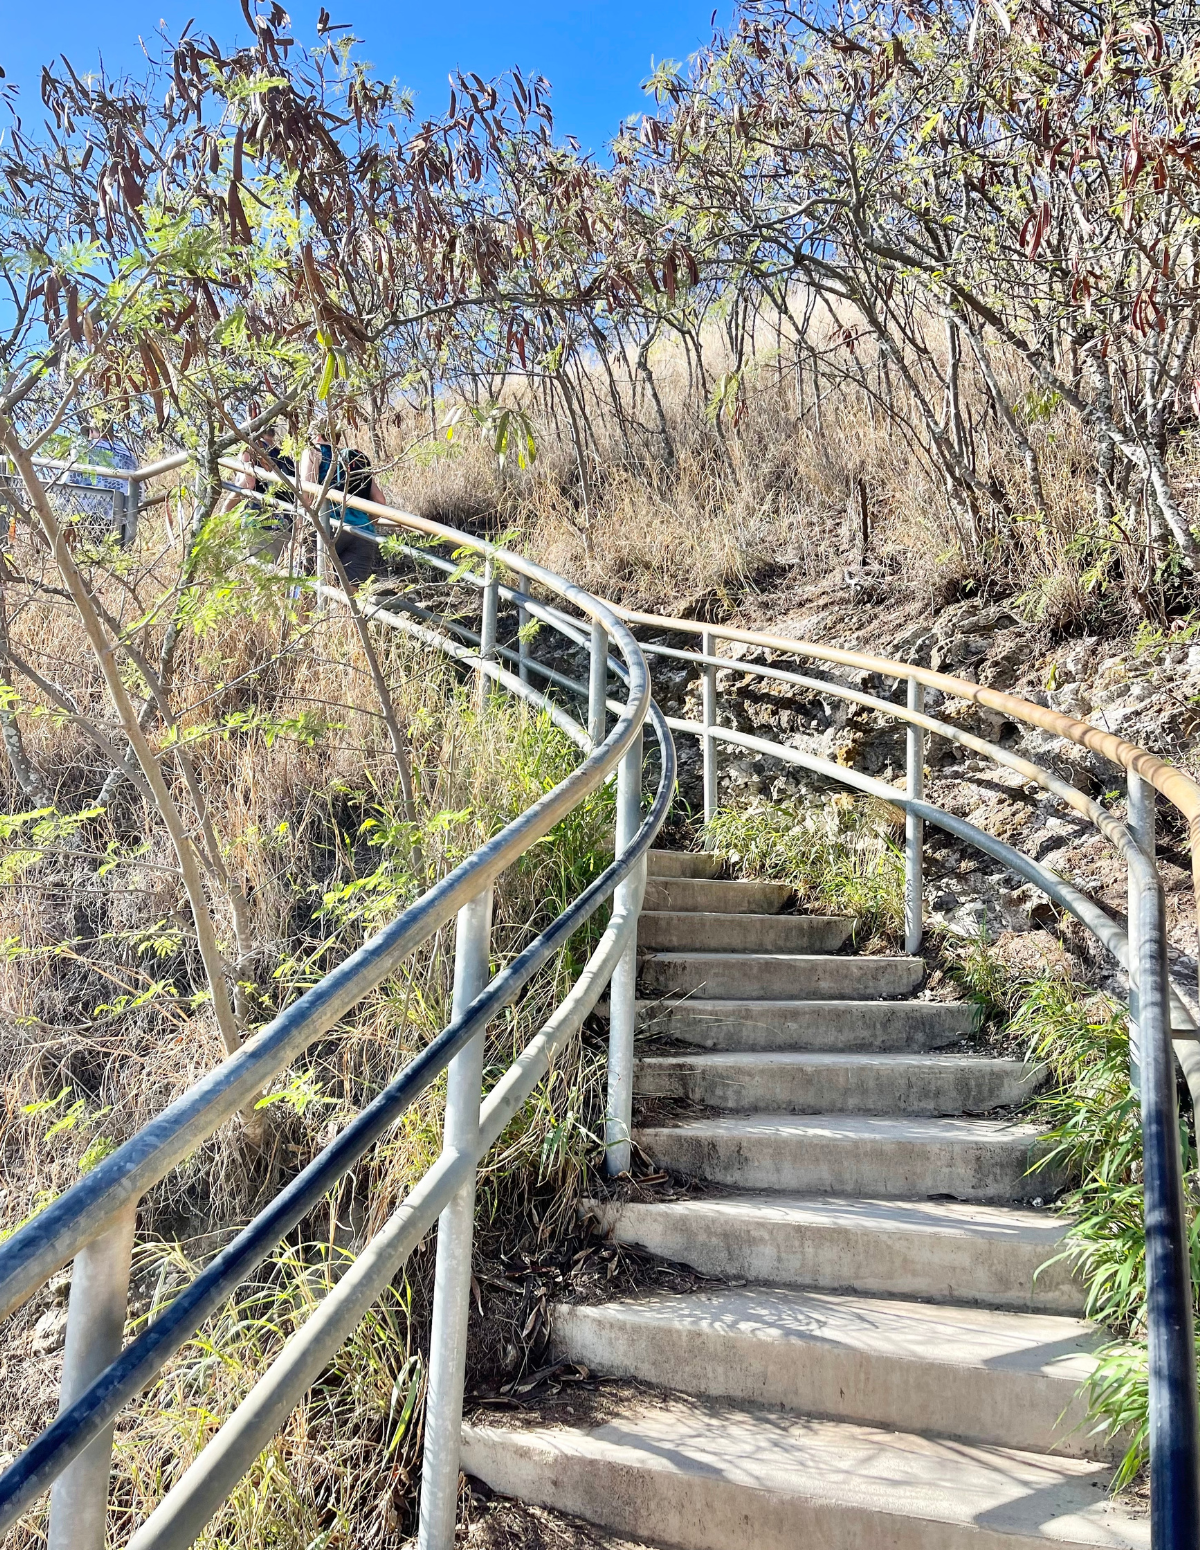
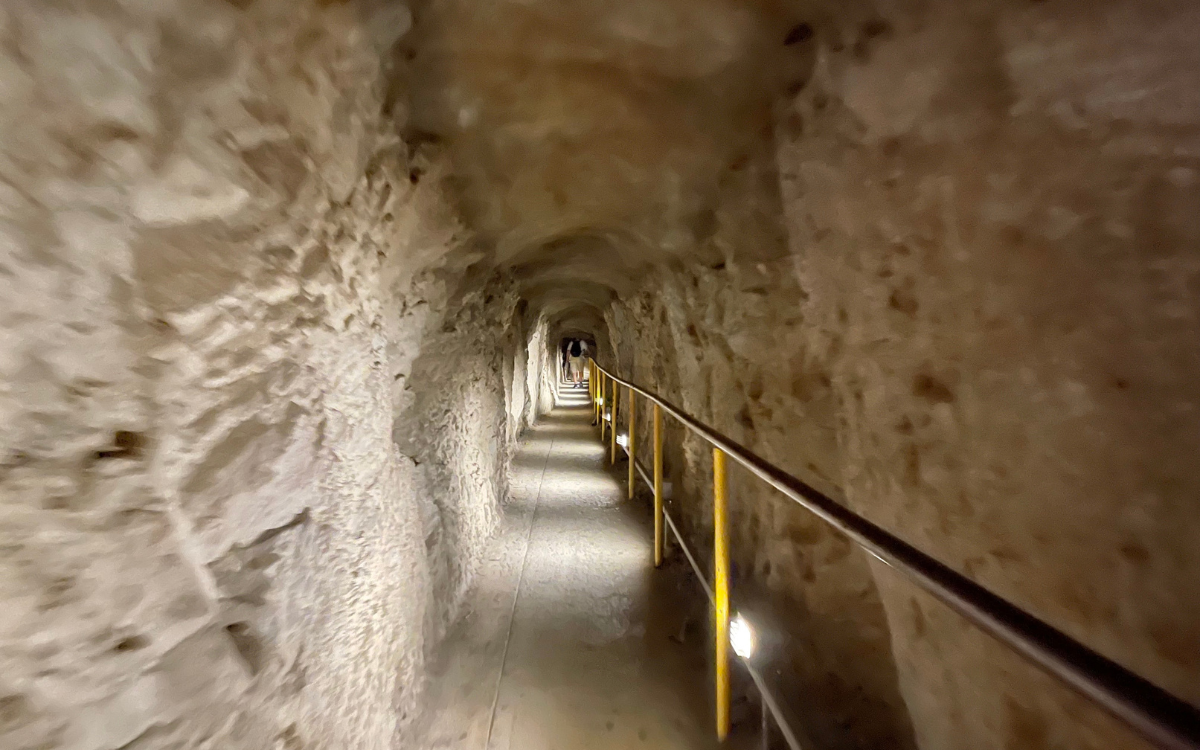
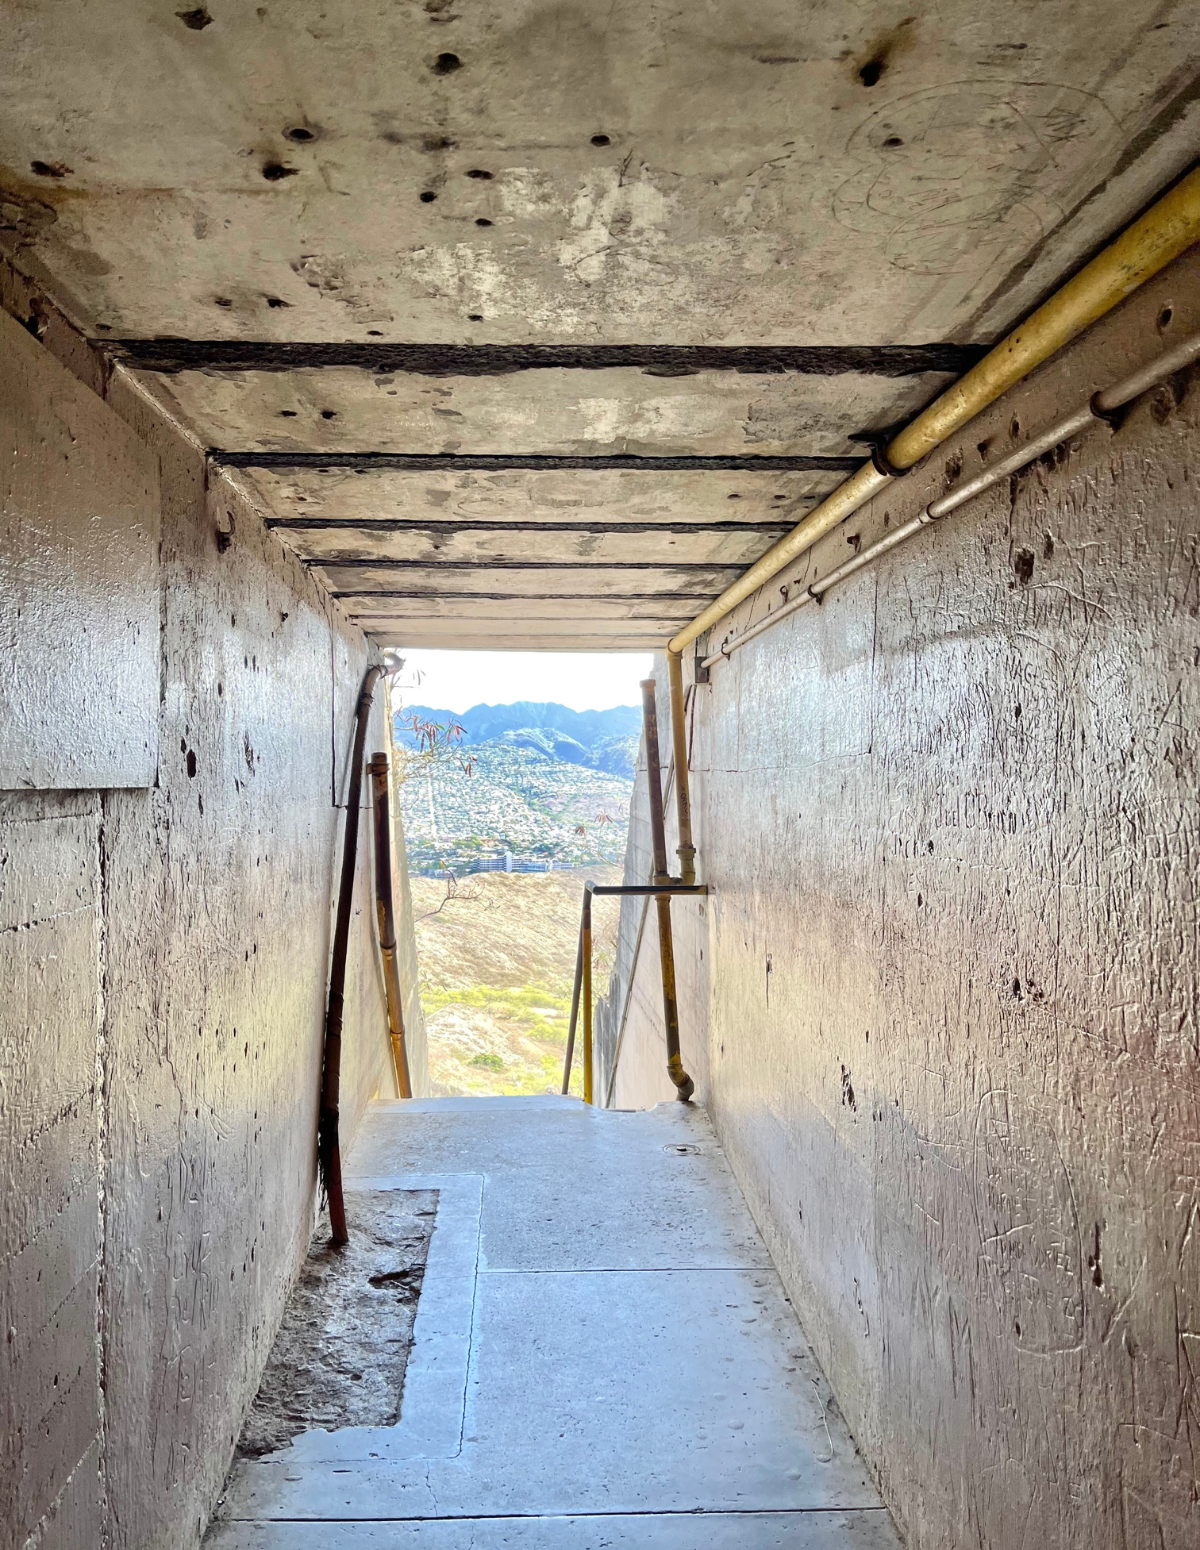
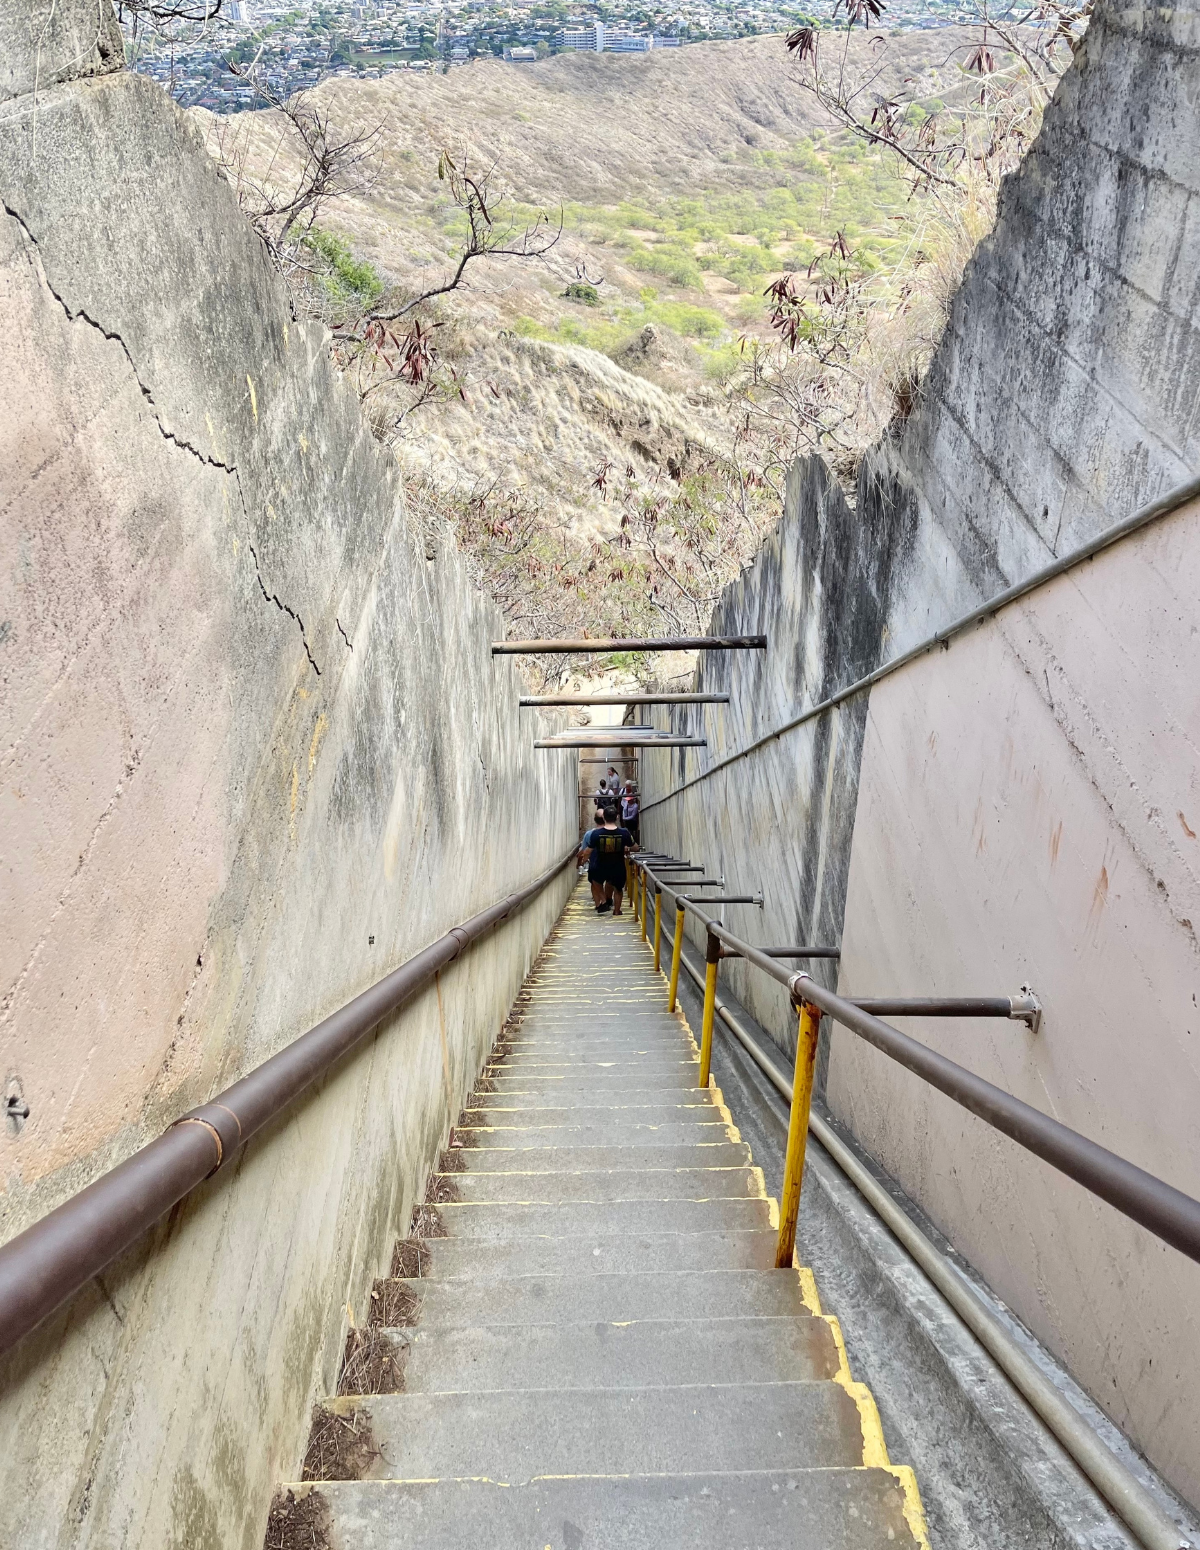
The most dramatic part of the hike is the tunnel you have to walk through once you get towards the top (maybe 30 seconds or so) and then…the stairs.
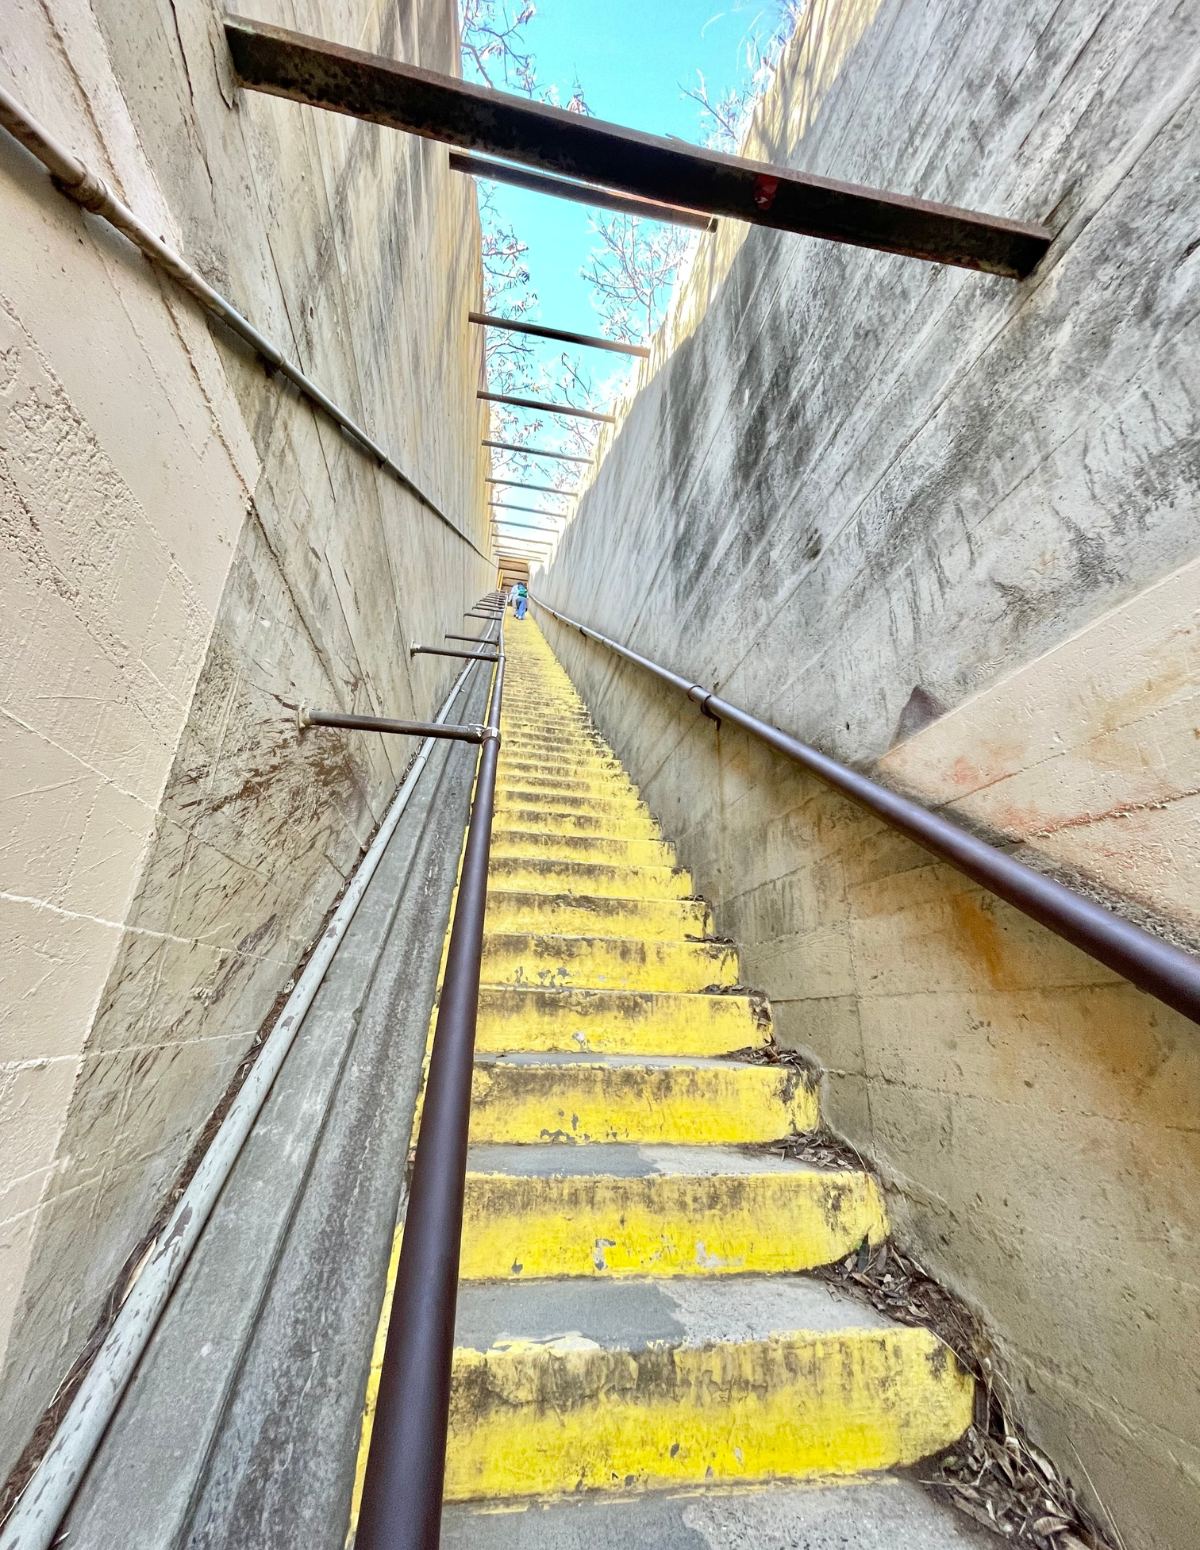
Once you come out of the tunnel, you’ve got two options. Turn right and you’ll go up the largest staircase you’ve ever seen ; )
There’s a sign suggesting that you go left instead. If you go left, you still have to climb some stairs, but they’re more broken up so it seems easier. Either way you go, it’s a loop.
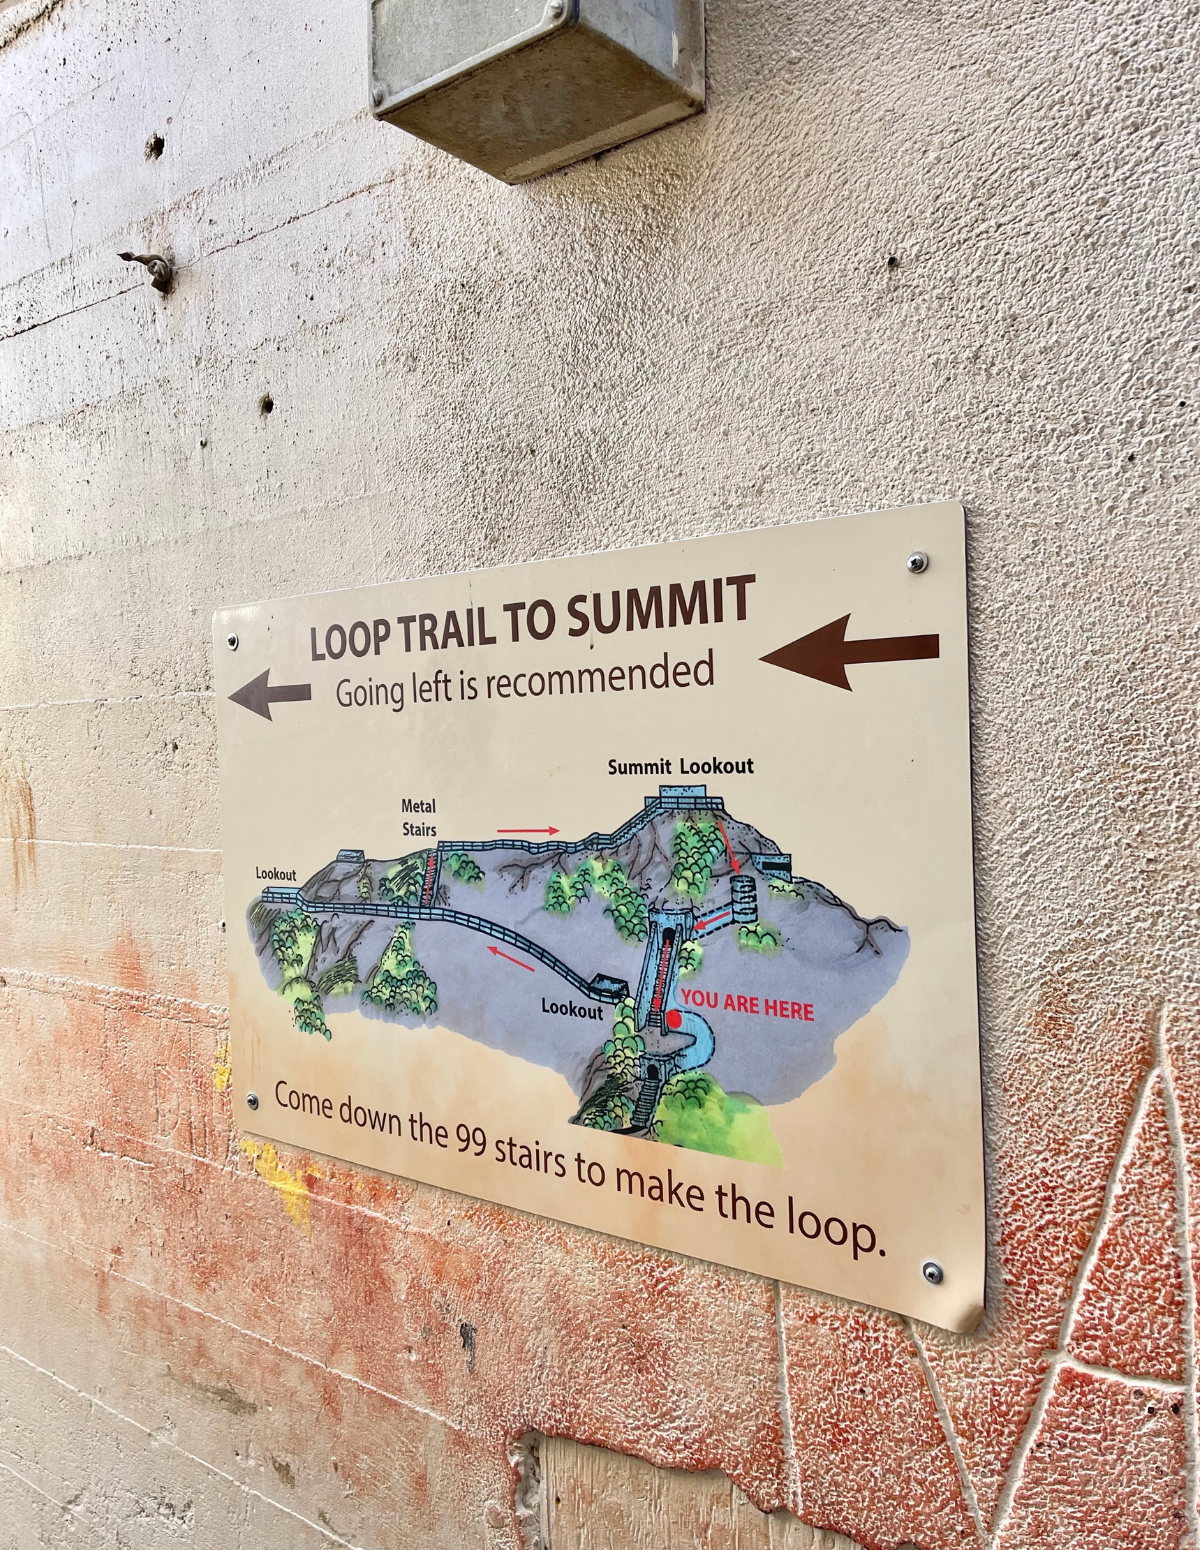
The first time I hiked Diamond Head, we went to the left and then once we were at the top we just retraced our steps back down (most people do this).
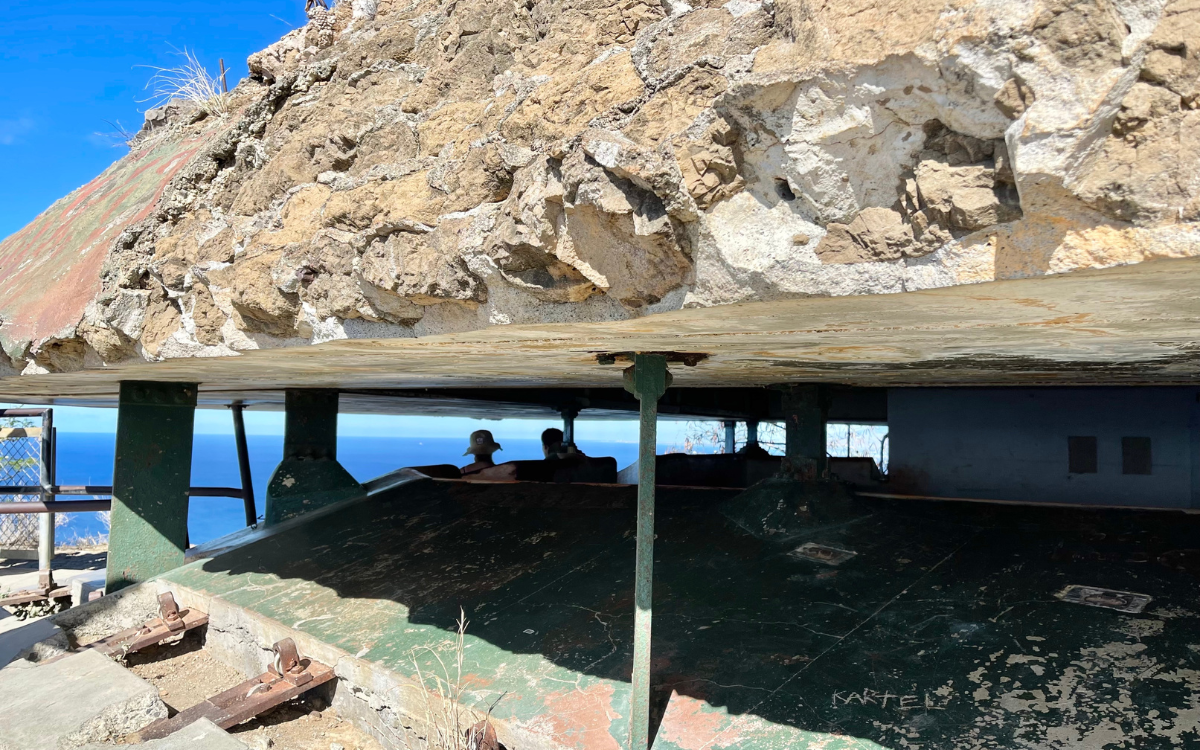
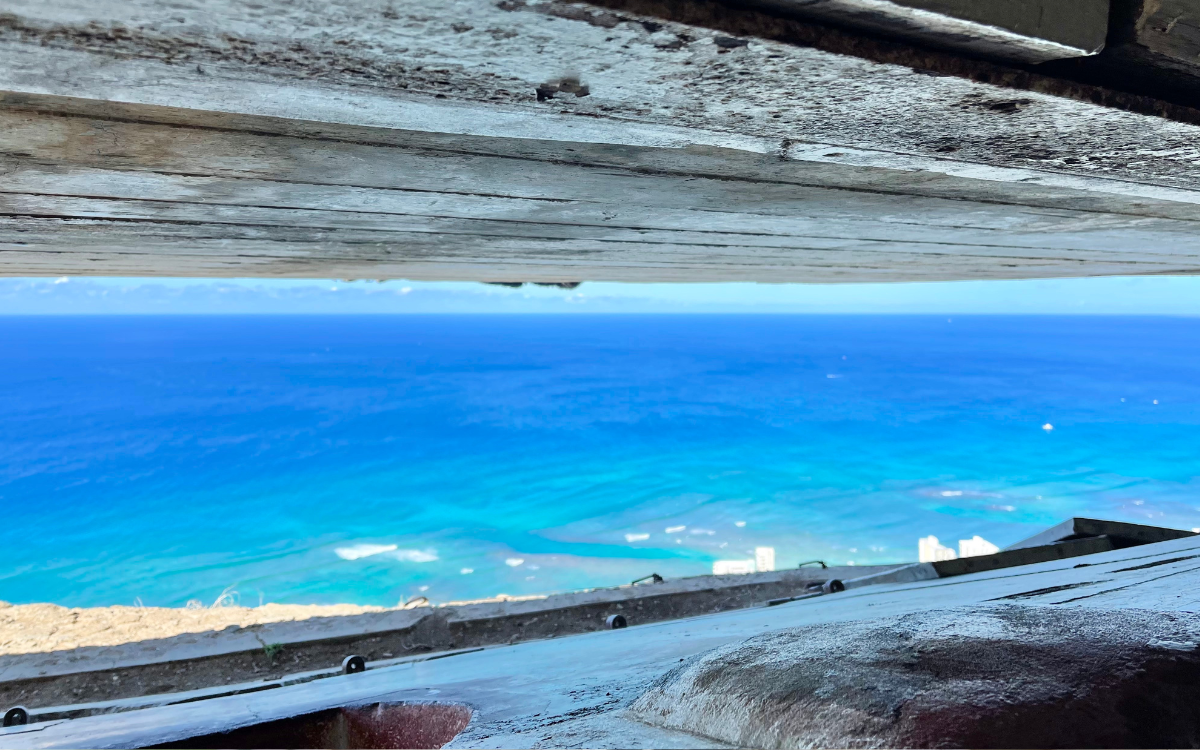
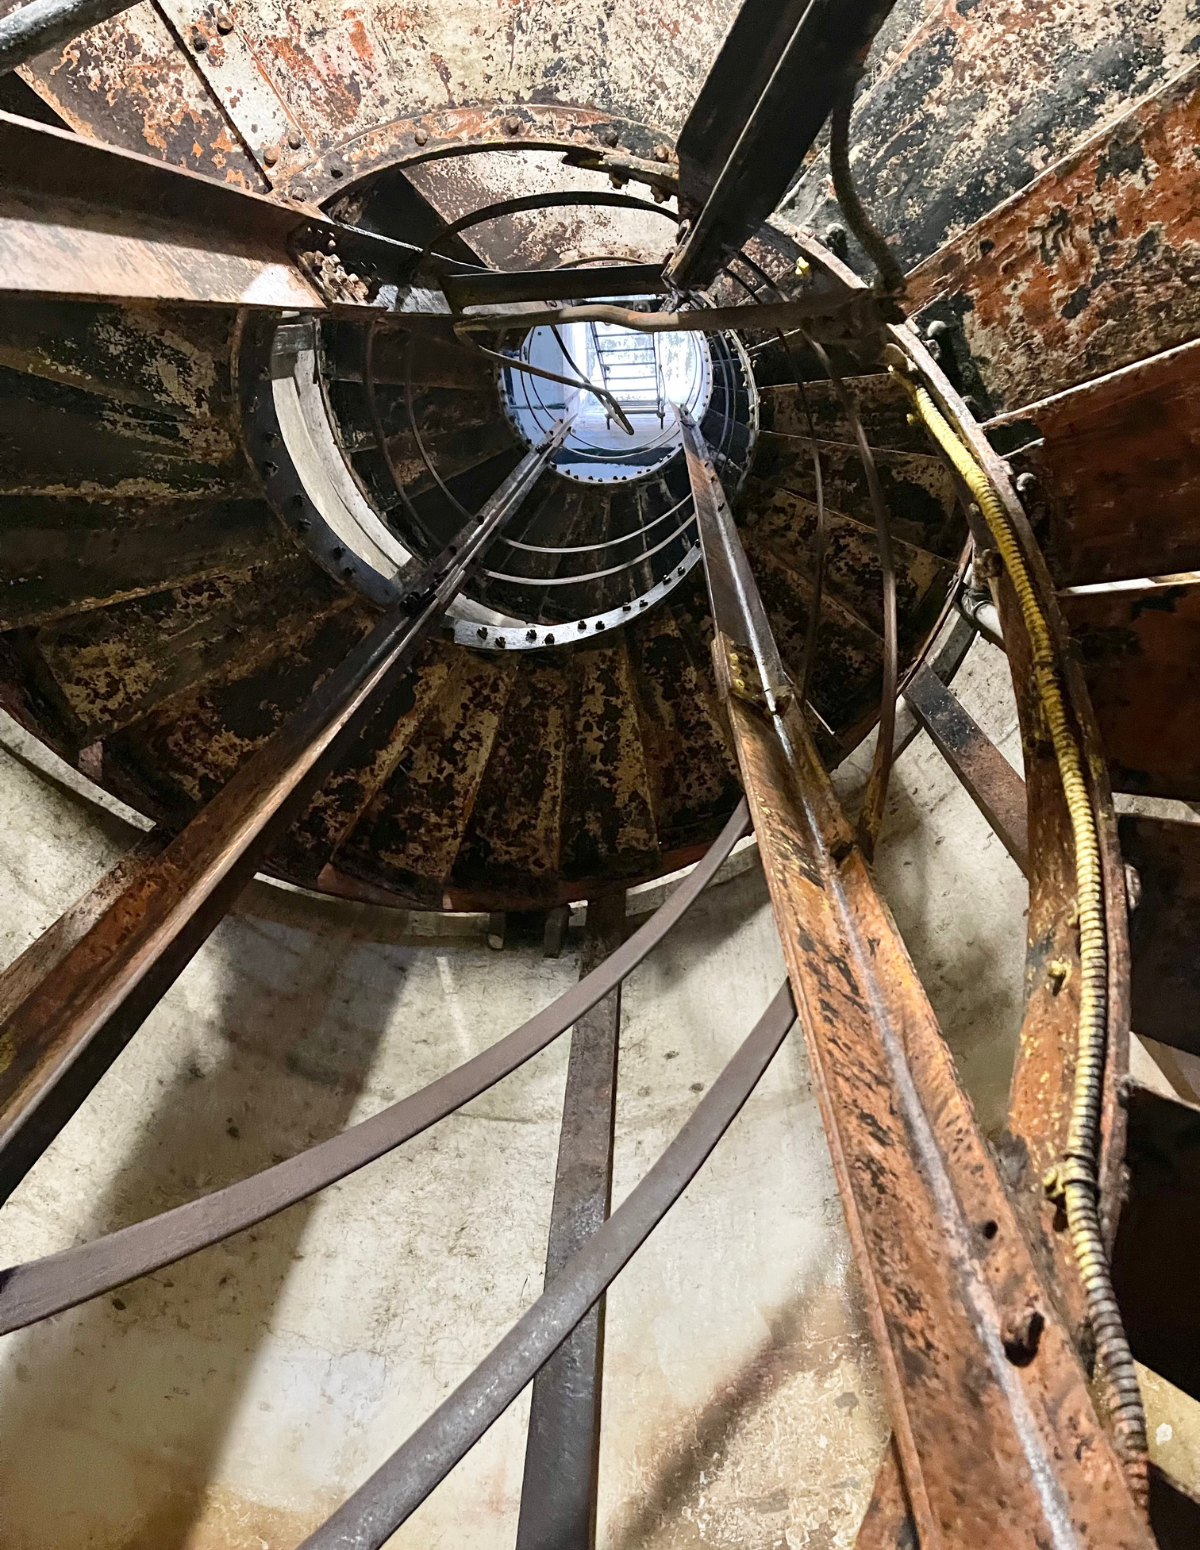
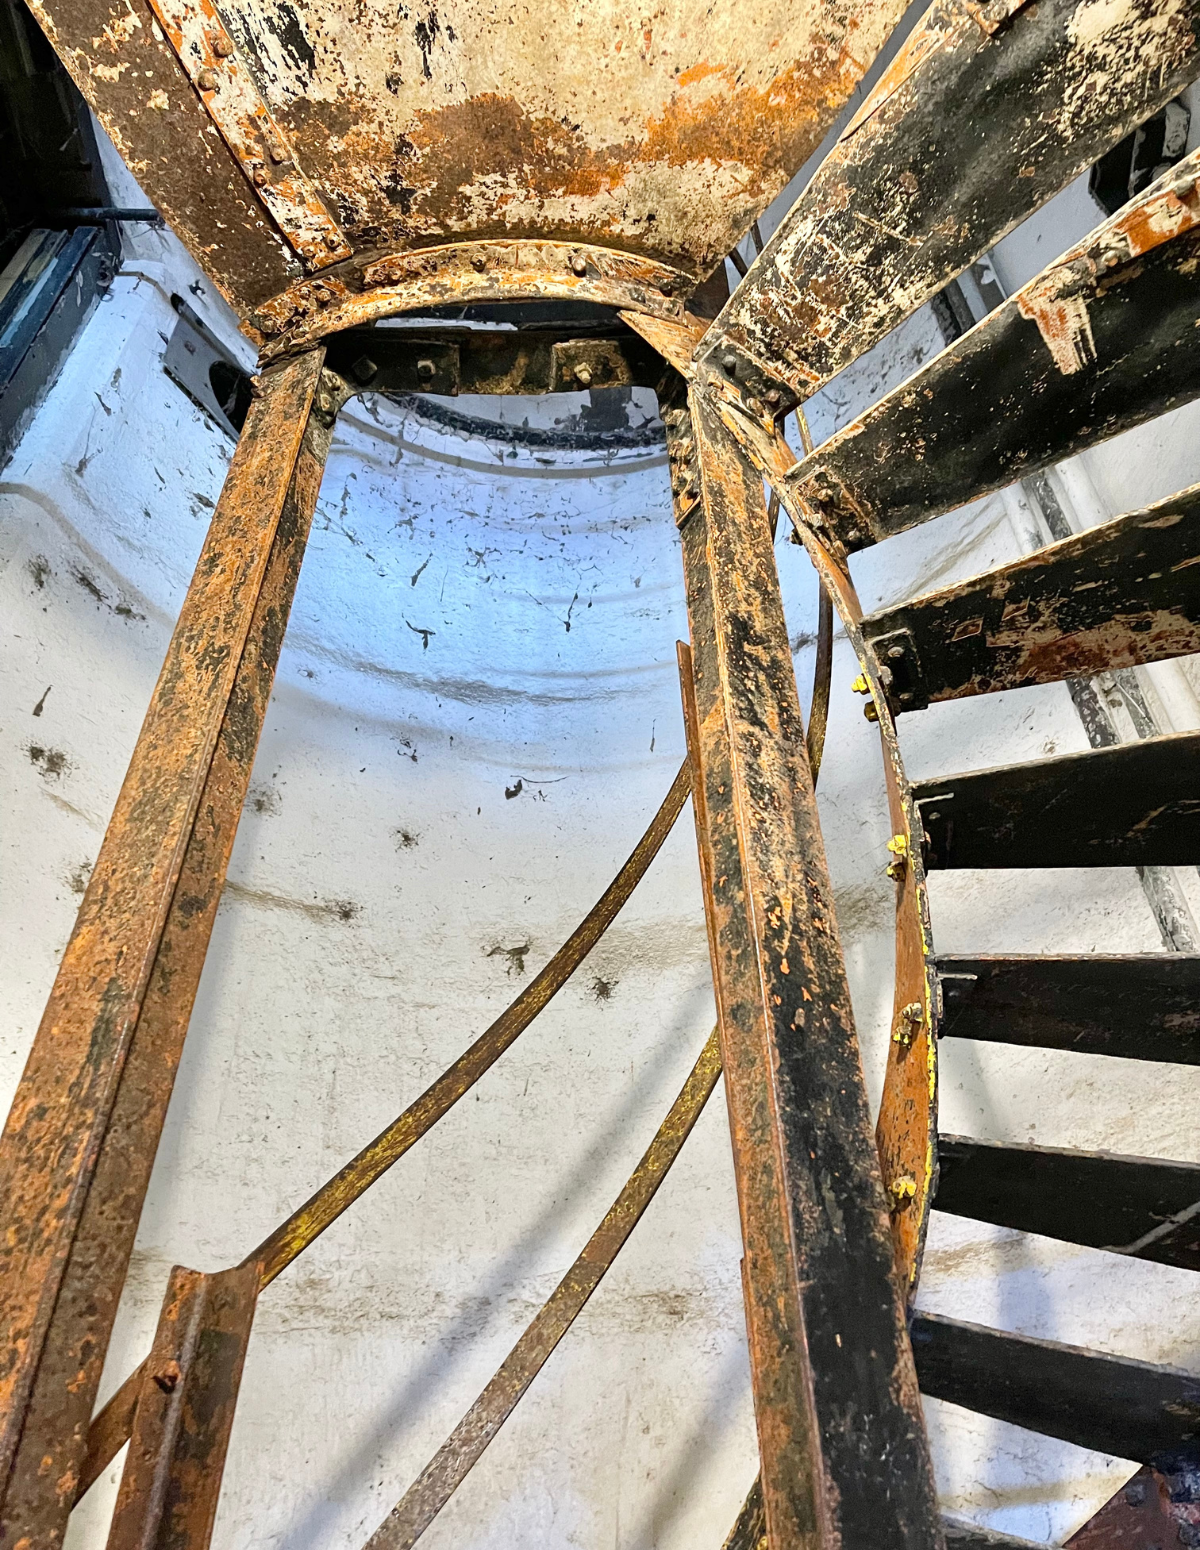
But if you want to do the full “loop” and come DOWN that massive staircase you saw when you came out of the tunnel, then once you’re at the very top, you climb into the pillbox (concrete bunker) and go down the metal spiral staircase to get to it.
Either way works.
So here are the logistics…
Increasing popularity has triggered a new reservation system, so you’ll need to plan this one in advance.
Reservations can be made 30 days in advance here for either just entry or parking and entry.
If you’re booking the entry and parking options (what I would recommend if you have a car), reservations are made in 2 hour increments starting at 6AM (6AM-8AM, 8AM-10AM, 10AM-12PM, etc.) and you’re asked to arrive within the first 30 minutes of your time slot.
If you’re just booking entry, reservations are made in hour increments starting at 6AM.
Entry is $5/person (whether you park, Uber, or hike in) plus $10/car for parking.
If you take the bus/trolley or park in the free spots, you’re going to have to walk pretty far before you get to the actual trailhead. But I believe Uber/Lyft drops you off right at the parking area.
Either way, you still need reservations.
I highly recommend booking an early time slot as there is NO SHADE on this hike.
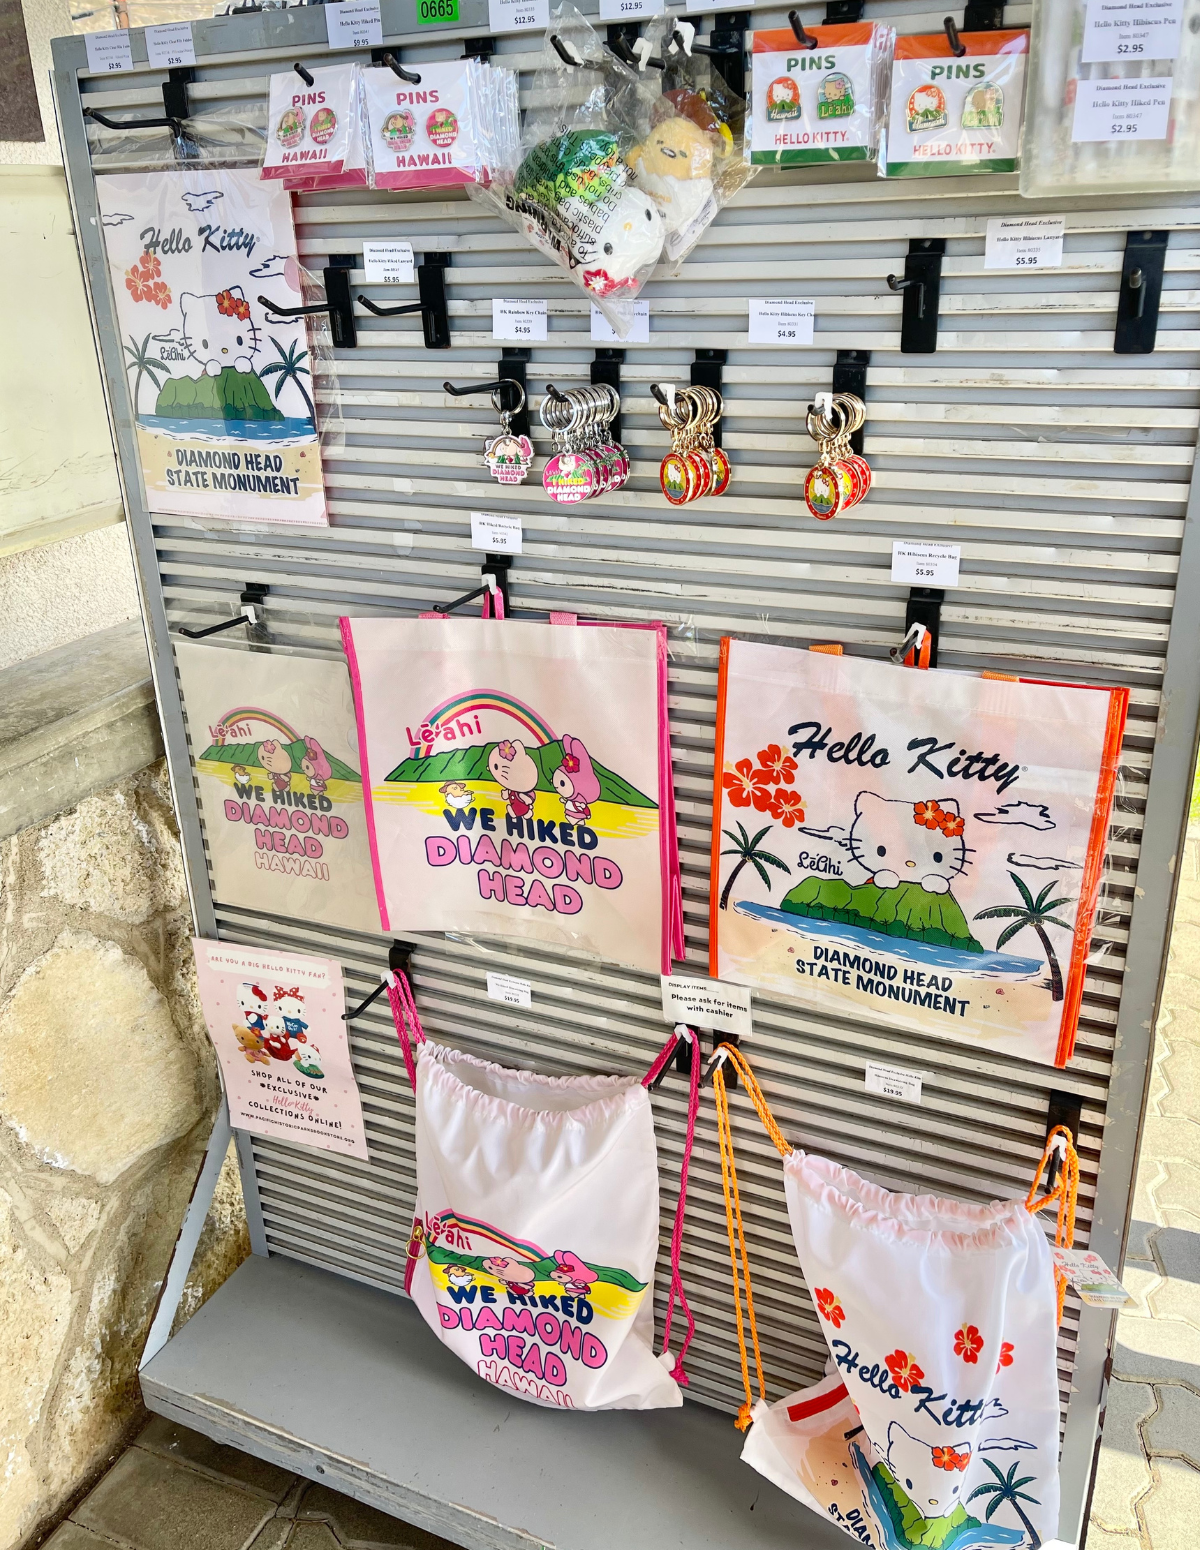
And if you’re a hesitant hiker and need a little incentive to push you over the edge, here it is…Diamond Head has a line of EXCLUSIVE HELLO KITTY MERCHANDISE. So hike Diamond Head and then you can buy an array of swag with Hello Kitty on it that says “I hiked Diamond Head.” What could be more fun?

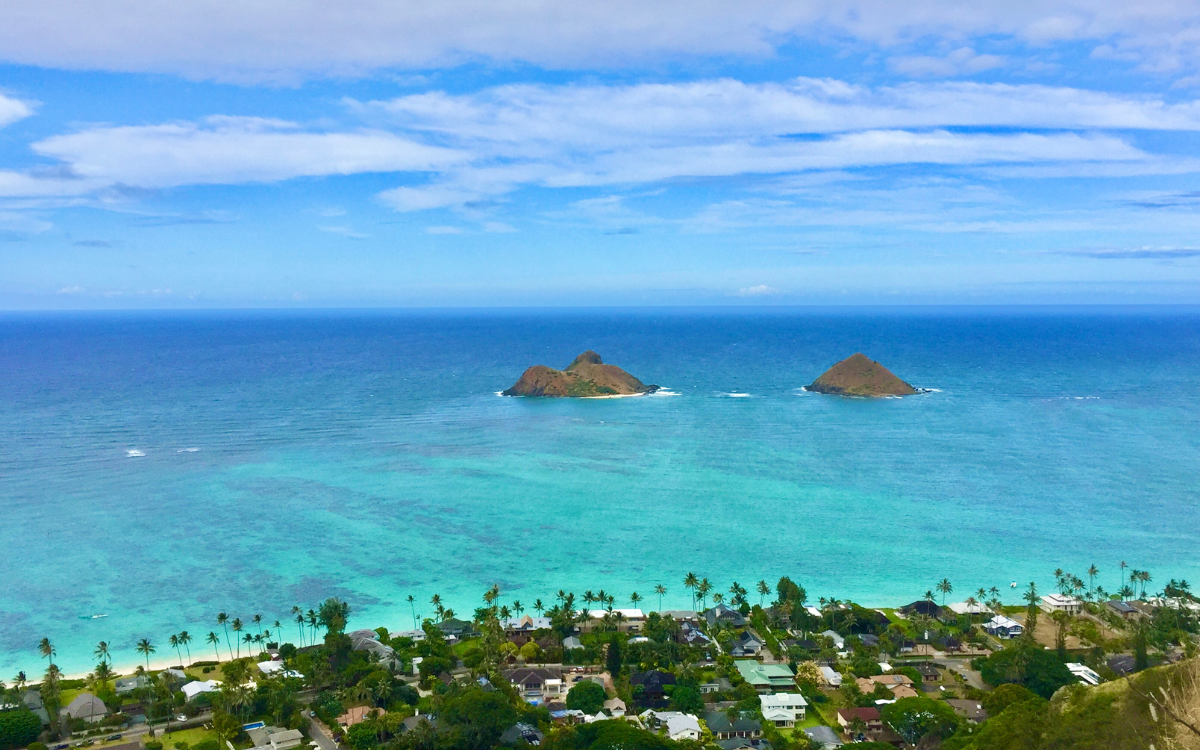
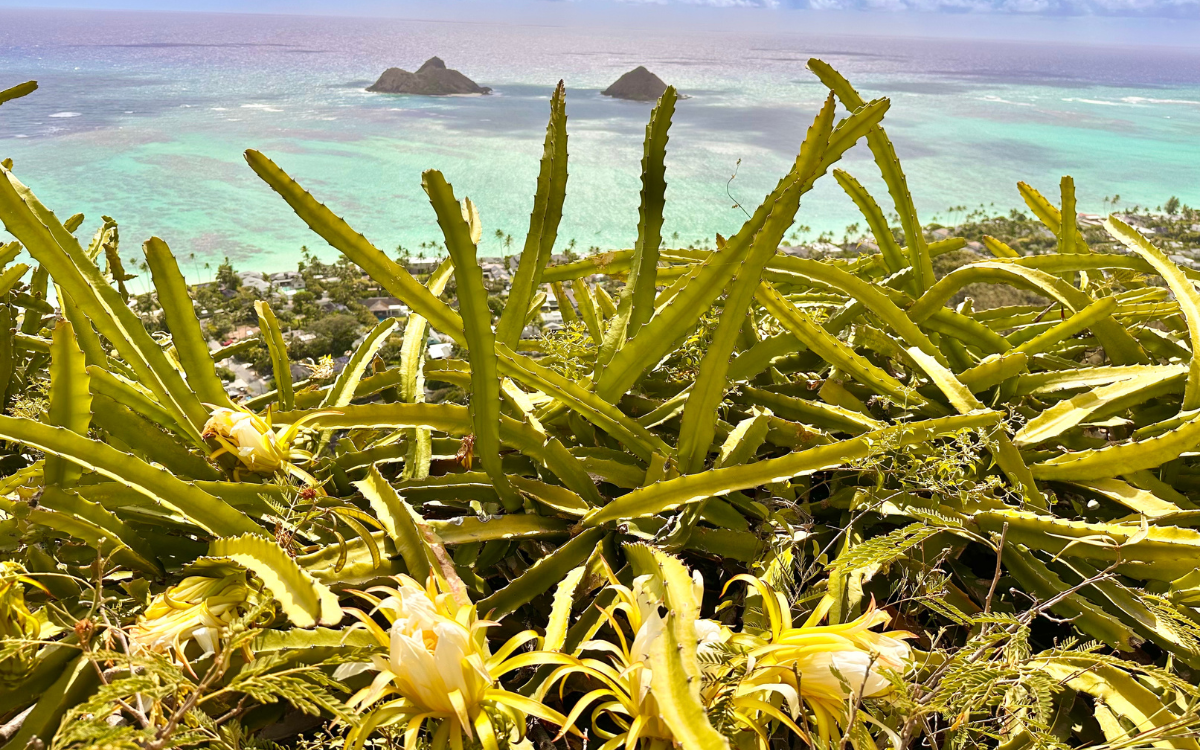
Lanikai Pillbox Hike
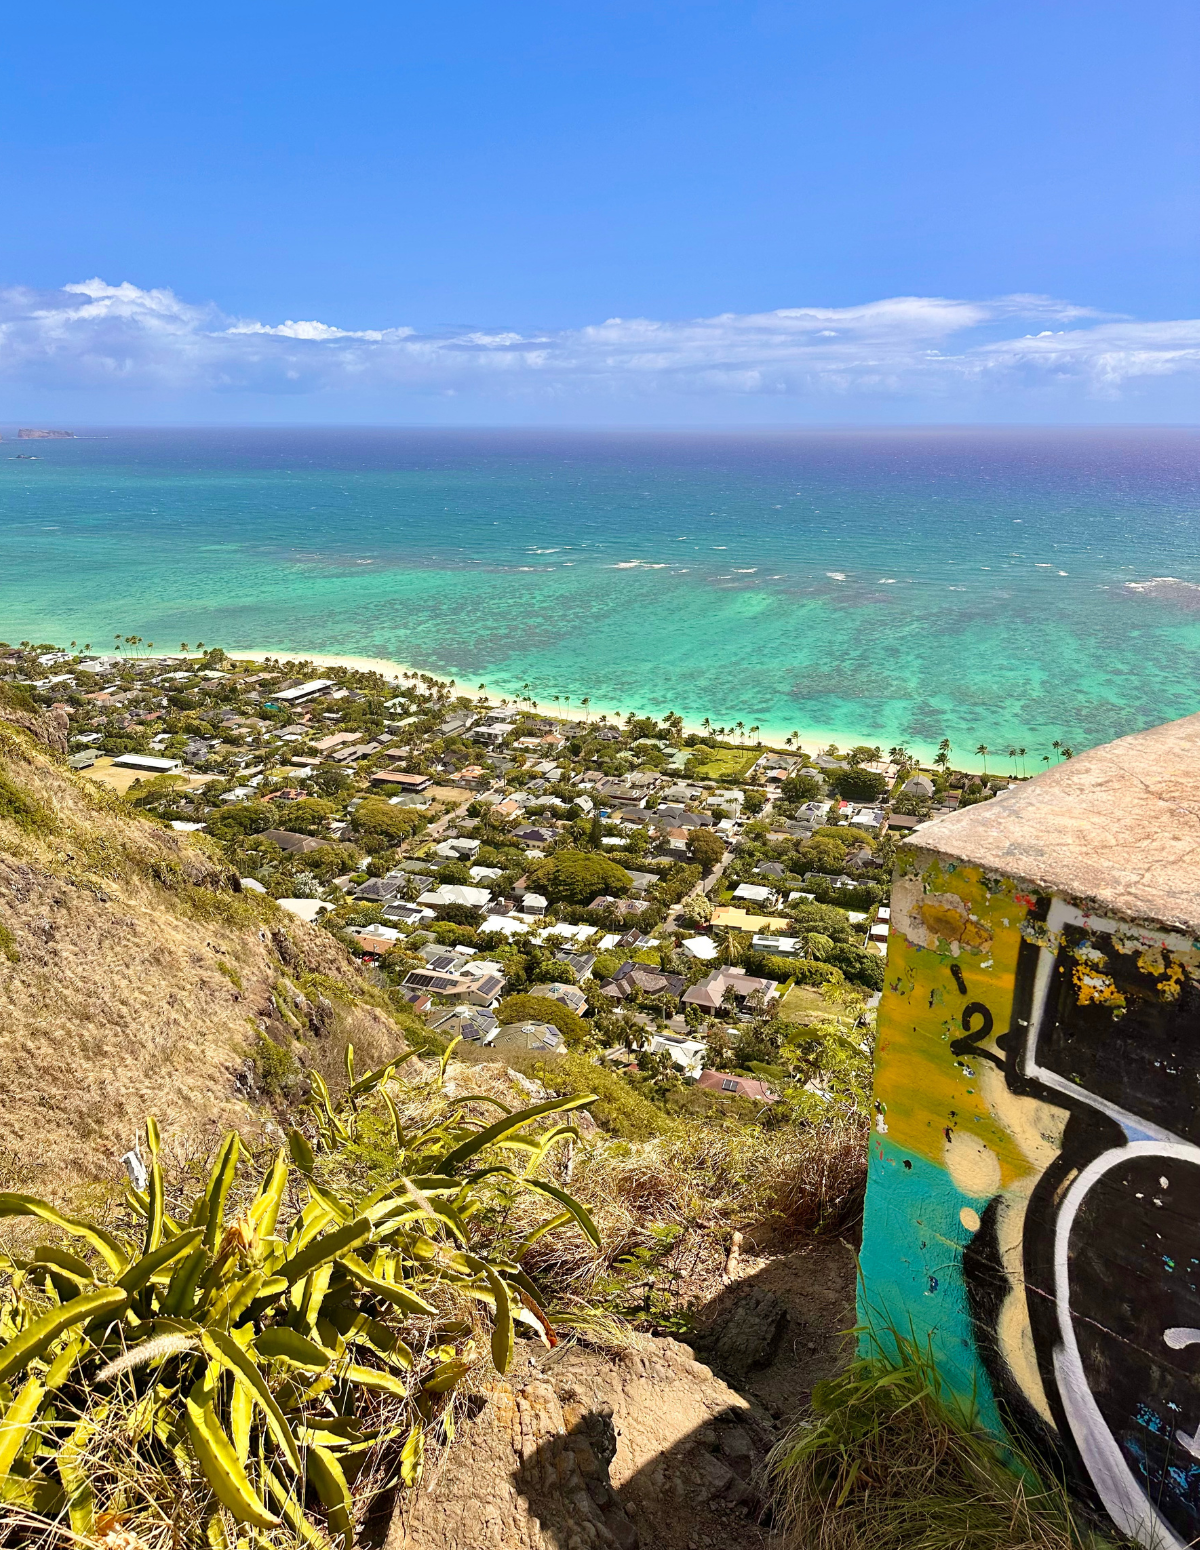
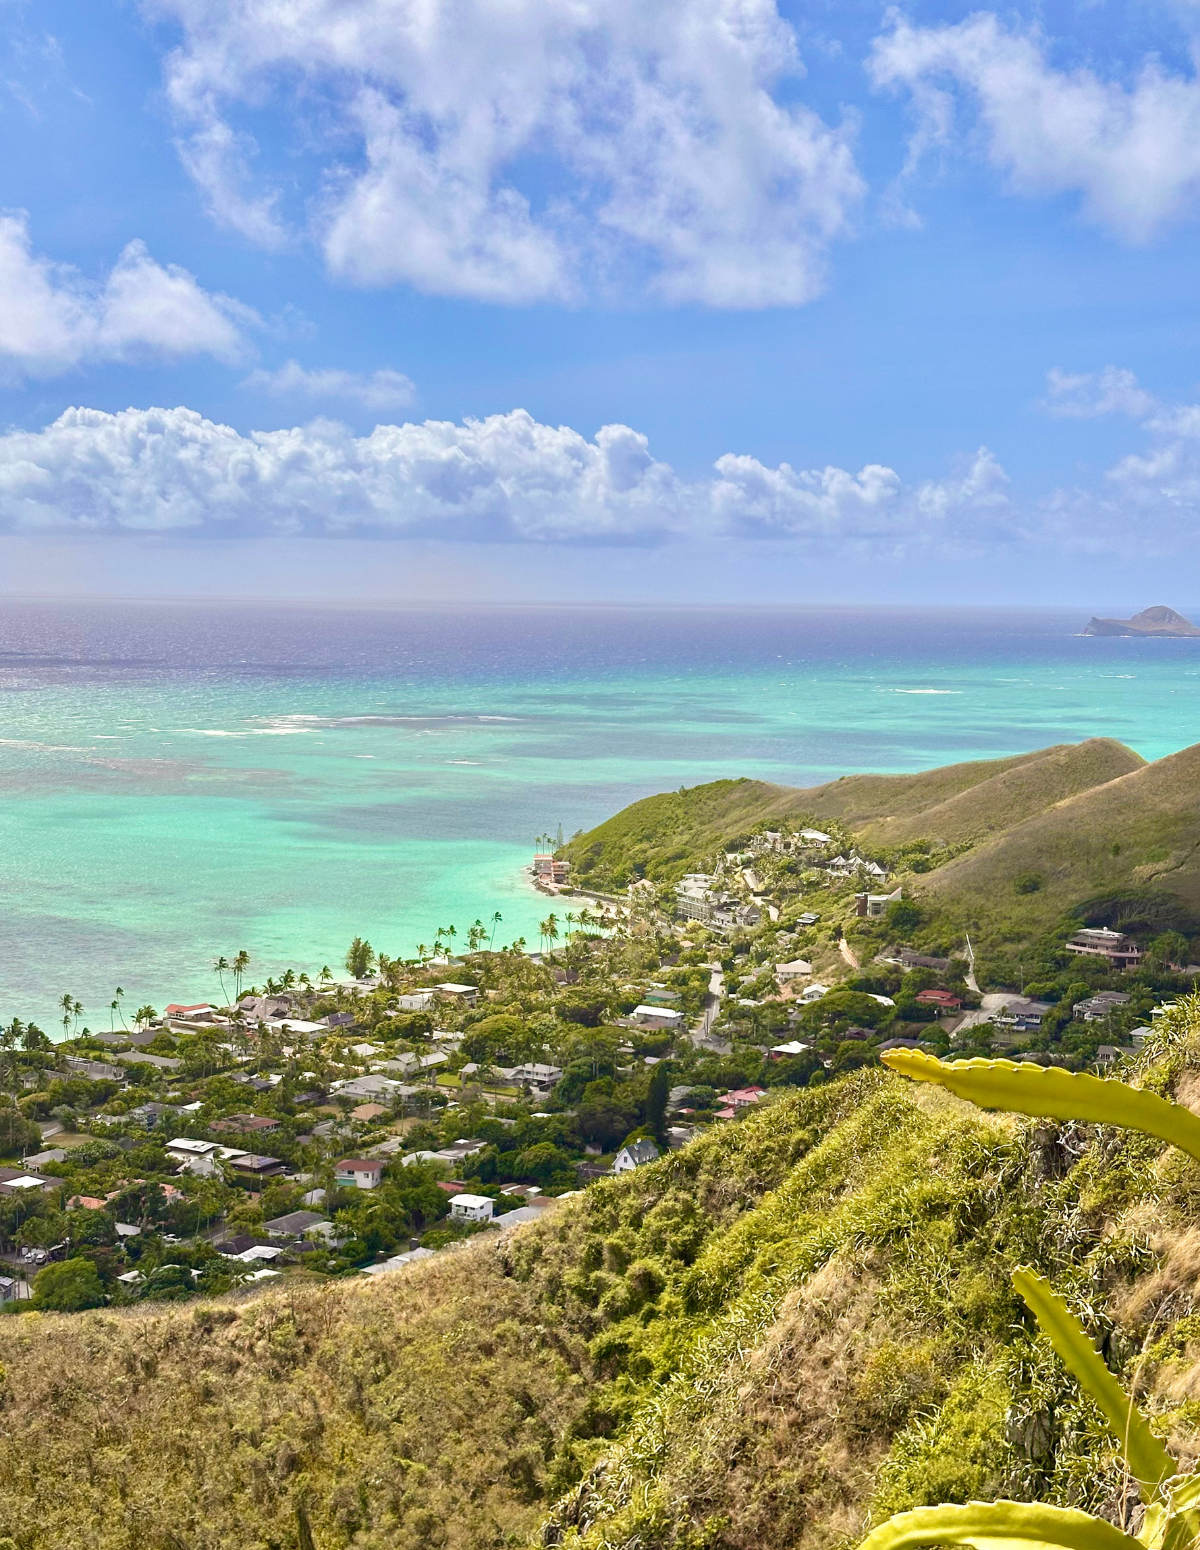
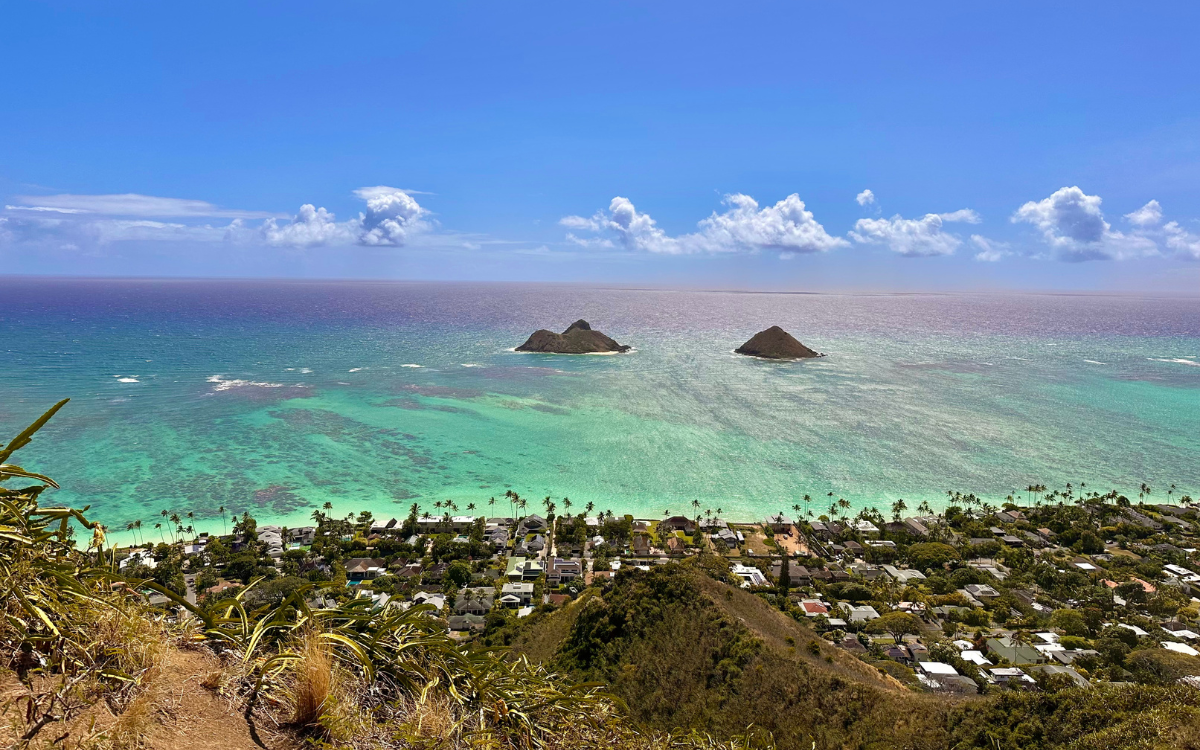
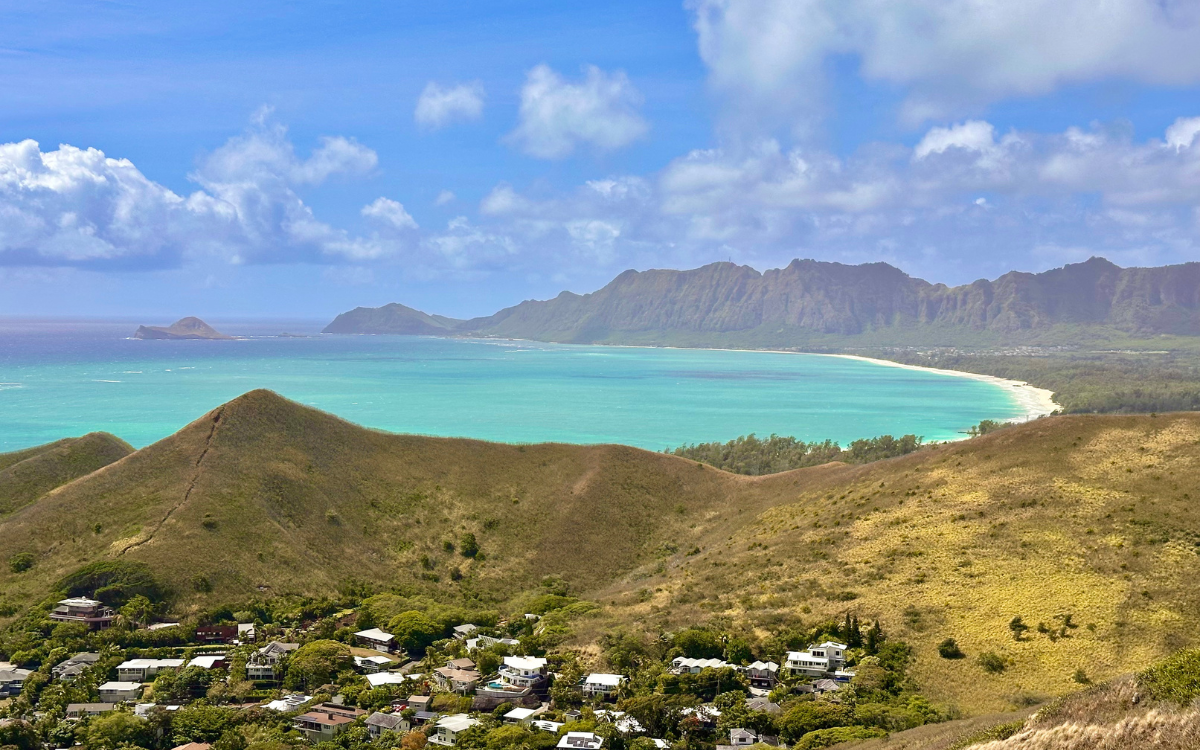
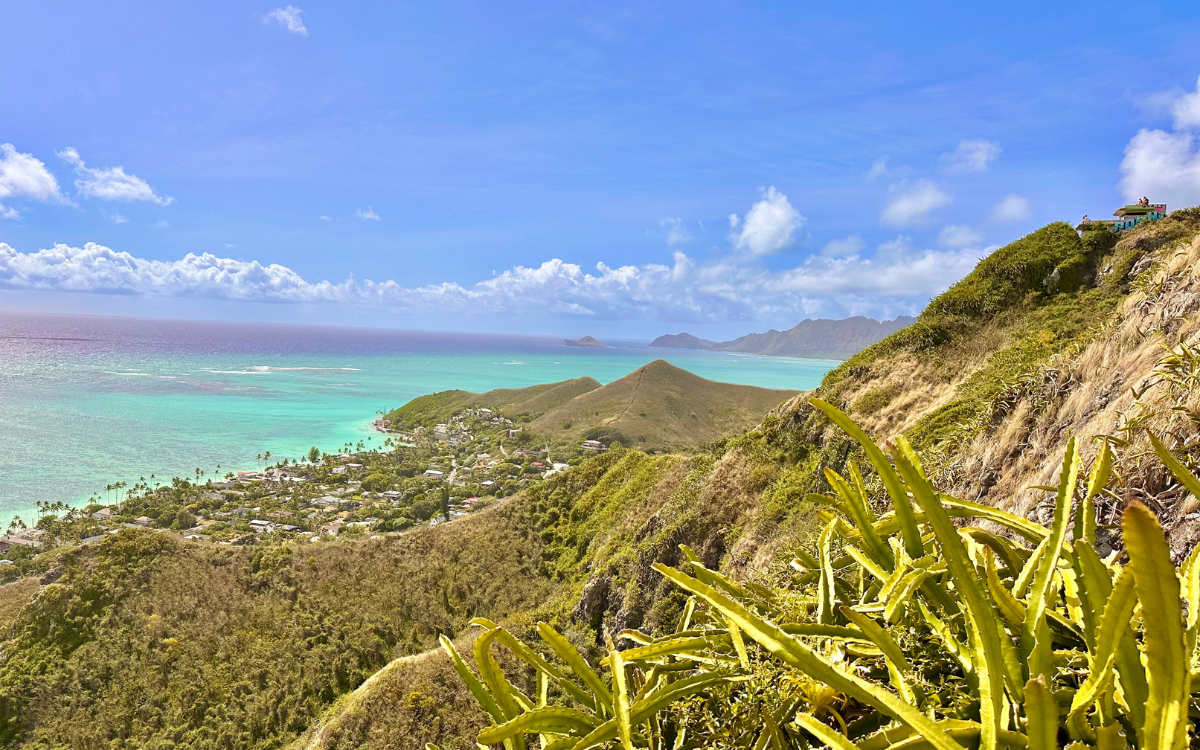
If you’re looking for a good hike on Oahu, that’s relatively short with big views, you’re going to love the Lanikai Pillbox trail on the Windward side of the island.
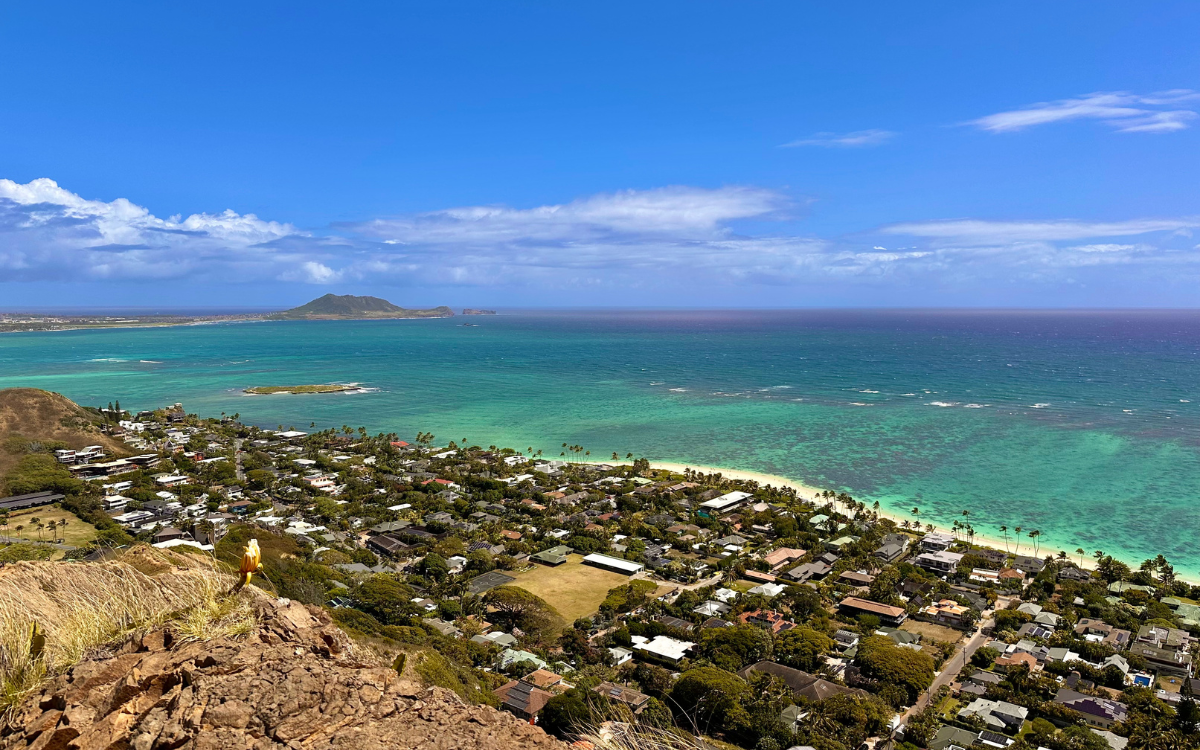
Oahu has a series of pillbox hikes (bunkers from WWII posted in various lookouts around the island) and the Lanikai Pillbox is definitely the most famous one. Views don’t get much better than this!
It’s a moderately challenging, but short trail with incredible panoramic views, and a bit of WWII history.
If you’re the type to fill your vacation with incredible hikes, you definitely want to put this one on your list. But even if you’re not, this one is worth adding to your vacation itinerary.
Seriously, if I was only going to do one hike on my trip to Oahu, I think this would be it.
Here’s everything you need to know before you go:

The trailhead is located in a residential neighborhood in Lanikai (off Ka’elepulu Drive) and there’s no parking here so I would plan to park at the Kailua Beach Park boat ramp and walk up. It’s about a half mile walk from the beach parking lot.
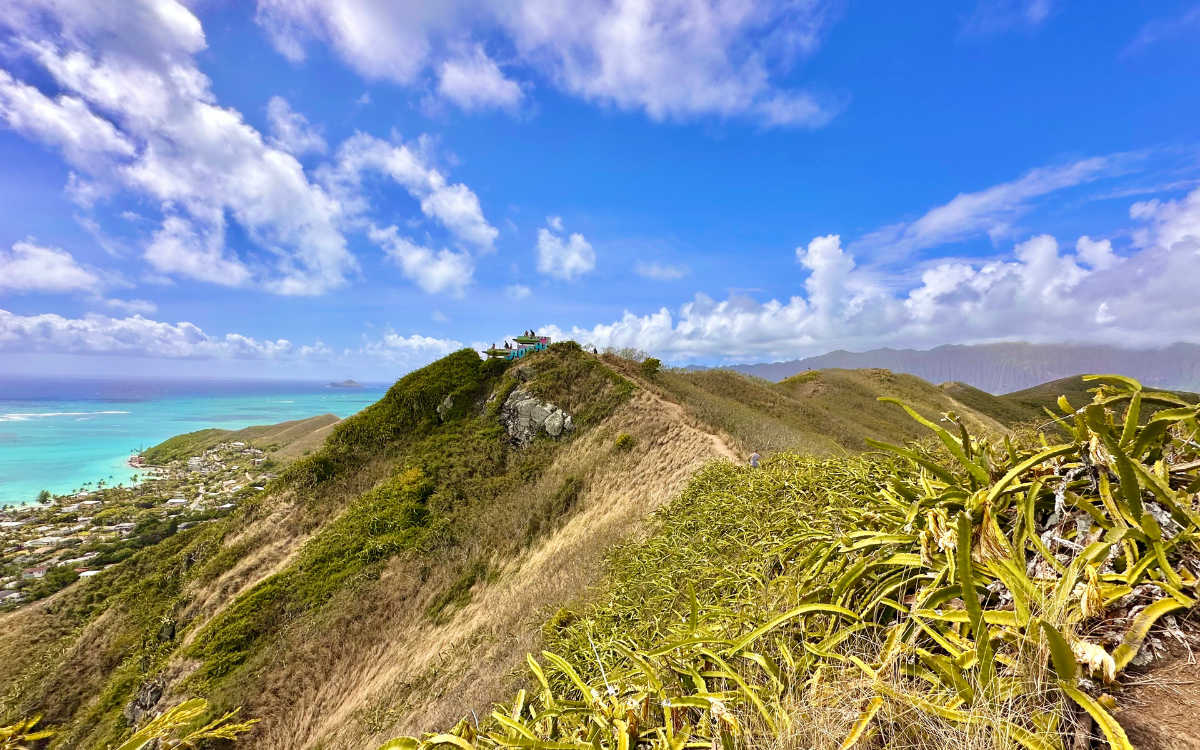
The trailhead is easy to find. It’s a pretty steep initial climb along a fenceline before you’ll find the ridge.
The trail is only about a mile round trip to the first pillbox and back, but you can walk further along the ridge to a second pillbox (about 1.5 miles round trip).
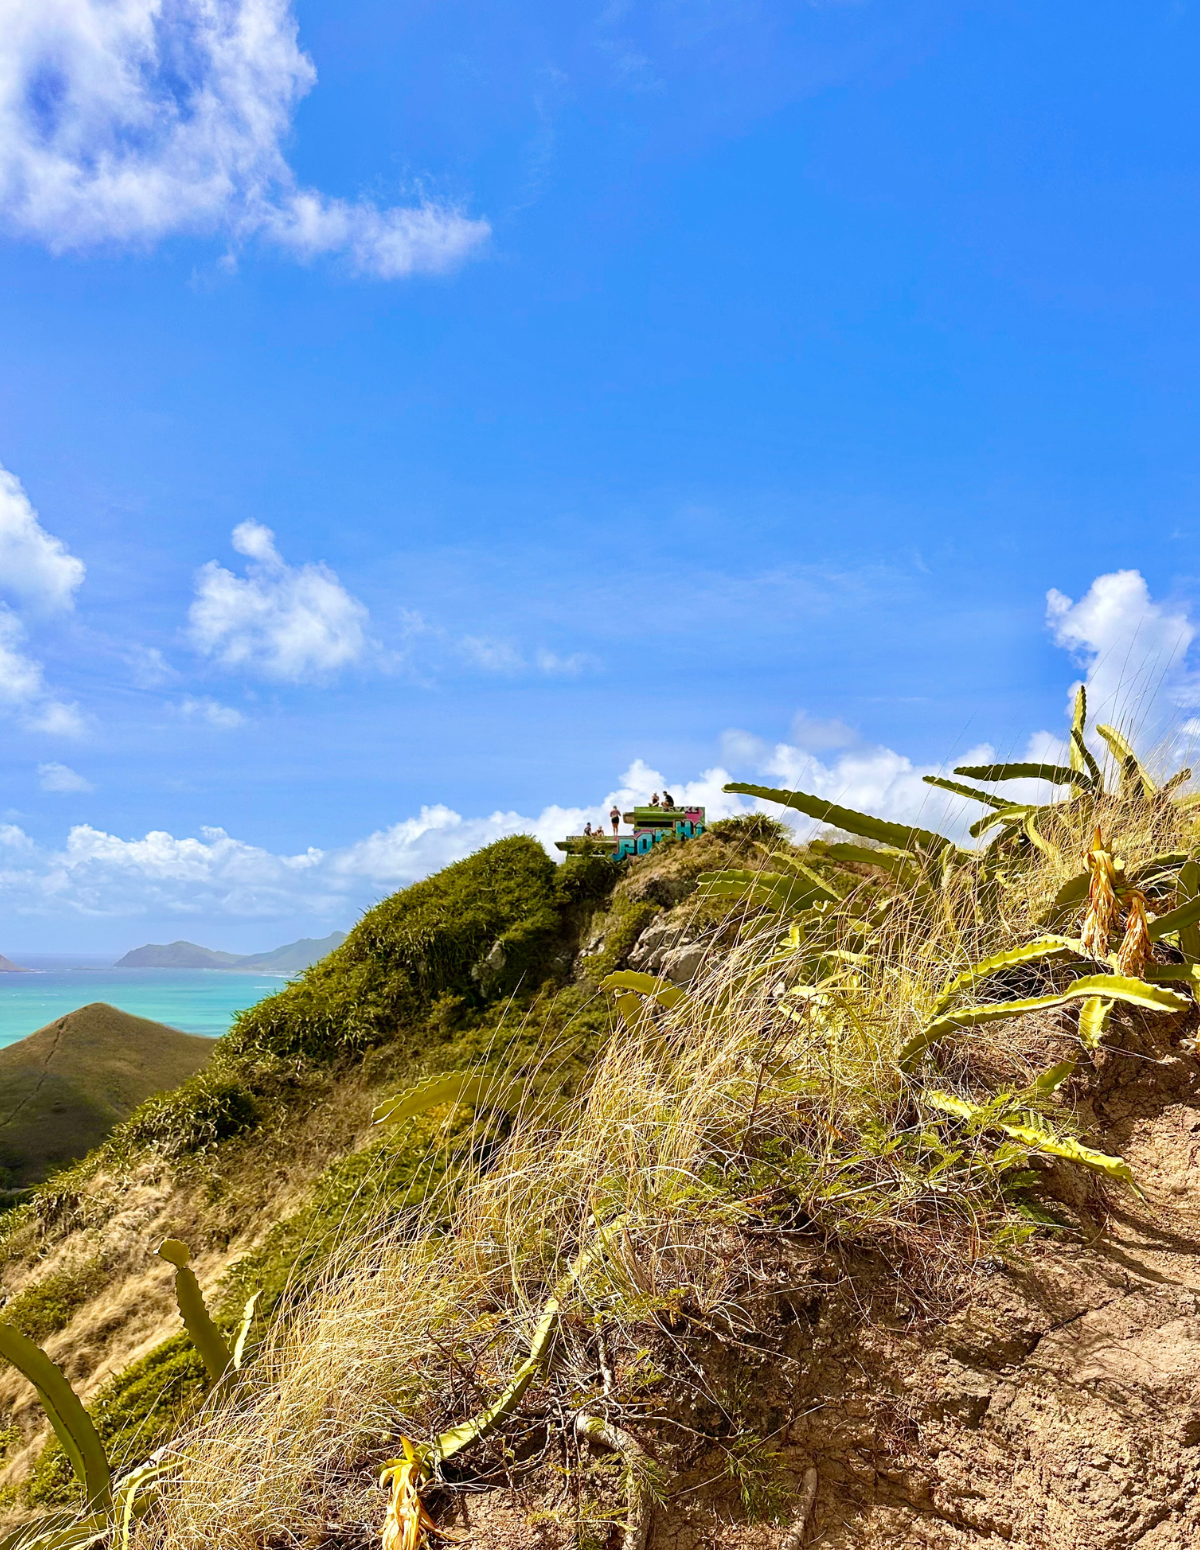
This hike only takes me about an hour up and back, but you really have to scramble in some places. The first part is by far the steepest. Most people stop when they reach the first pillbox, but definitely keep going to the second one for even better views.
Since the trail is relatively short, I wouldn’t necessarily call it a “hard” hike, but the trail is a lot less defined and cleared than Diamond Head so you have to do a bit of negotiating.
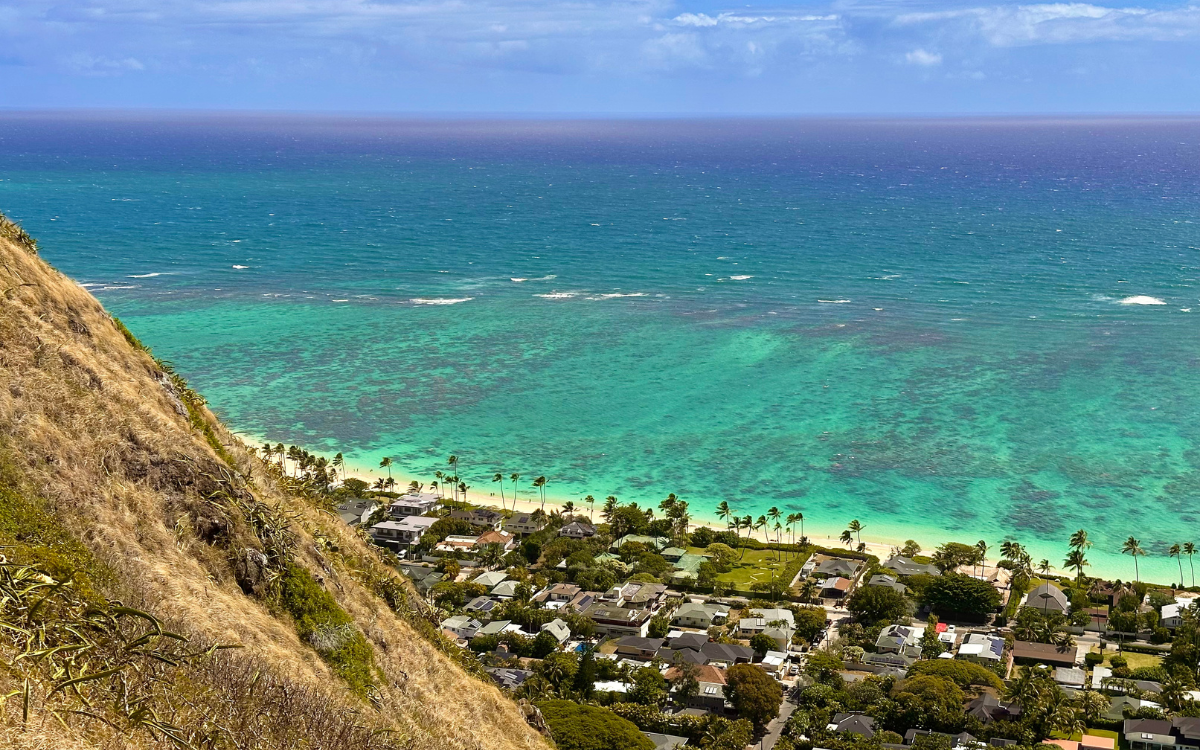
Because the view faces east, some people like to go for sunrise, but there’s no way I would do this in the dark.
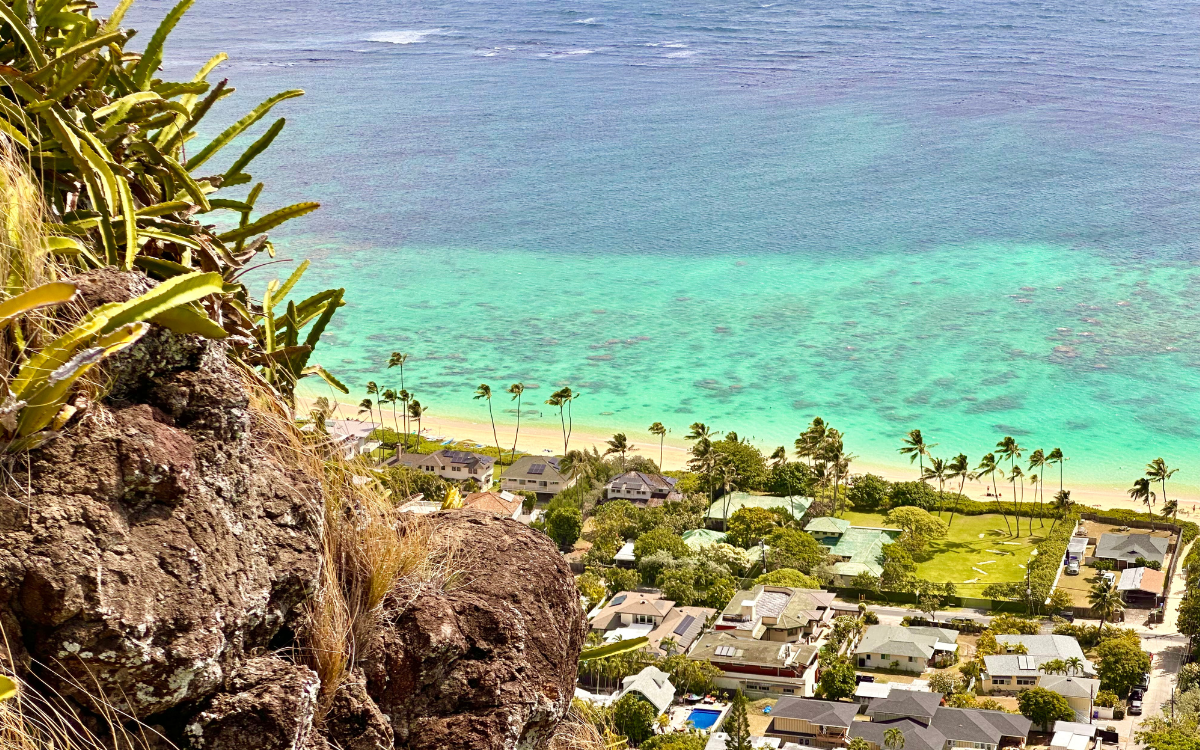
If you’re trying to beat the heat, go first thing in the morning. But if you’re wanting to photograph the most vivid colors, you’ll get better lighting in the afternoon.
I like to pack a pair of flip flops and a towel in my backpack so I can stop at Lanikai Beach after the hike.
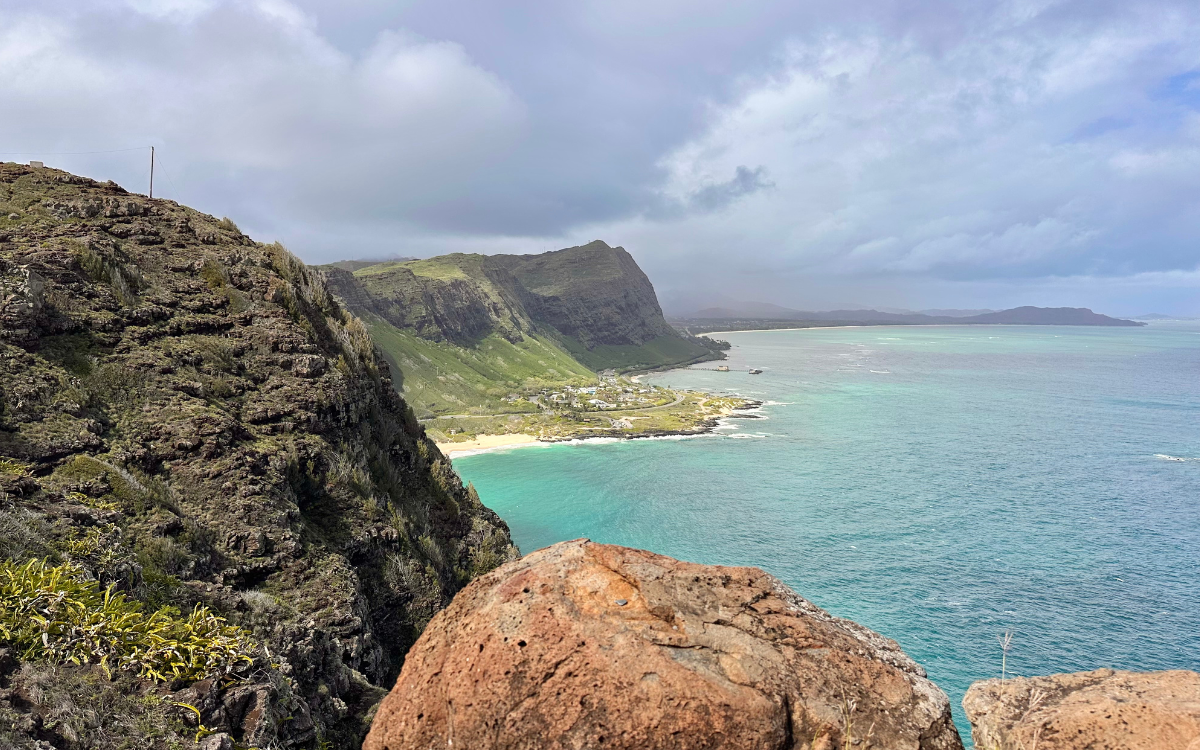
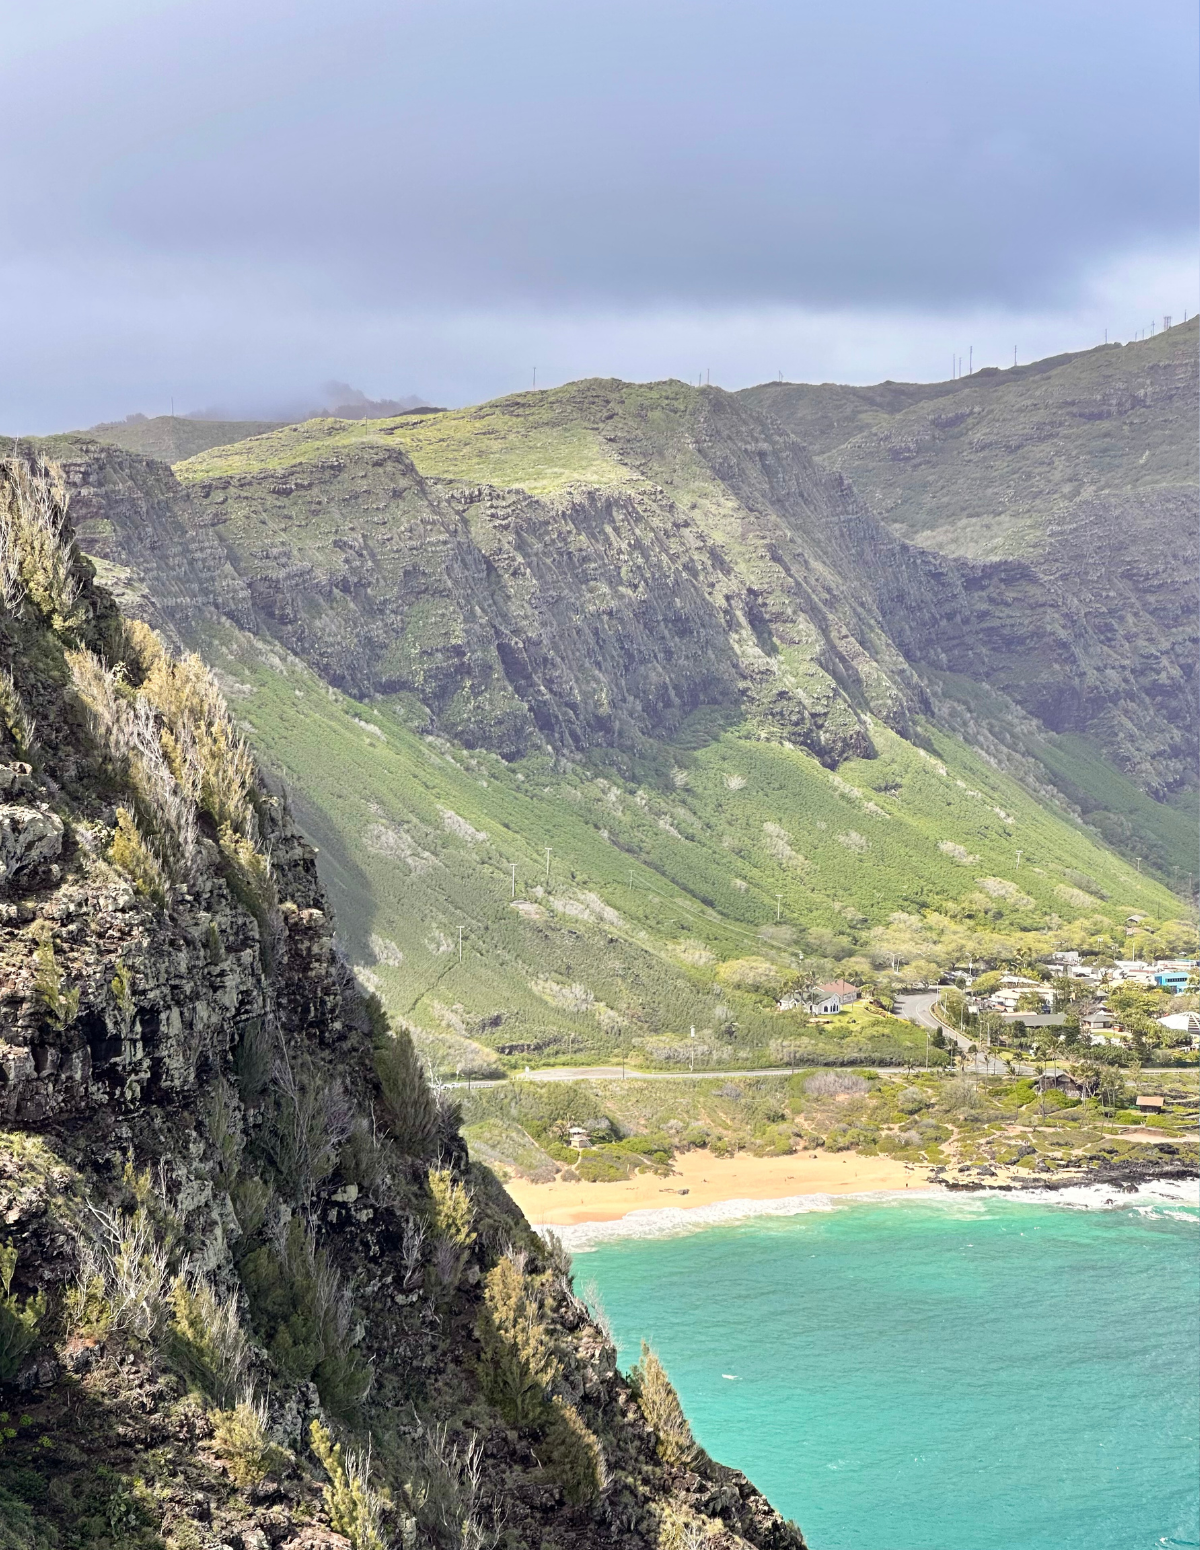
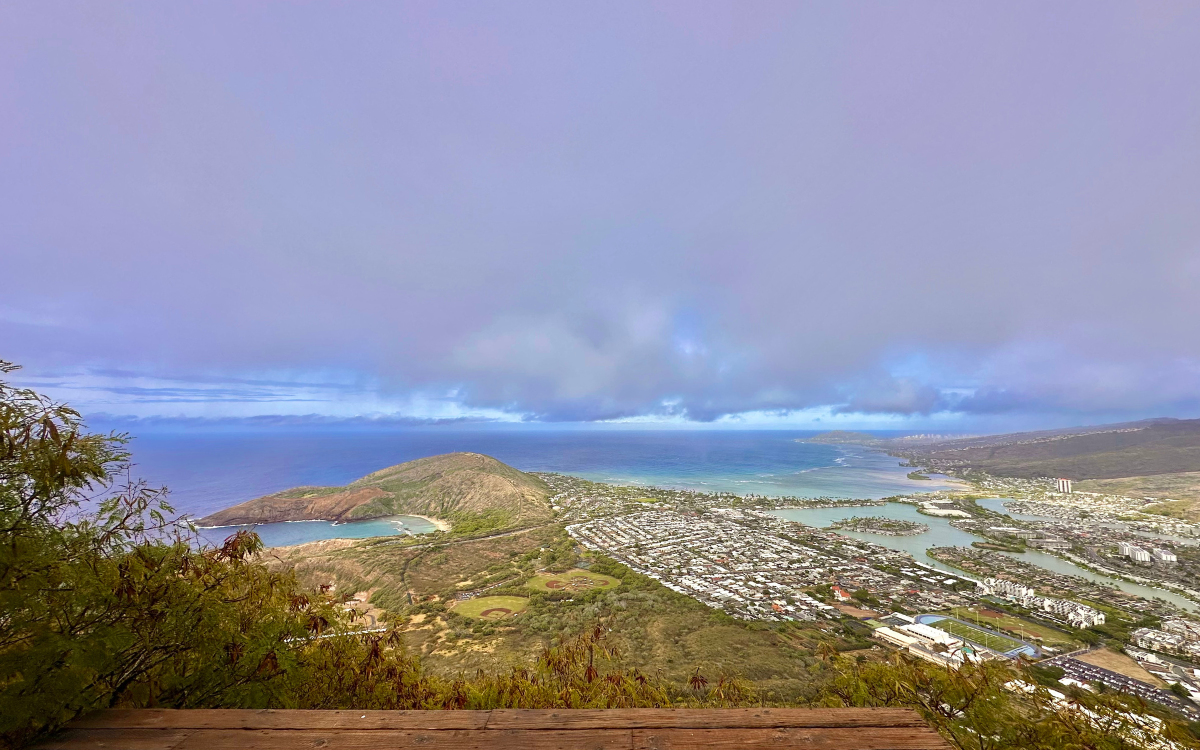
Makapu’u Point and Trail
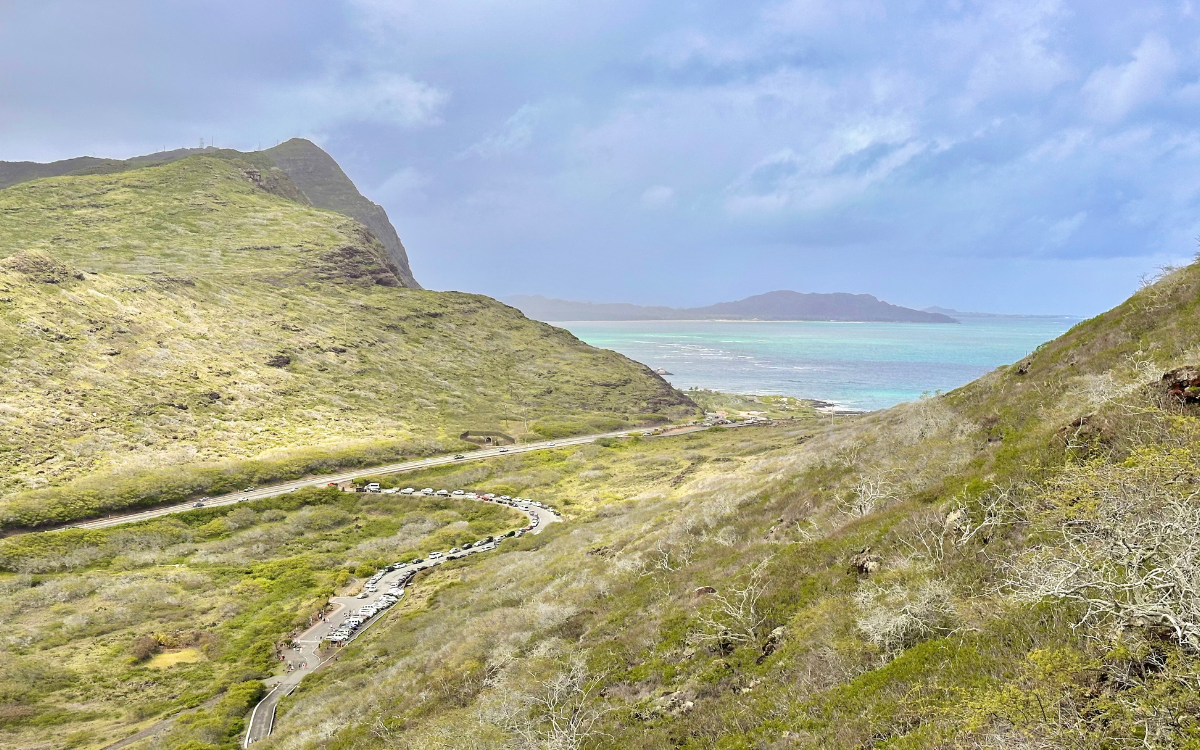
If you’re looking for a trail with stunning coastal views that will get your lungs burning a bit, but that’s still really accessible, the Makapu’u Lighthouse Trail on Oahu is a must do.
This popular hike on Oahu’s southeastern coastline is not only accessible to hikers of all skill levels but also offers breathtaking panoramas and a chance to spot SO MANY WHALES in the winter.
Here’s what you need to know:
The Makapu’u Lighthouse Trail is a 2-mile out-and-back hike. This is just the kind of hike I like. It’s short and sweet with a big payoff of great views at the top.
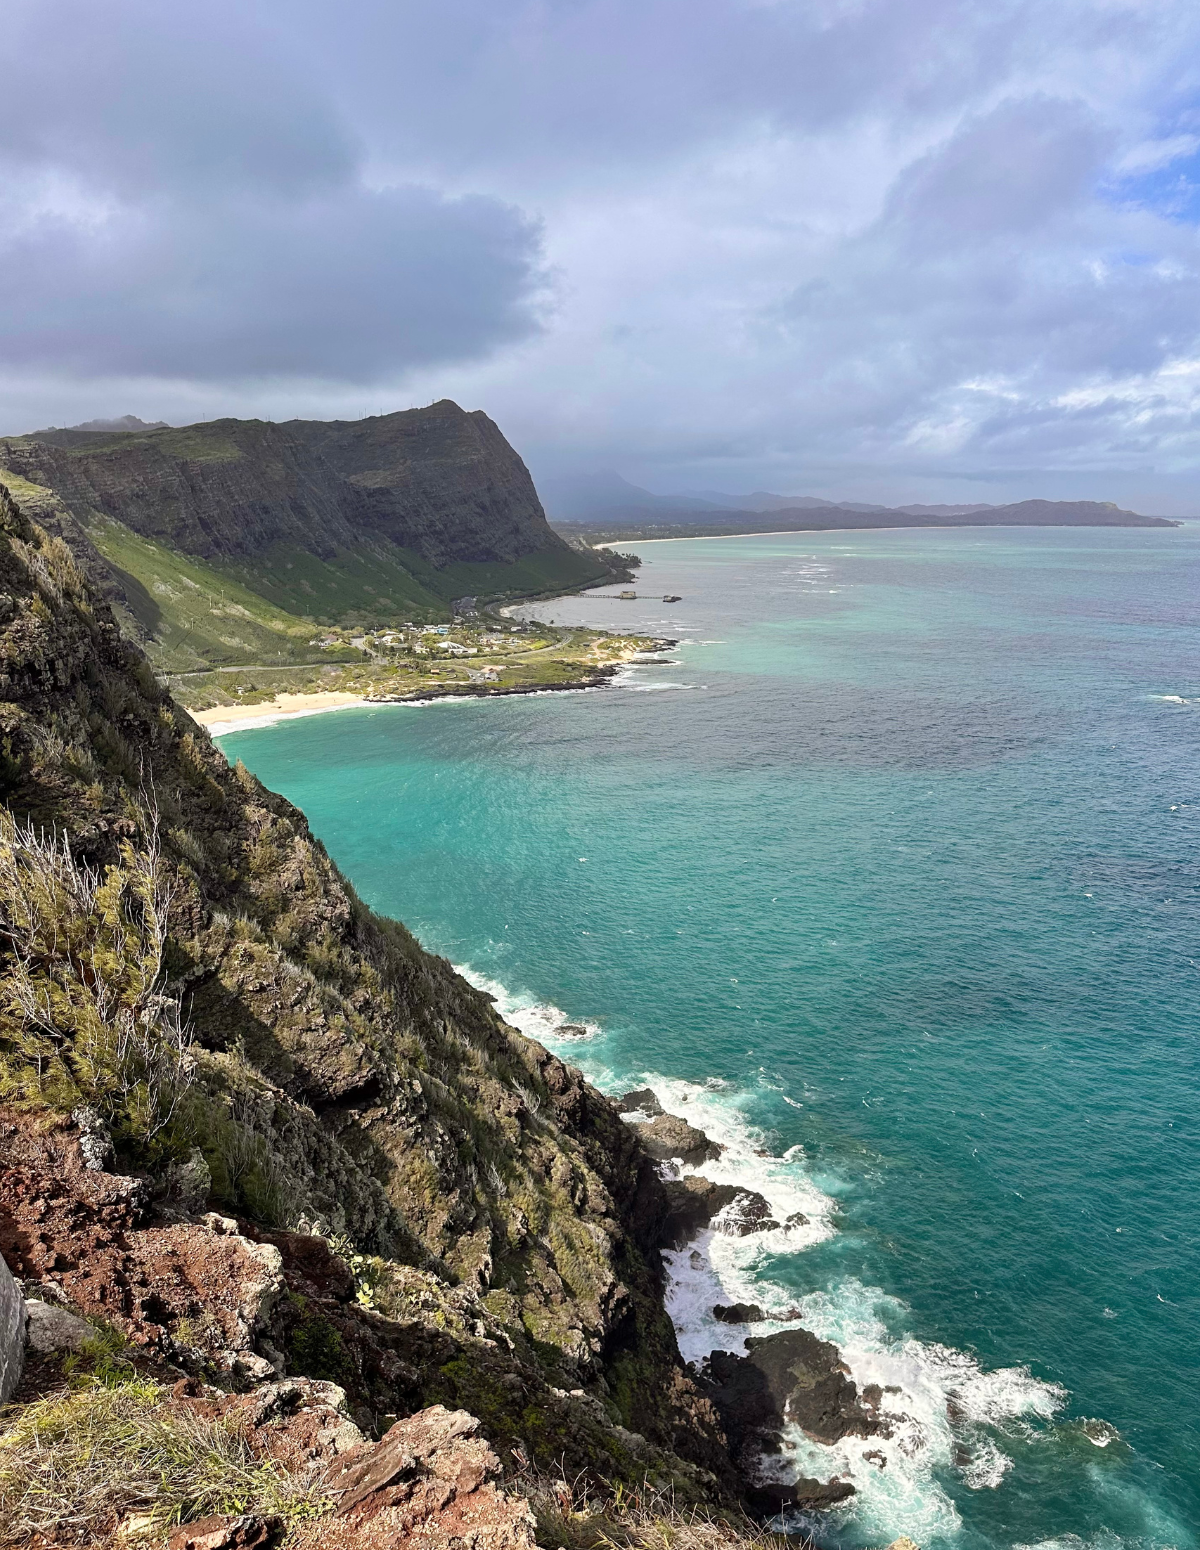
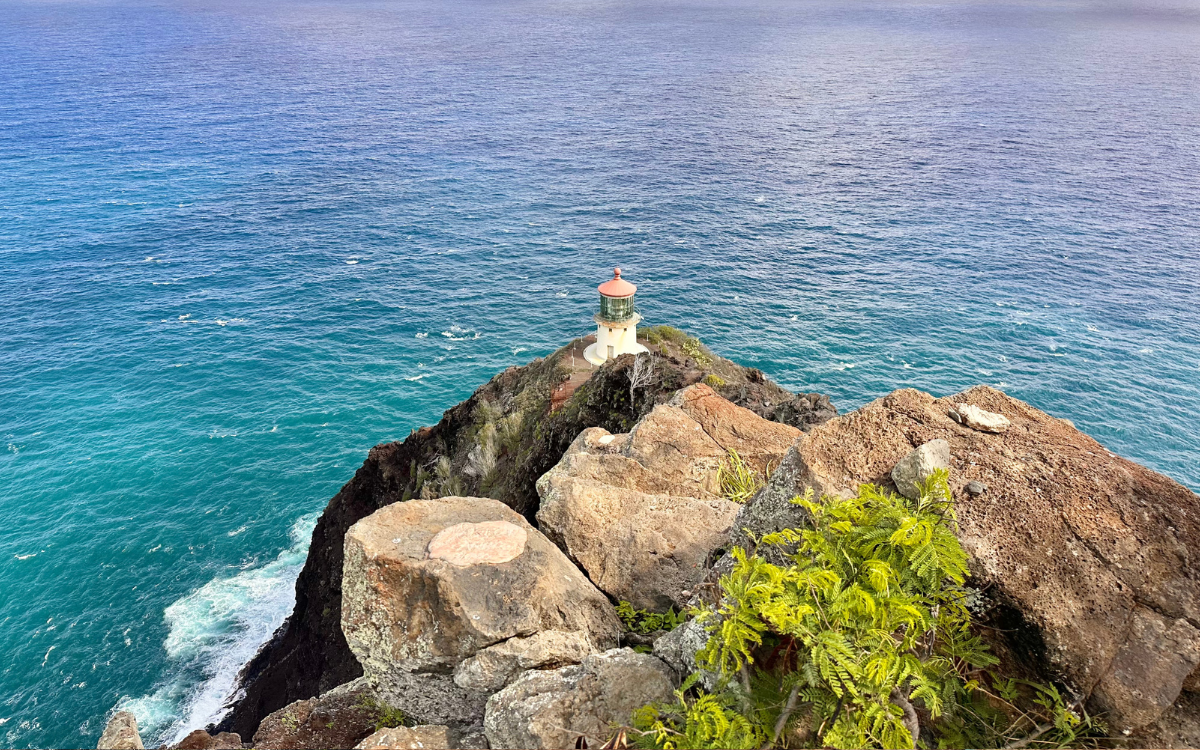
From the top, you’ll see Makapu’u Lighthouse down below and spectacular views of the Waimanolo coastline and offshore islands.
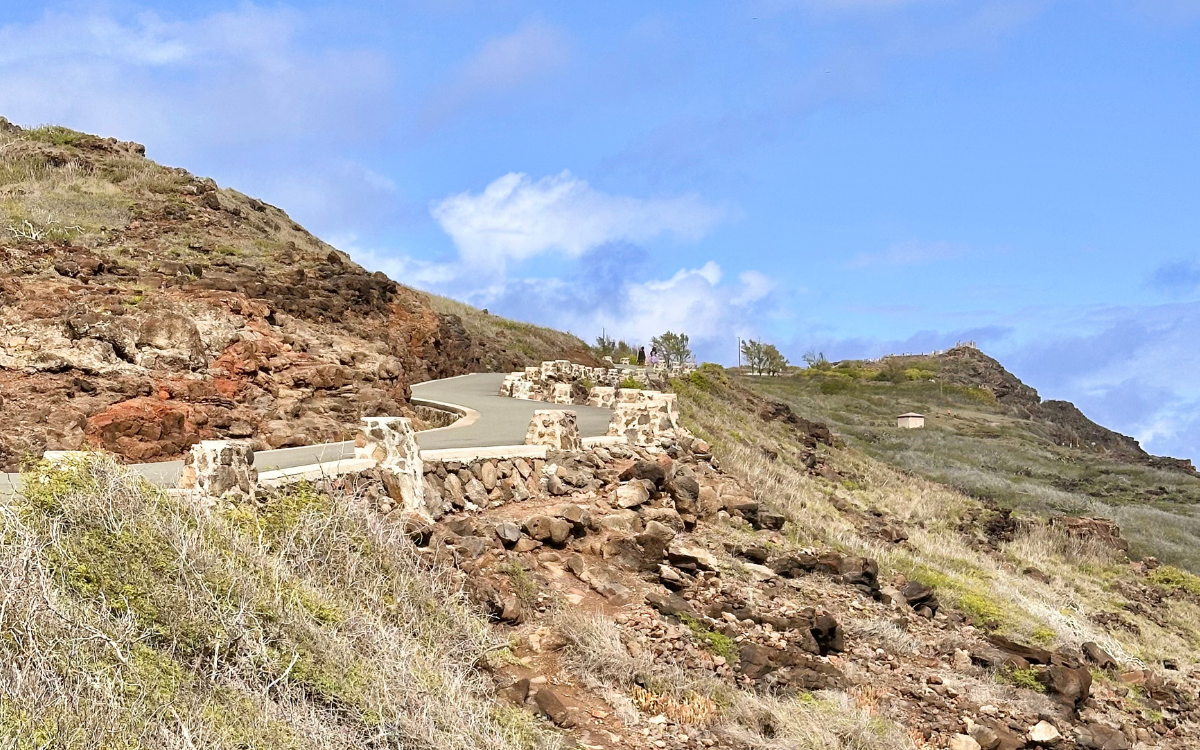
Yes, it’s only a mile to the top and it’s completely paved, but it is fairly steep so I recommend wearing sneakers or strap on sandals.
Also, there is NO SHADE on this hike so go early in the day and take plenty of water and wear sunscreen.
Located on the southeastern side of the island, you’ll find the trailhead on the right (ocean) side of the road after you pass Sandy Beach Park and come around the point. The road you turn off on is usually lined with cars and there’s a small parking lot at the bottom. If you come to the Sea Life Park you’ve gone too far.
Last time I did this hike in January, I saw soooo many spouts and whales breaching in the ocean below so be sure to keep an eye out.
There are plenty of places along the path to stop and take in the view so don’t be in too big of a hurry to make it to the top.
And once you do make it to the top, be sure to go to all of the viewing platforms because they all have different angles.
The one at the very top is where you’ll look down and see the lighthouse.
This is a great hike to pair with snorkeling at Hanauma Bay or the Halona Blowhole or even a drive up the windward coast past Kailua and Kaneohe.
Also, if you need a treat after the hike, there’s a Leonard’s Malasadas truck in the parking lot of the Koko Head Marina nearby.
Manoa Falls
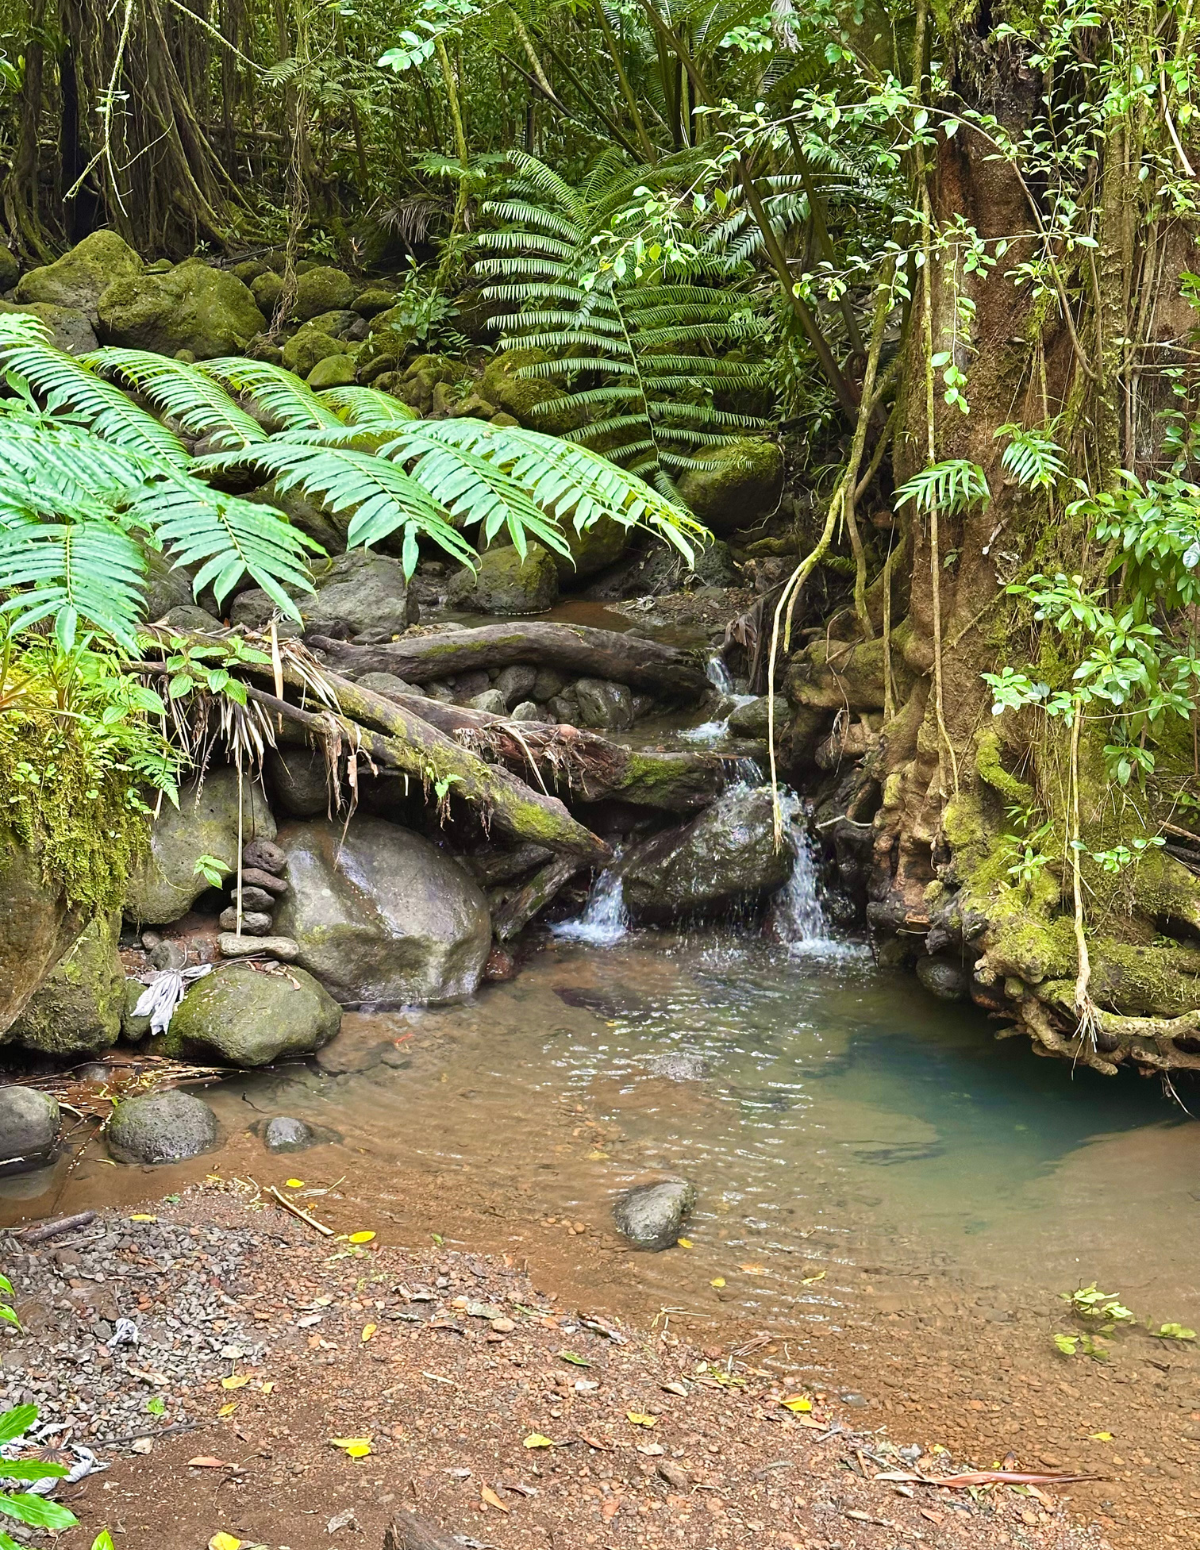
Everybody wants to see a waterfall in Hawaii, and Manoa Falls is a great one if you want a bit of an adventure without committing to a crazy hike.
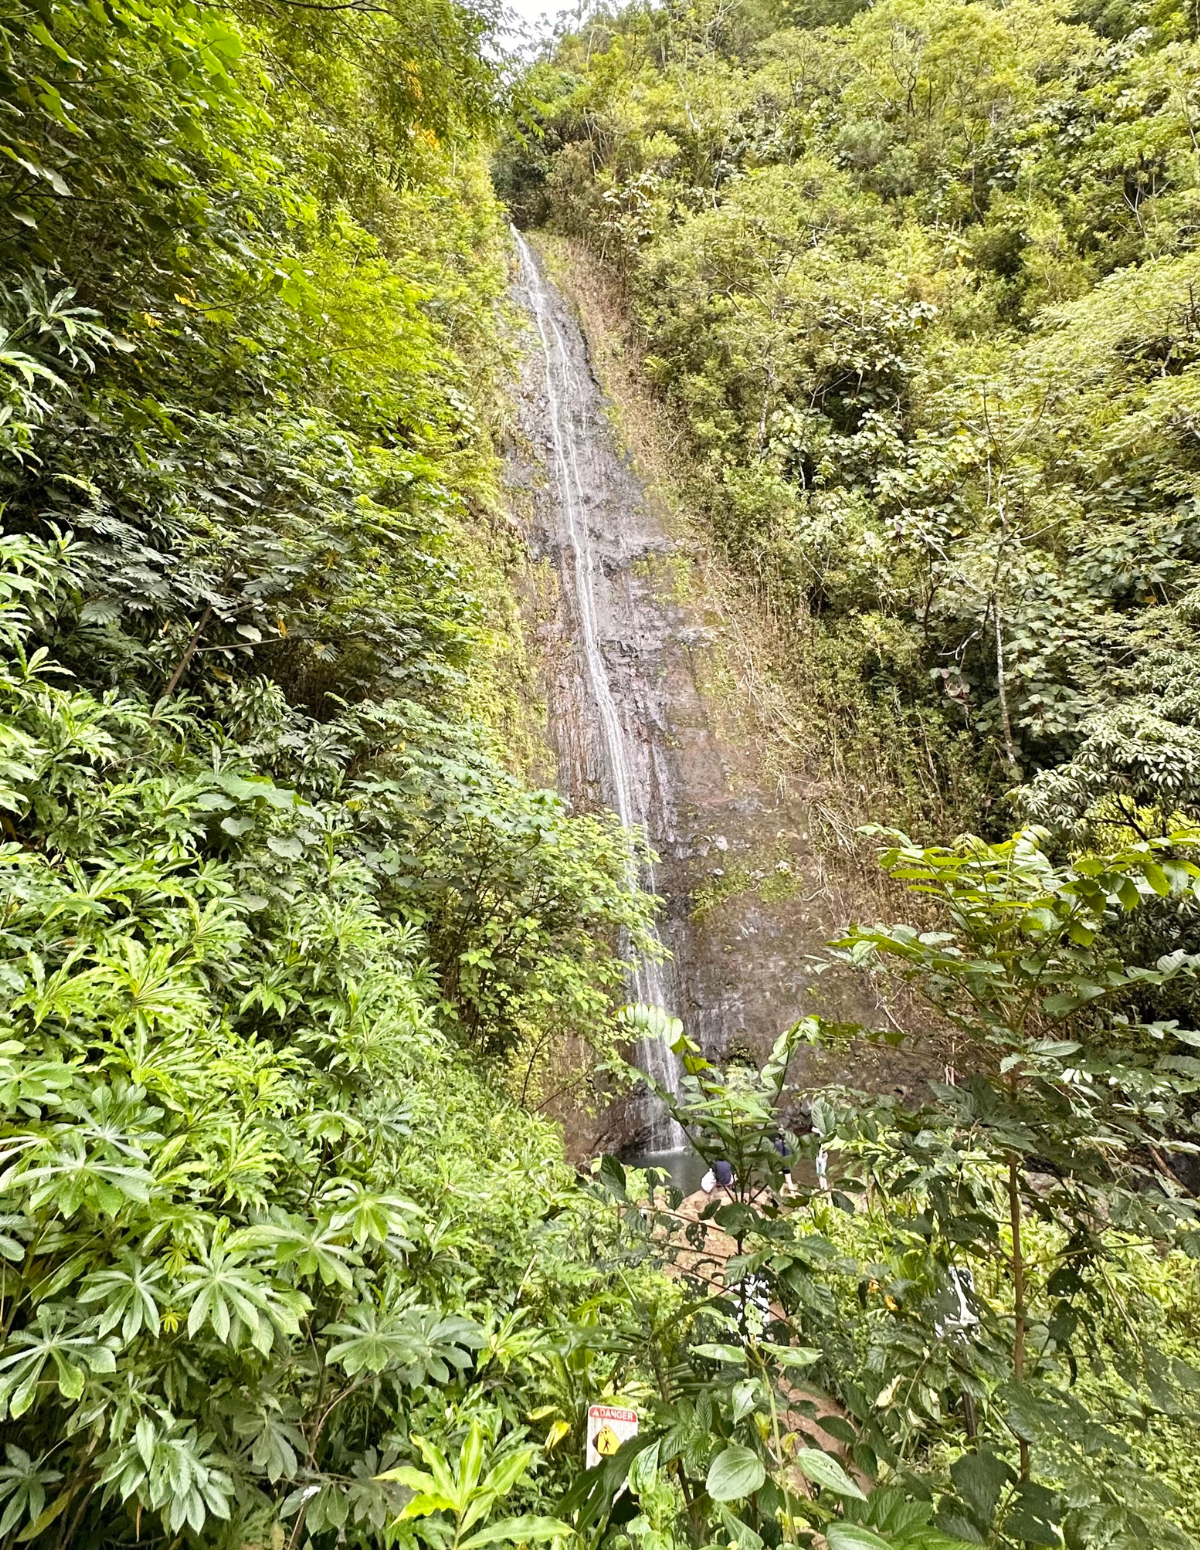
Manoa Falls Trail is a popular hike because it’s fairly quick (1.6 miles round trip), relatively easy, close to Waikiki, and pretty rewarding (hello waterfall!).
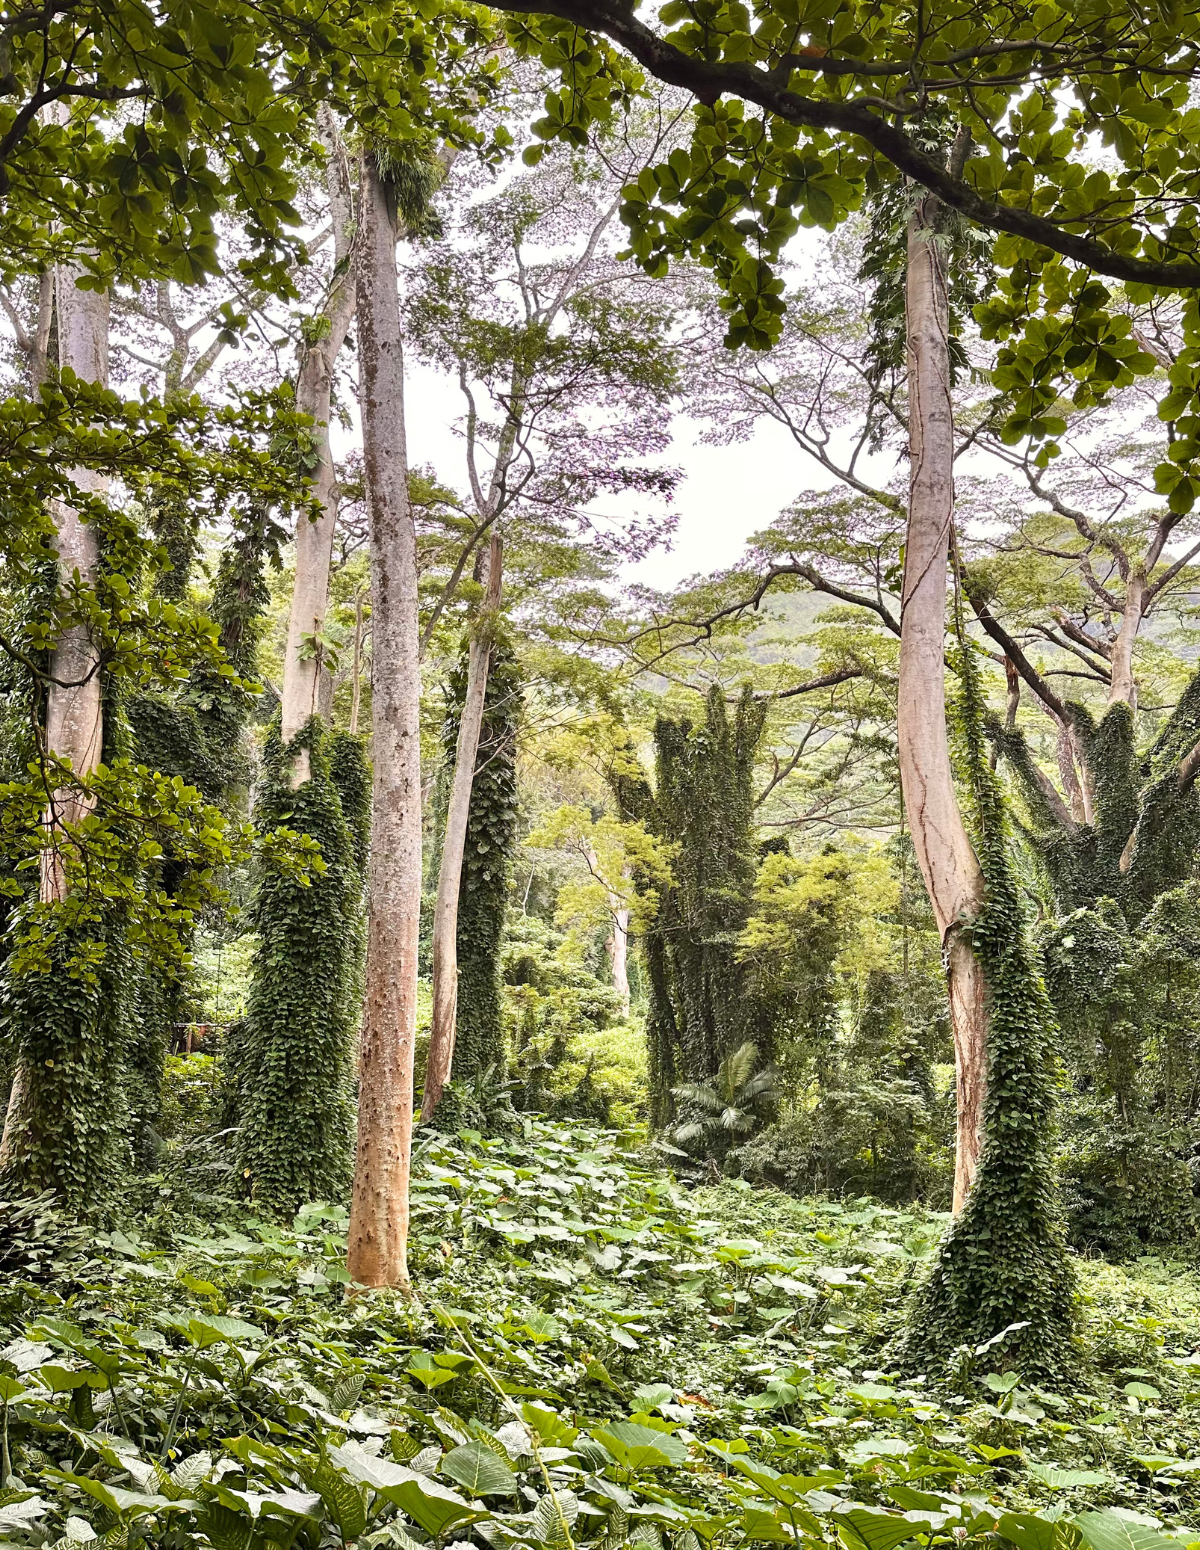
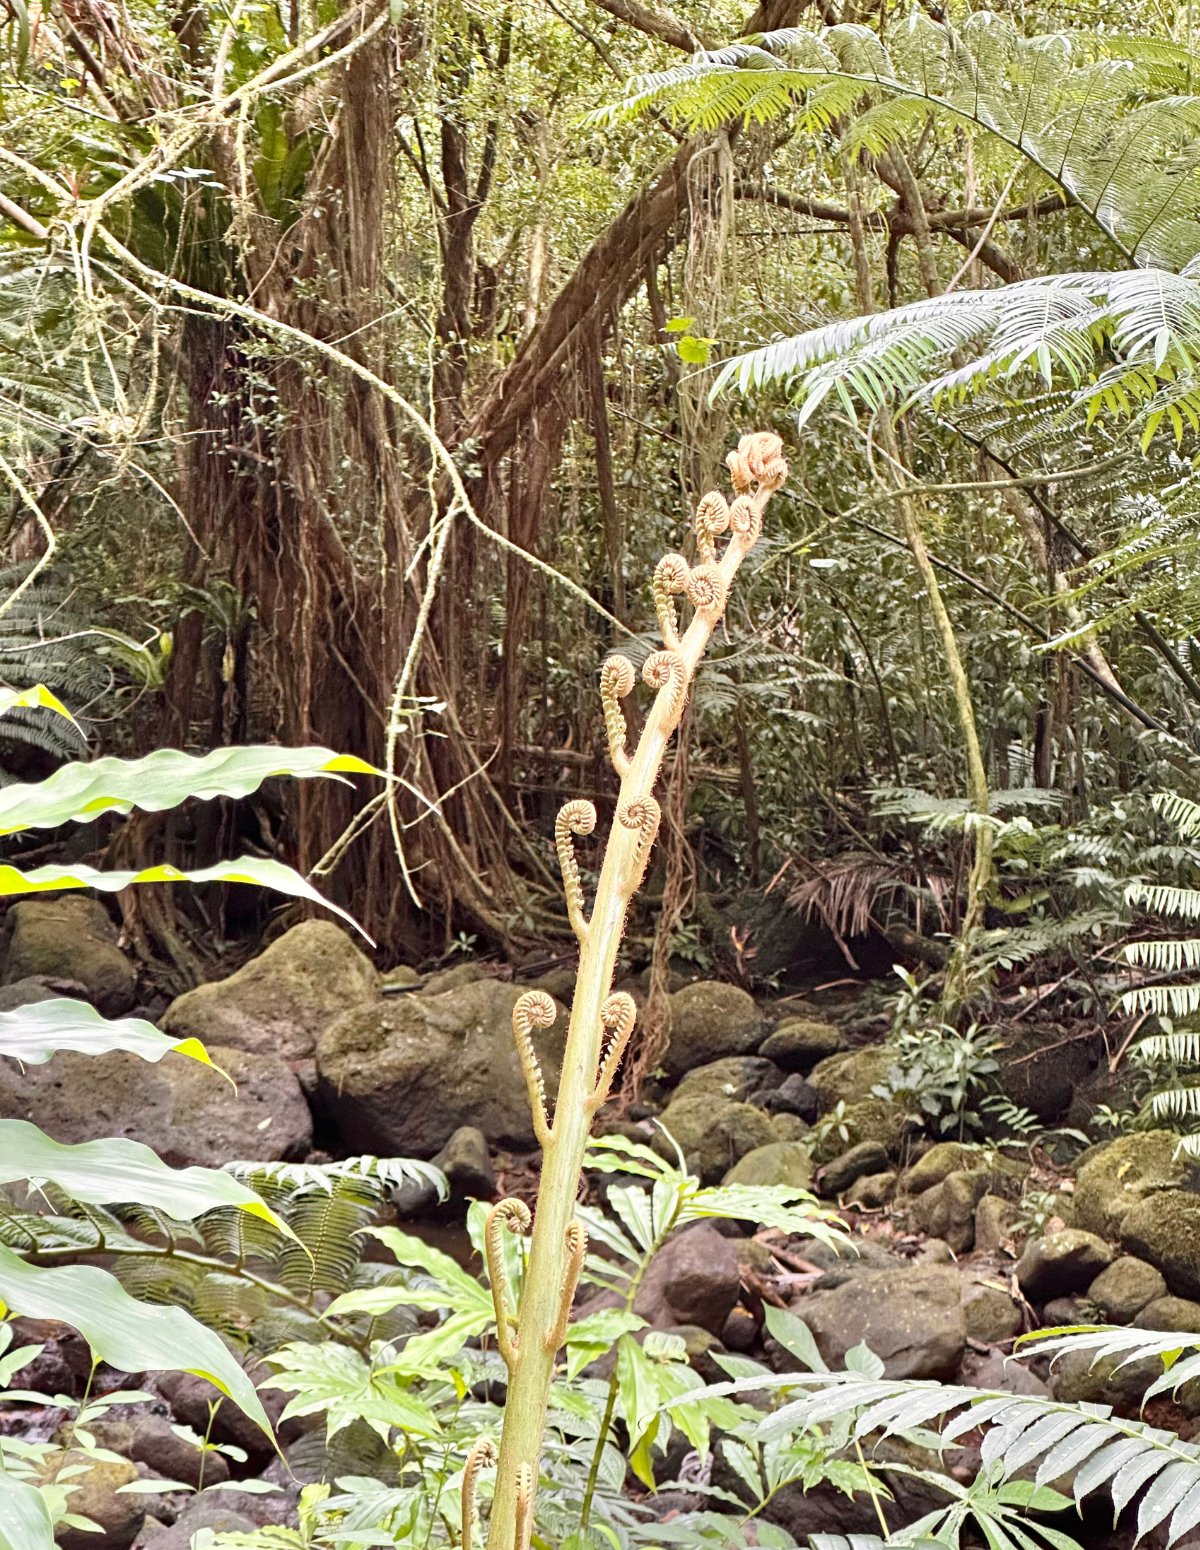
Unlike a lot of the shorter and accessible hikes on Oahu that are pretty wide open or arid before leading to ocean views, the trail to Manoa Falls is through a lush, tropical rainforest.
I would classify this as an “easy hike,” but it is a little bit of a lung burner. The trail is a pretty gently uphill trek, but it is uphill and the humidity often makes it feel more difficult.
It’s also not paved. The trail has gravel and loose rocks and can be slippery if it’s wet (which it usually is since it’s a rainforest).
There are also a lot of mosquitoes here! They don’t usually bother me, but they were really swarming around especially on the first part of the trail. They sell different kinds of bug spray options in the gift shop and I would suggest grabbing something before you start.
There’s no entrance fee to hike the Manoa Falls Trail, but if you park in their lot, it’s $7. Otherwise you can park on the street further down in the neighborhood, but it adds at least a 10 minute uphill trek to the hike.
There’s also a visitor center with clean restrooms and a little gift shop at the trailhead.
Side Note: If you’re looking for a rental car for your trip, I LOVE Discount Hawaii Car Rentals. They’re seriously the only company I ever use. They’ll give you the very best prices, you don’t have to reserve with a credit card or pay until you show up, you can cancel and re-book anytime if you find a better rate, and they usually have a special that adds additional drivers for no fee. It’s a no brainer. Click here to check rates for your trip.
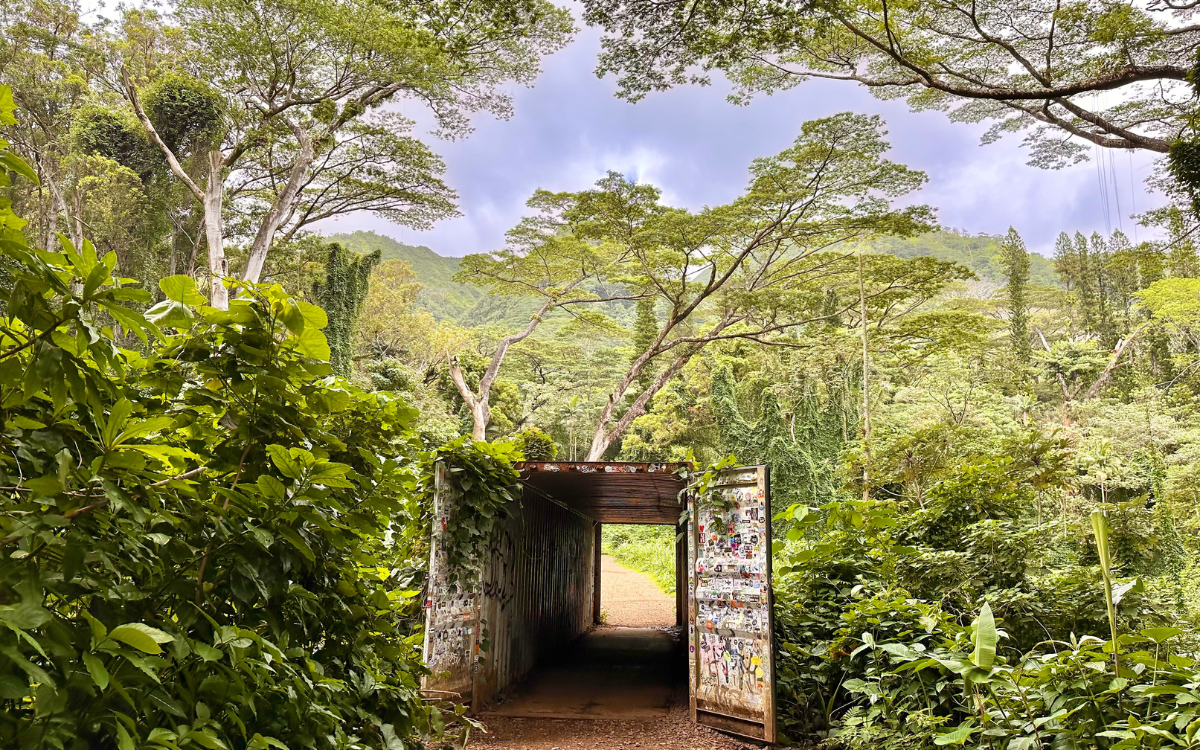
Ehukai Pillbox
Oahu has a series of pillbox hikes (bunkers from WWII posted in various lookouts around the island) and while the Lanikai Pillbox is definitely the most famous one, I think the Ehukai Pillbox on the north shore is a close second.
The Ehukai Pillbox Trail is located just off the famous Sunset Beach on Oahu’s North Shore, right behind Sunset Elementary School.
You’ll turn into the parking lot and there’s a row of parking in front of the park (don’t go through the gates into the school yard).

The trailhead is just behind where you park. There’s only a dozen or so parking spots here, but there’s plenty more across the road.
The trailhead is easy to find. From the parking lot, it’s a well-trodden path that quickly starts to ascend through the forest.

The hike is about 1.5-miles round-trip (about a 30 minute climb to the top) and leads you to two military pillboxes (or bunkers) built during World War II.
These structures were originally used to defend the island from potential attacks. Today, they serve as historic landmarks and provide an epic vantage point for hikers.
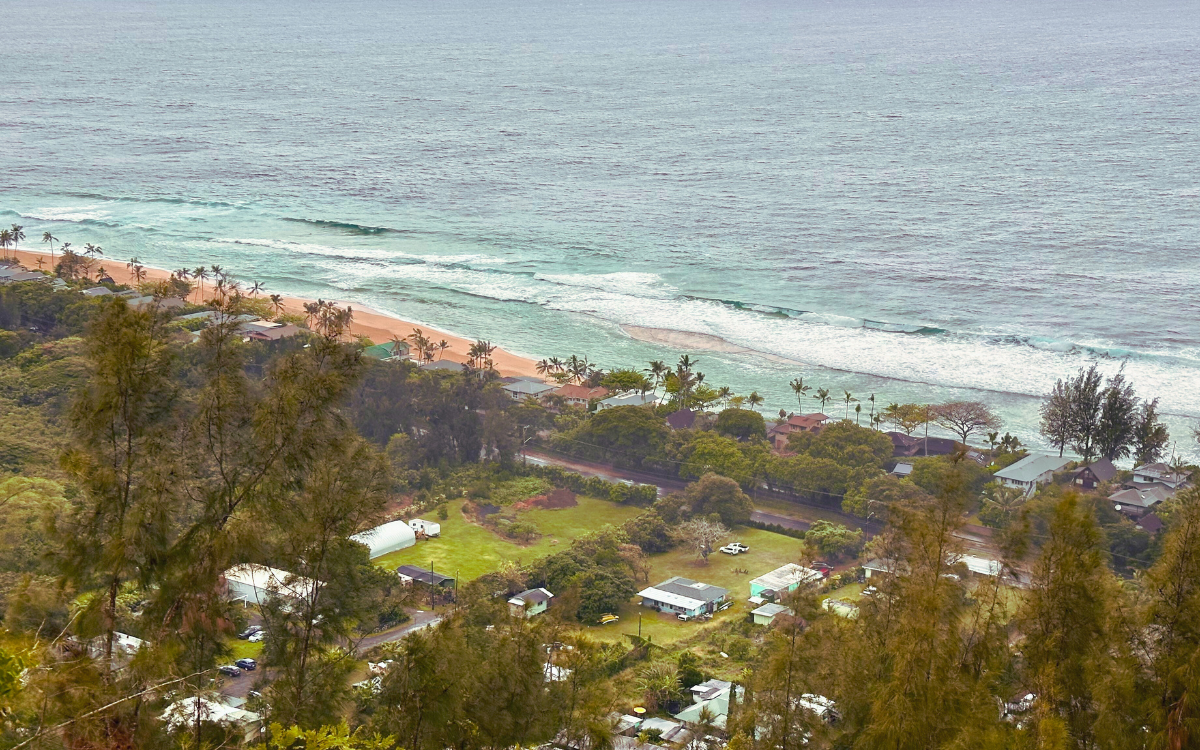
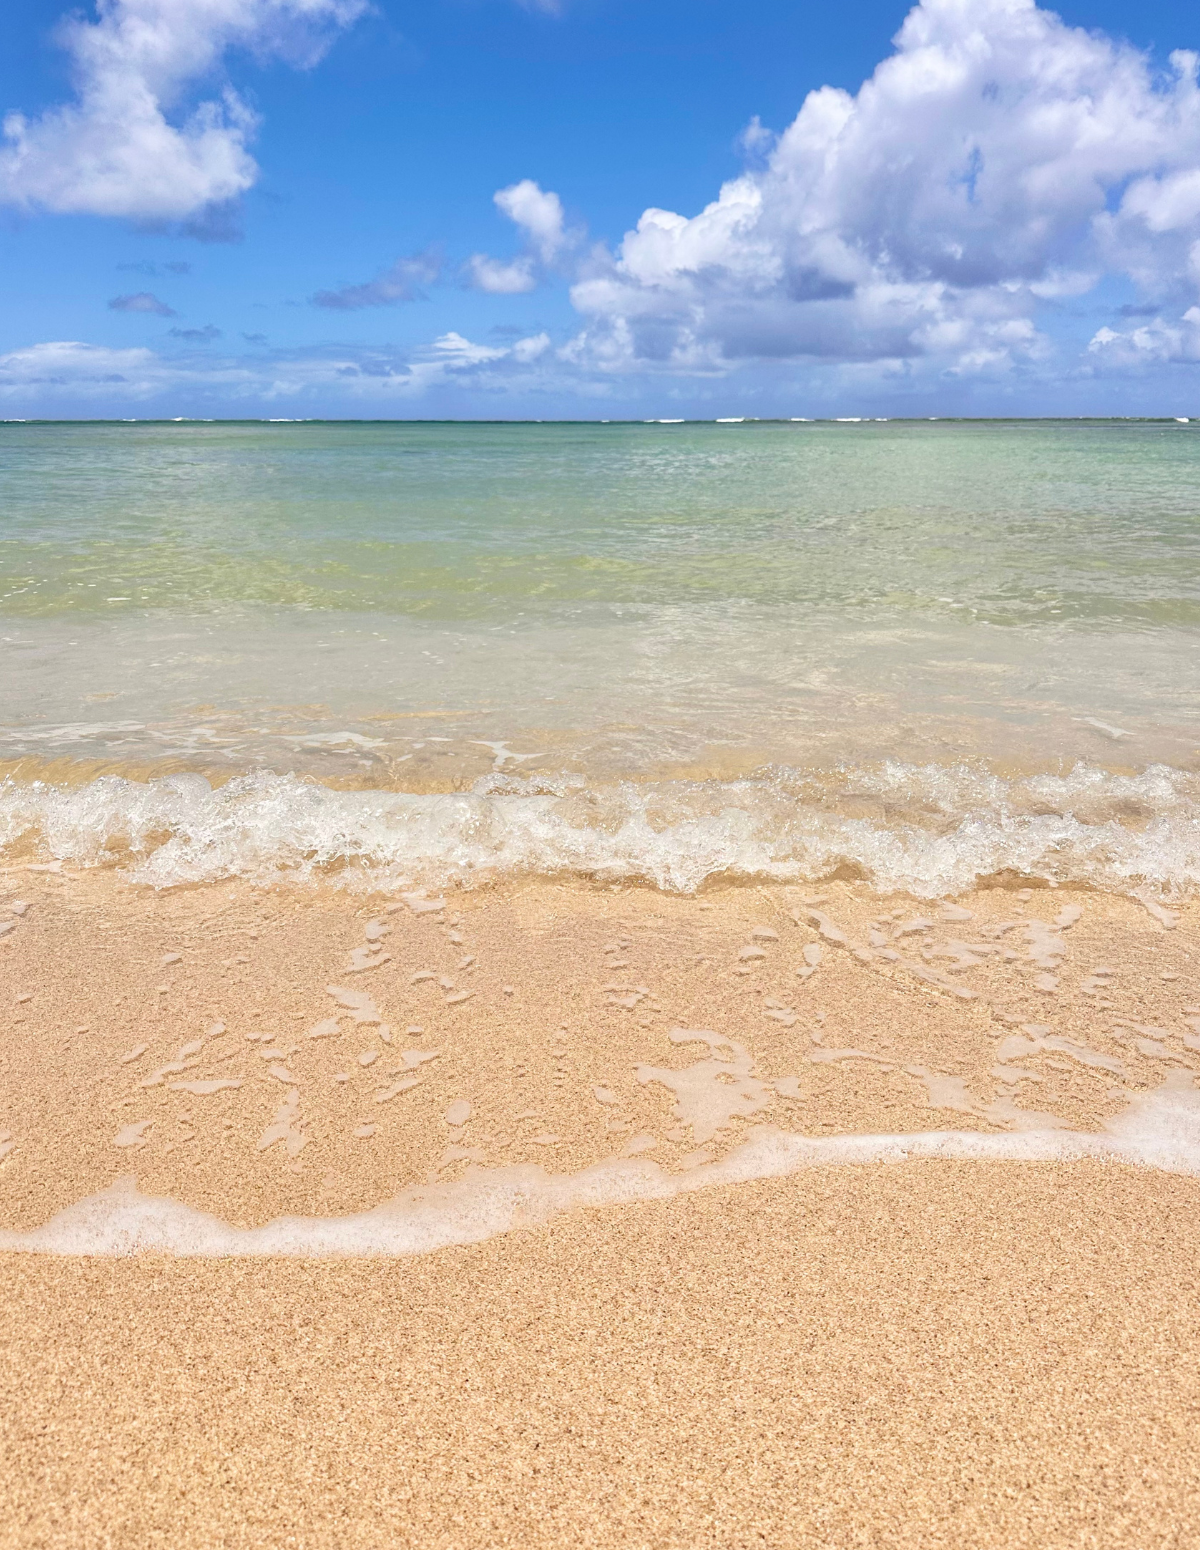
From the top you’ll be treated to sweeping views of the North Shore’s golden beaches, lush hillsides, and turquoise waters.
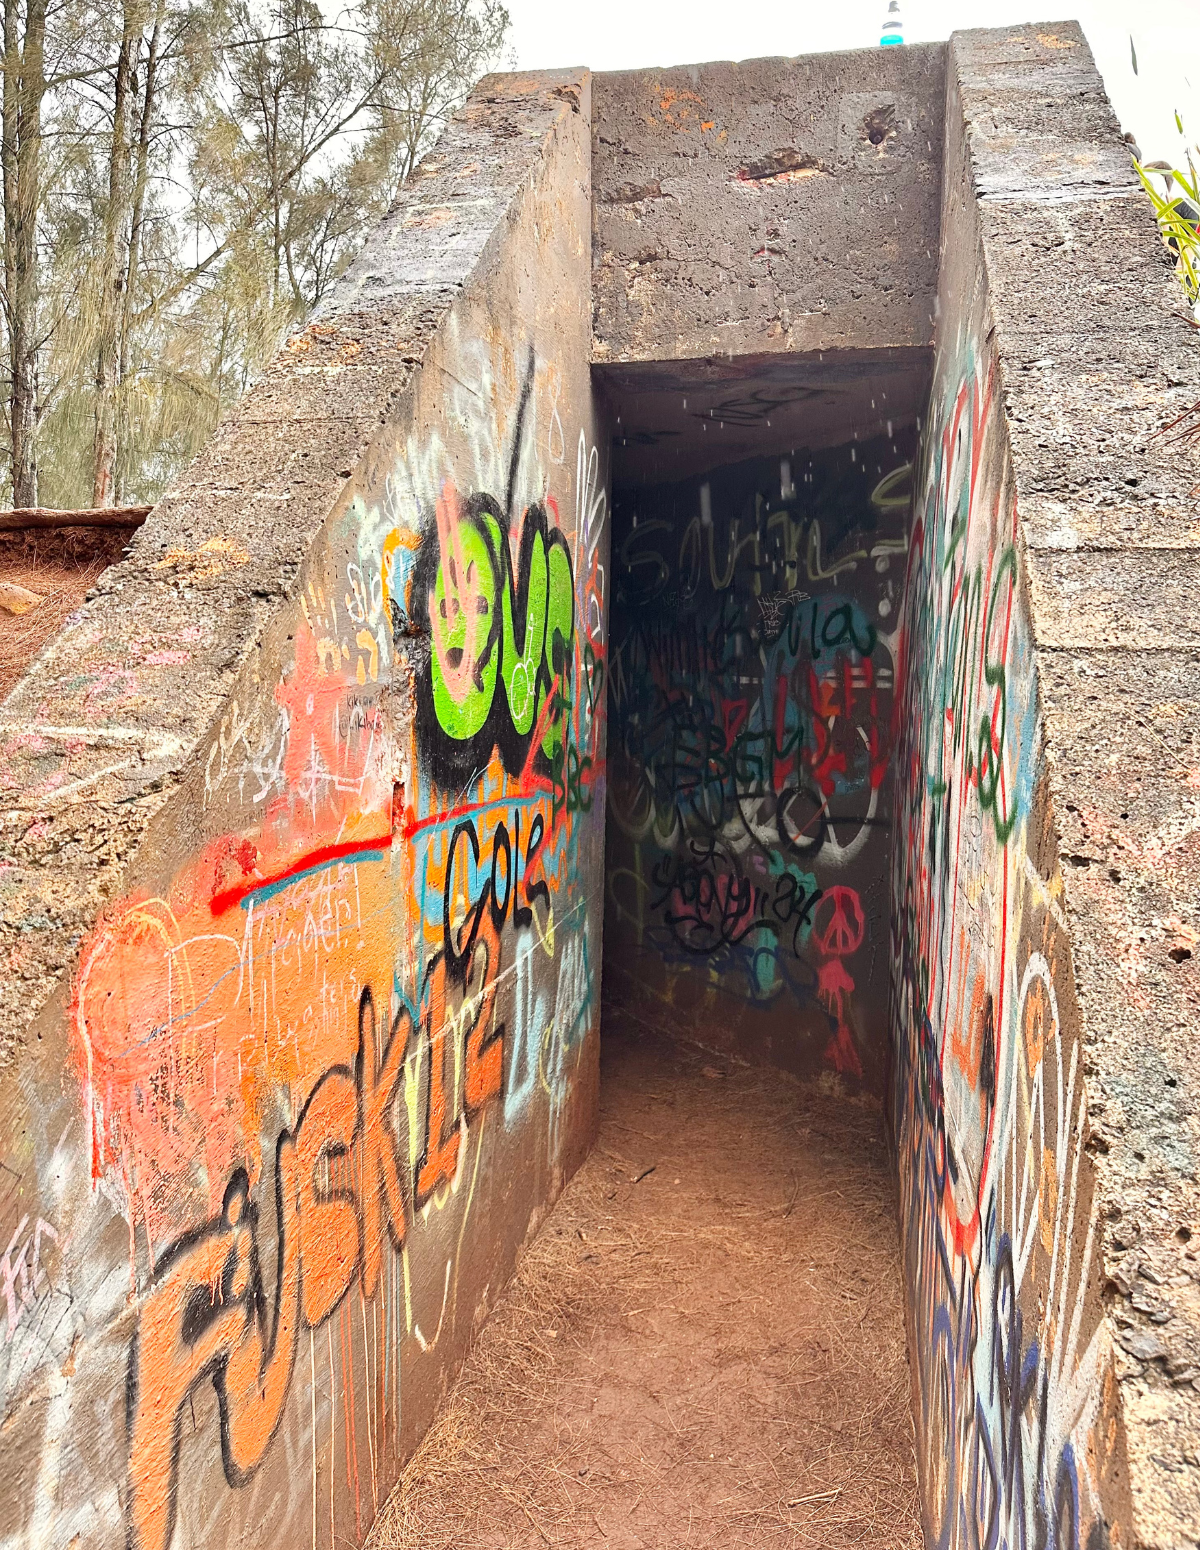
And the pillbox itself is a fun spot for photos. It’s covered with colorful graffiti art from local artists.

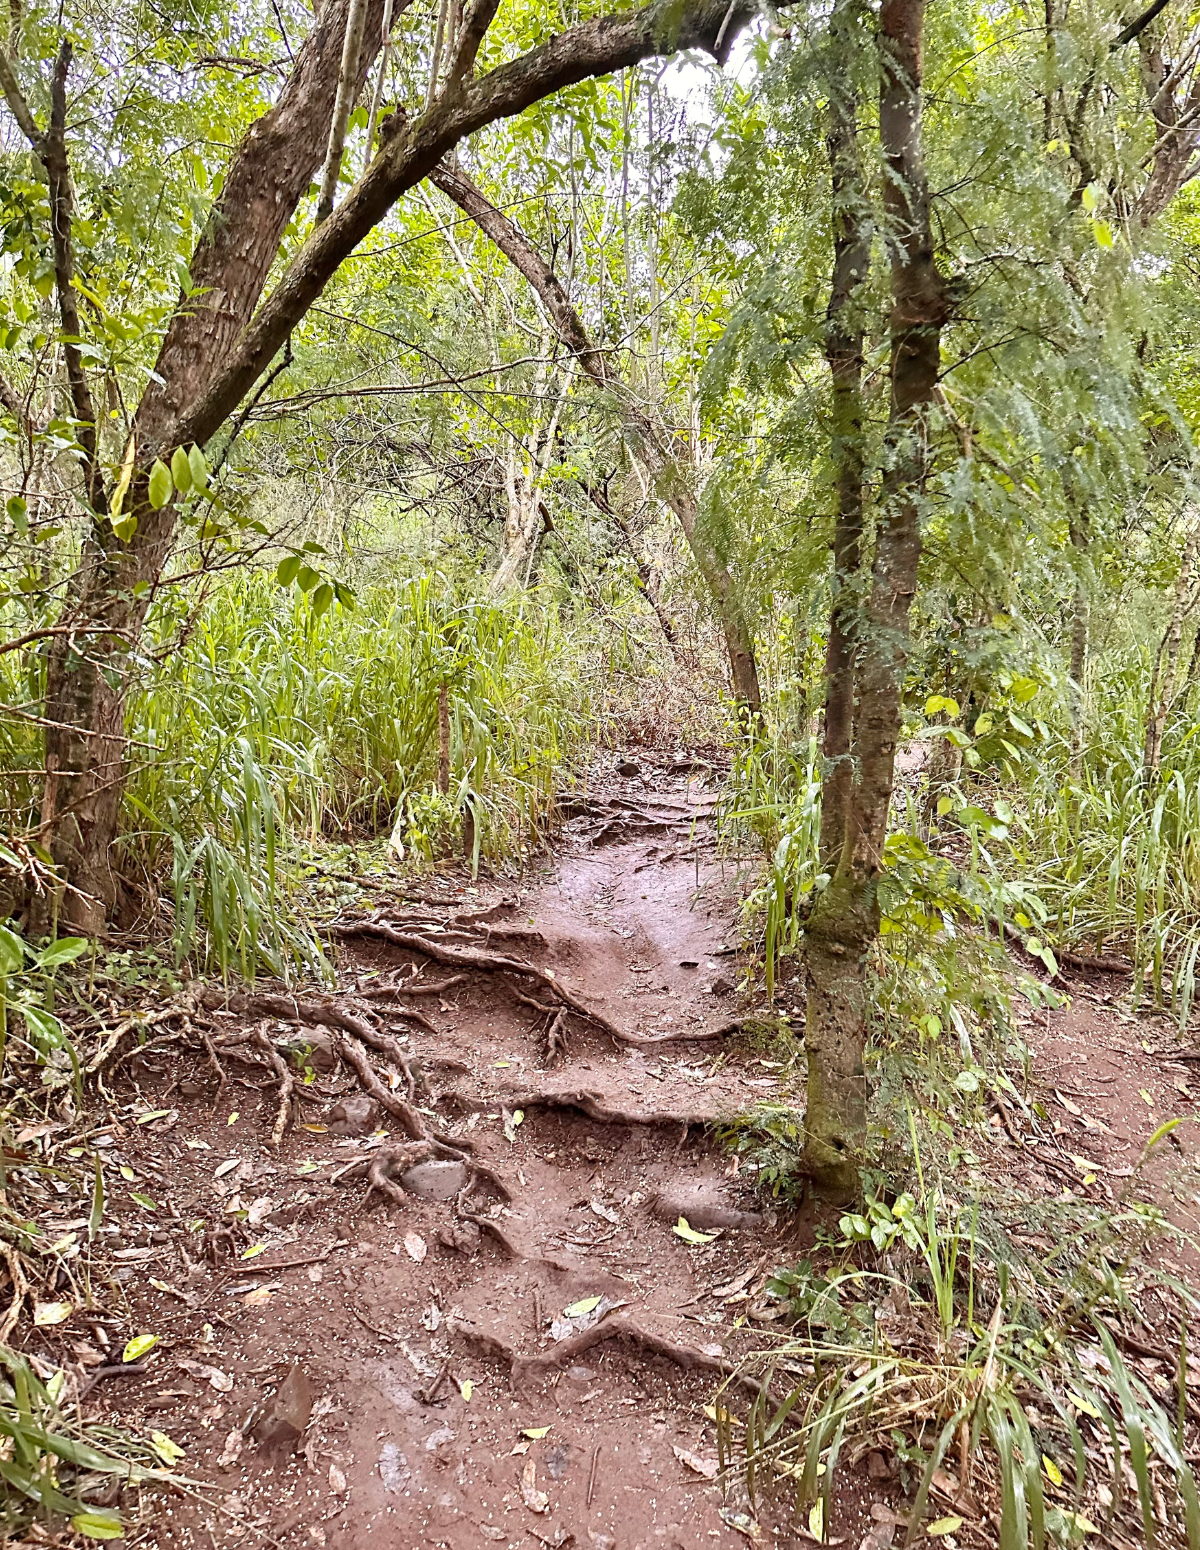
About the trail itself…The hike is a moderately strenuous climb at the beginning, with some steep sections and rocky terrain and plenty of tree roots, but there are ropes to help you out in the tricky places. If you’re in decent shape, you won’t have any trouble, especially because it’s a pretty short distance.
That all changes though if it’s been raining. Even a slight drizzle and the trail gets SUPER slick to that point that I would not advise attempting (ask me how I know ; )
But if it’s the only time it fits into your schedule and you’re determined to make it work, just go slow…use the ropes, and plan to get a little bit muddy. When descending through the tricky bits where there are no ropes, sometimes I opt to use my hands and “crab walk” instead of risking a fall.
And it’s good to know…there are restrooms at the park at the trailhead with running water so you can wash up after.
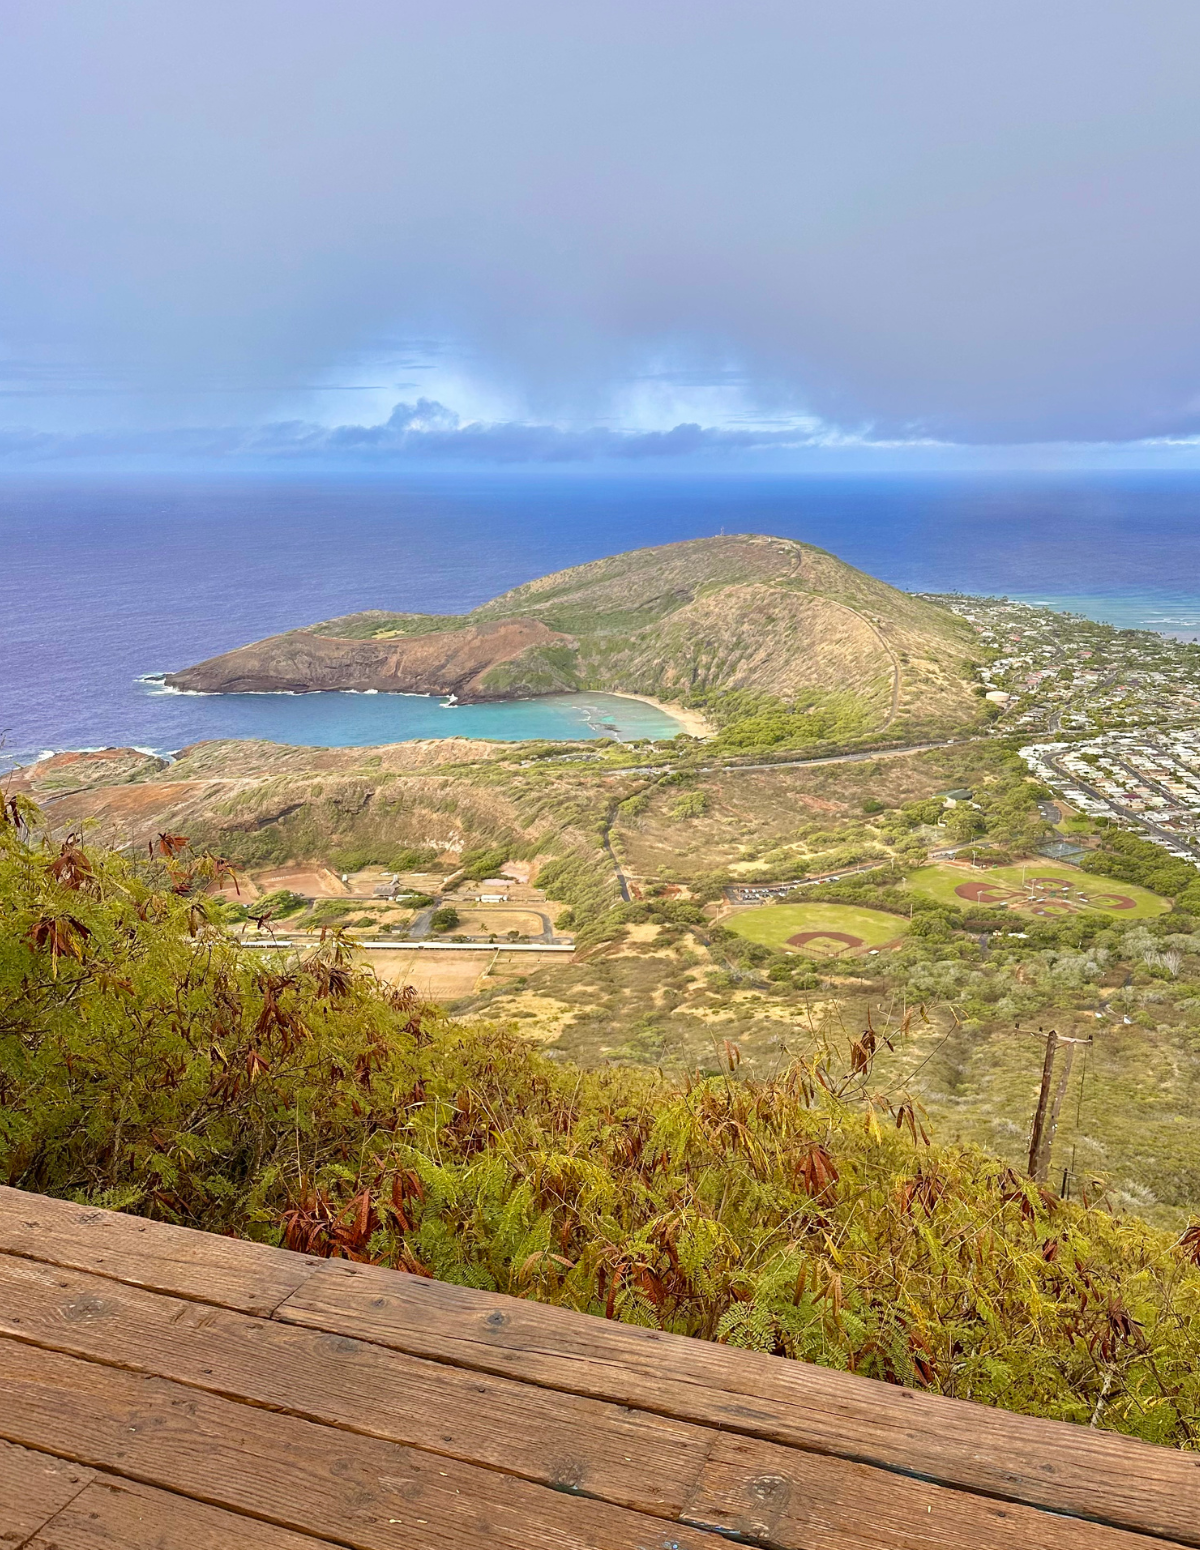
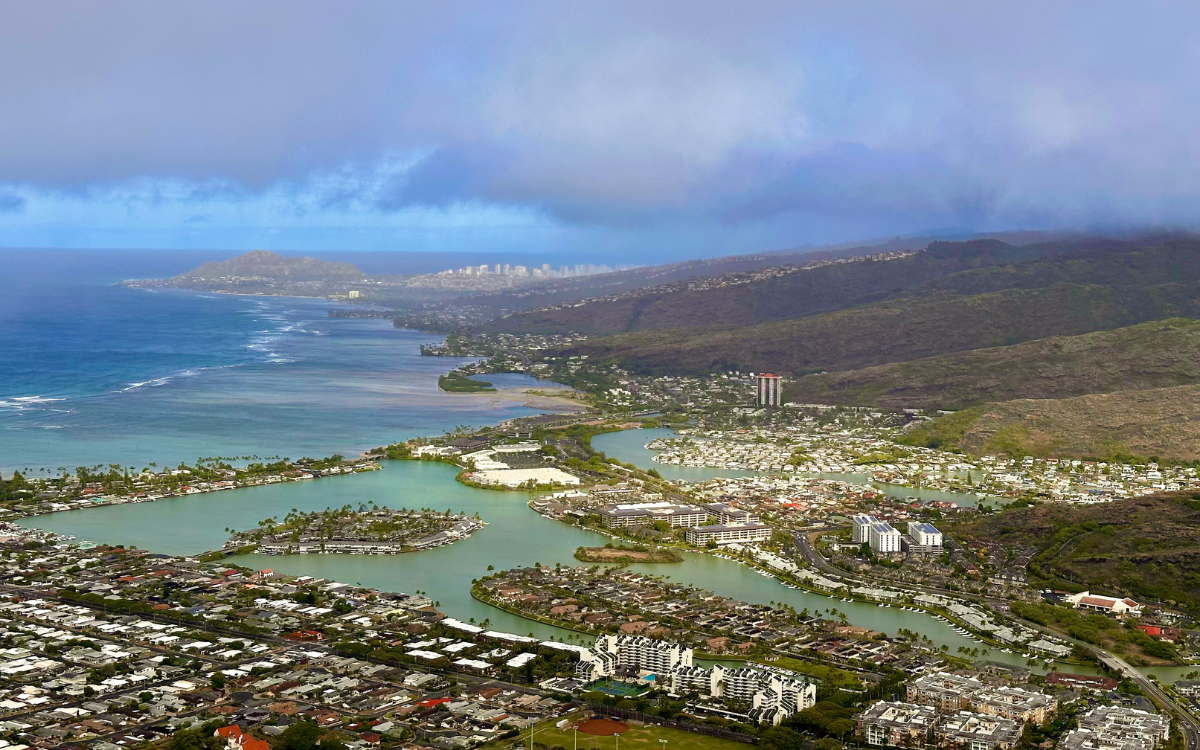
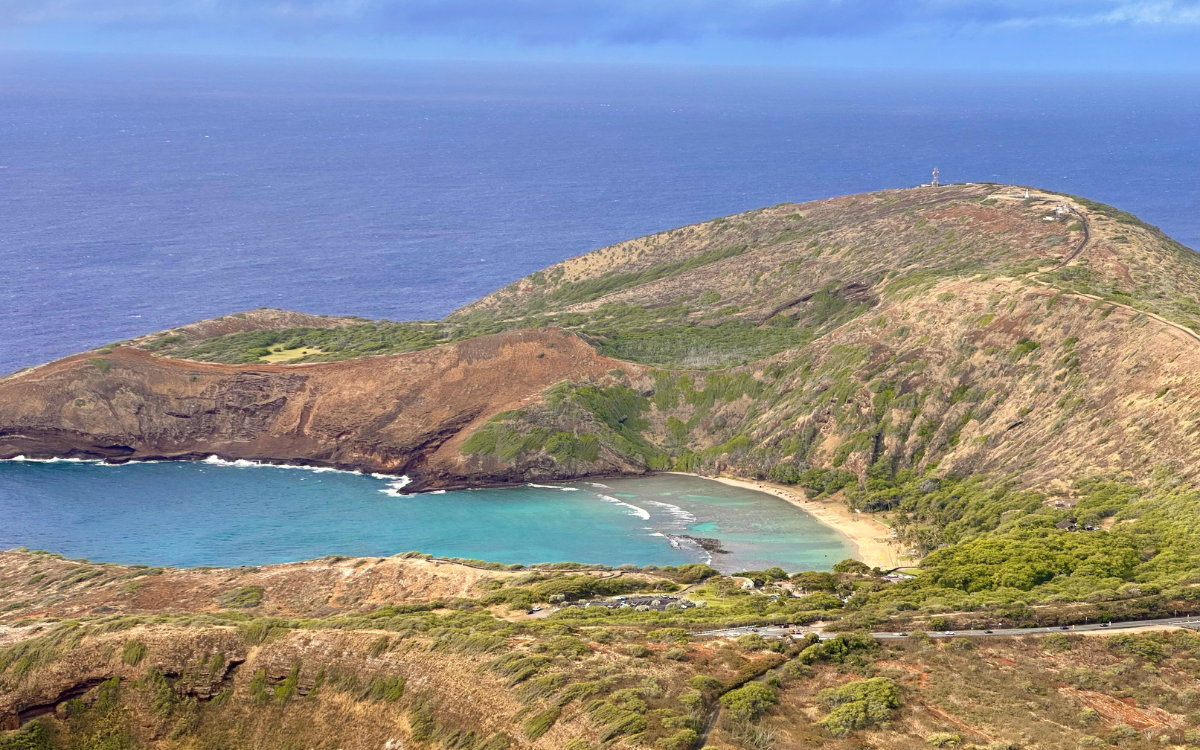
Koko Head Crater
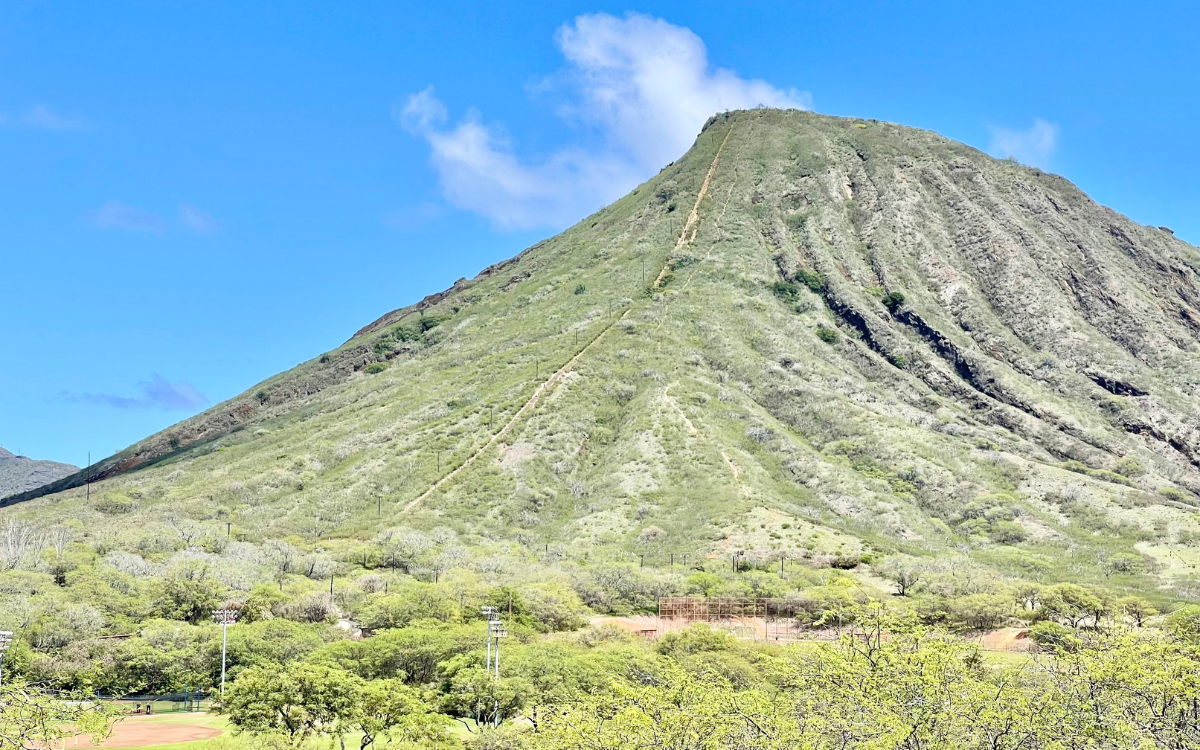
Koko Head isn’t the most famous extinct volcanic crater hike on Oahu (that would be Diamond Head), but it has its own claim to fame.
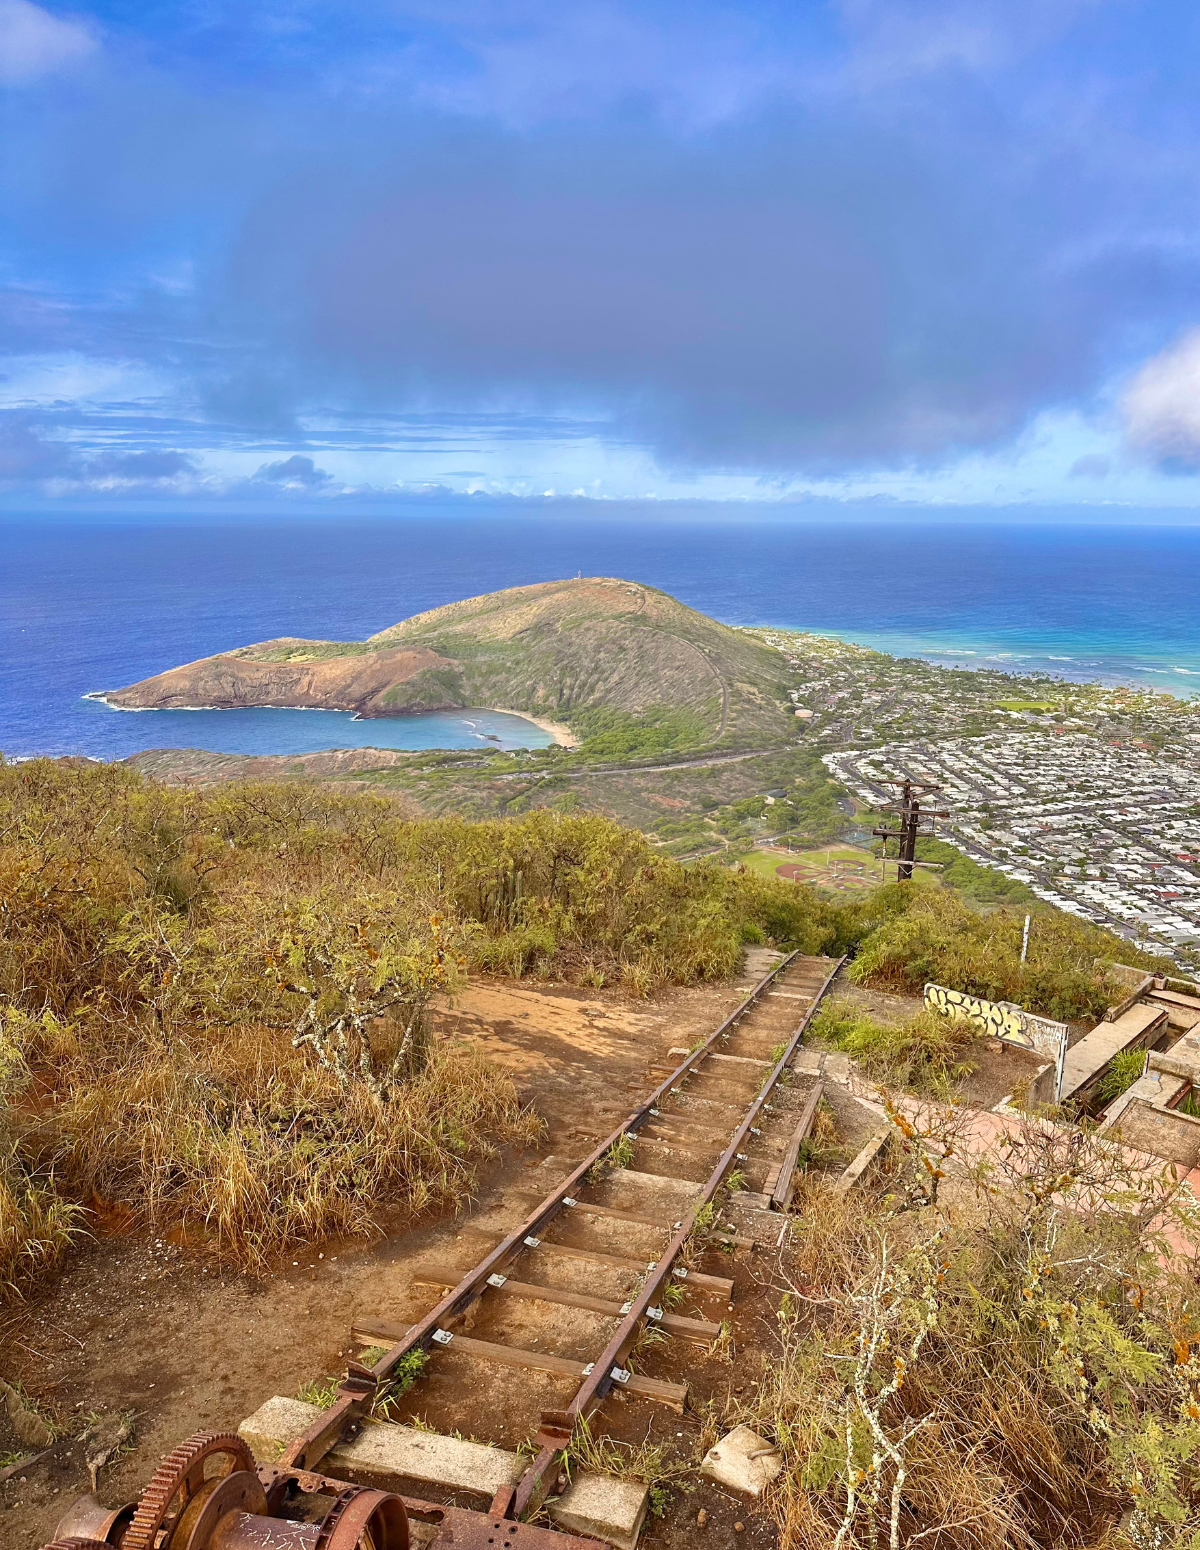
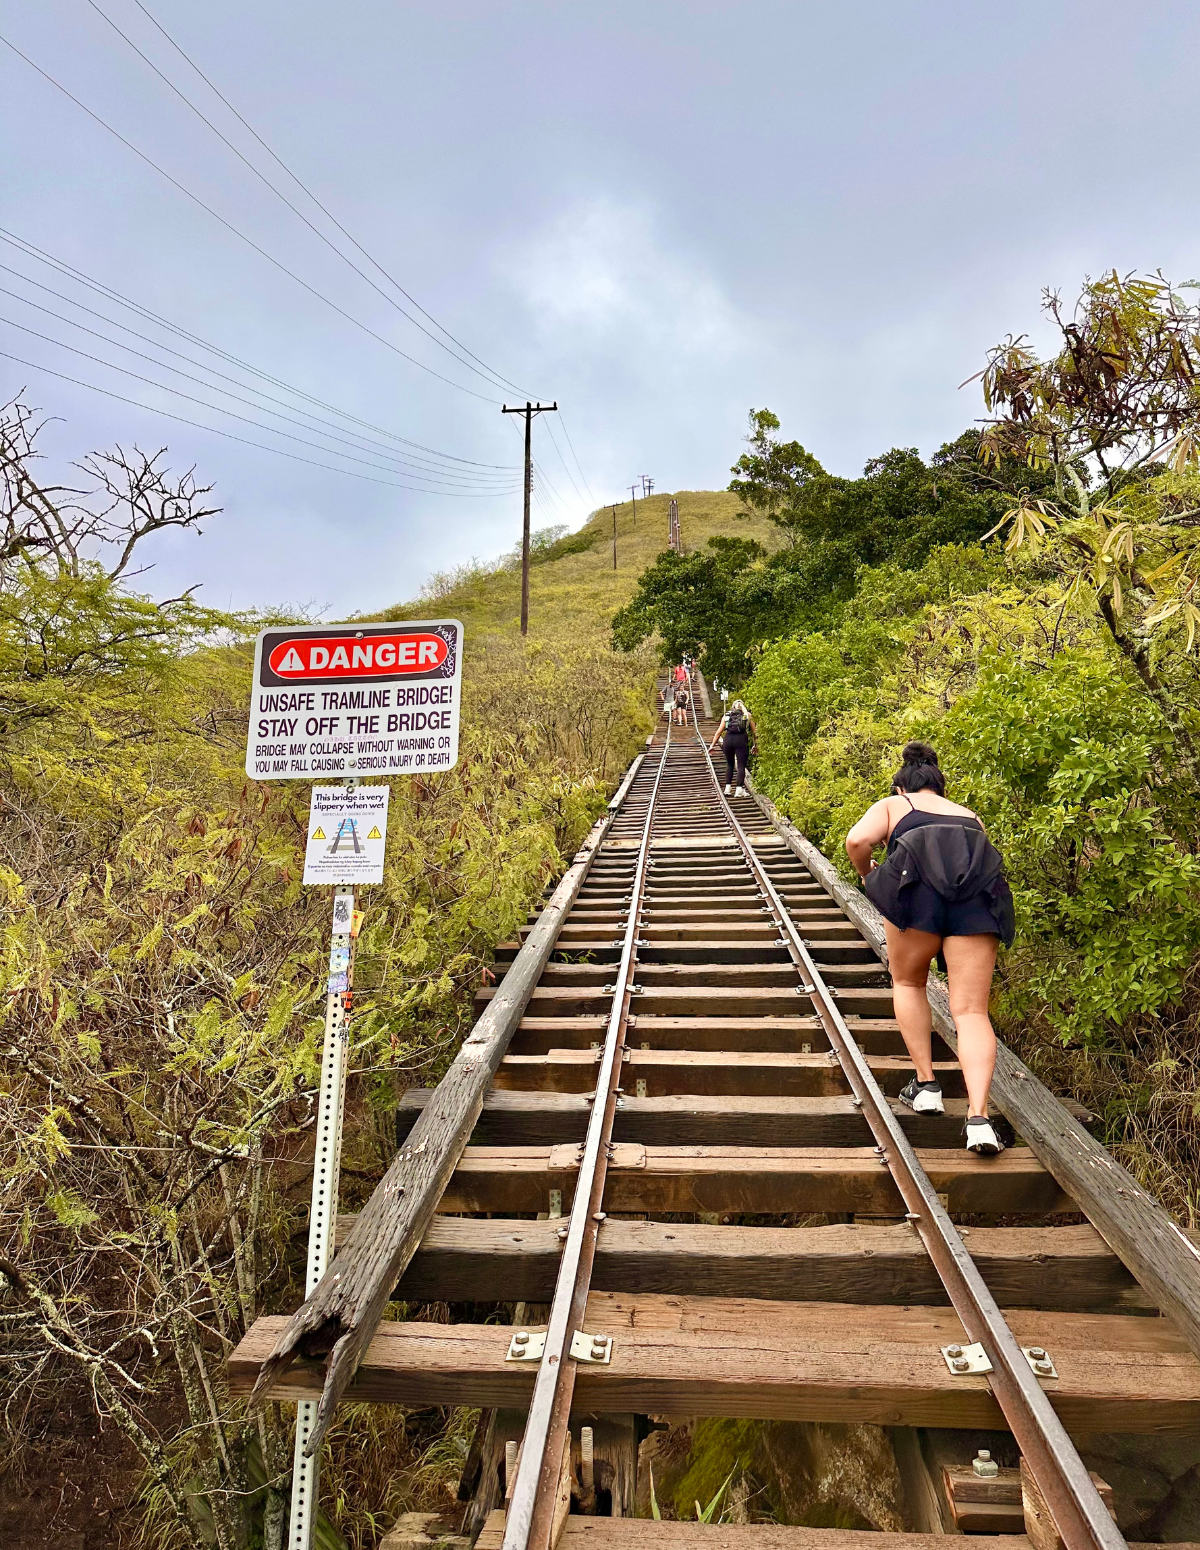
While most hikes with an altitude gain feature a winding trail with switchbacks to make the climb more manageable, the Koko Head trail is over 1000 stairs straight up the side of the crater.
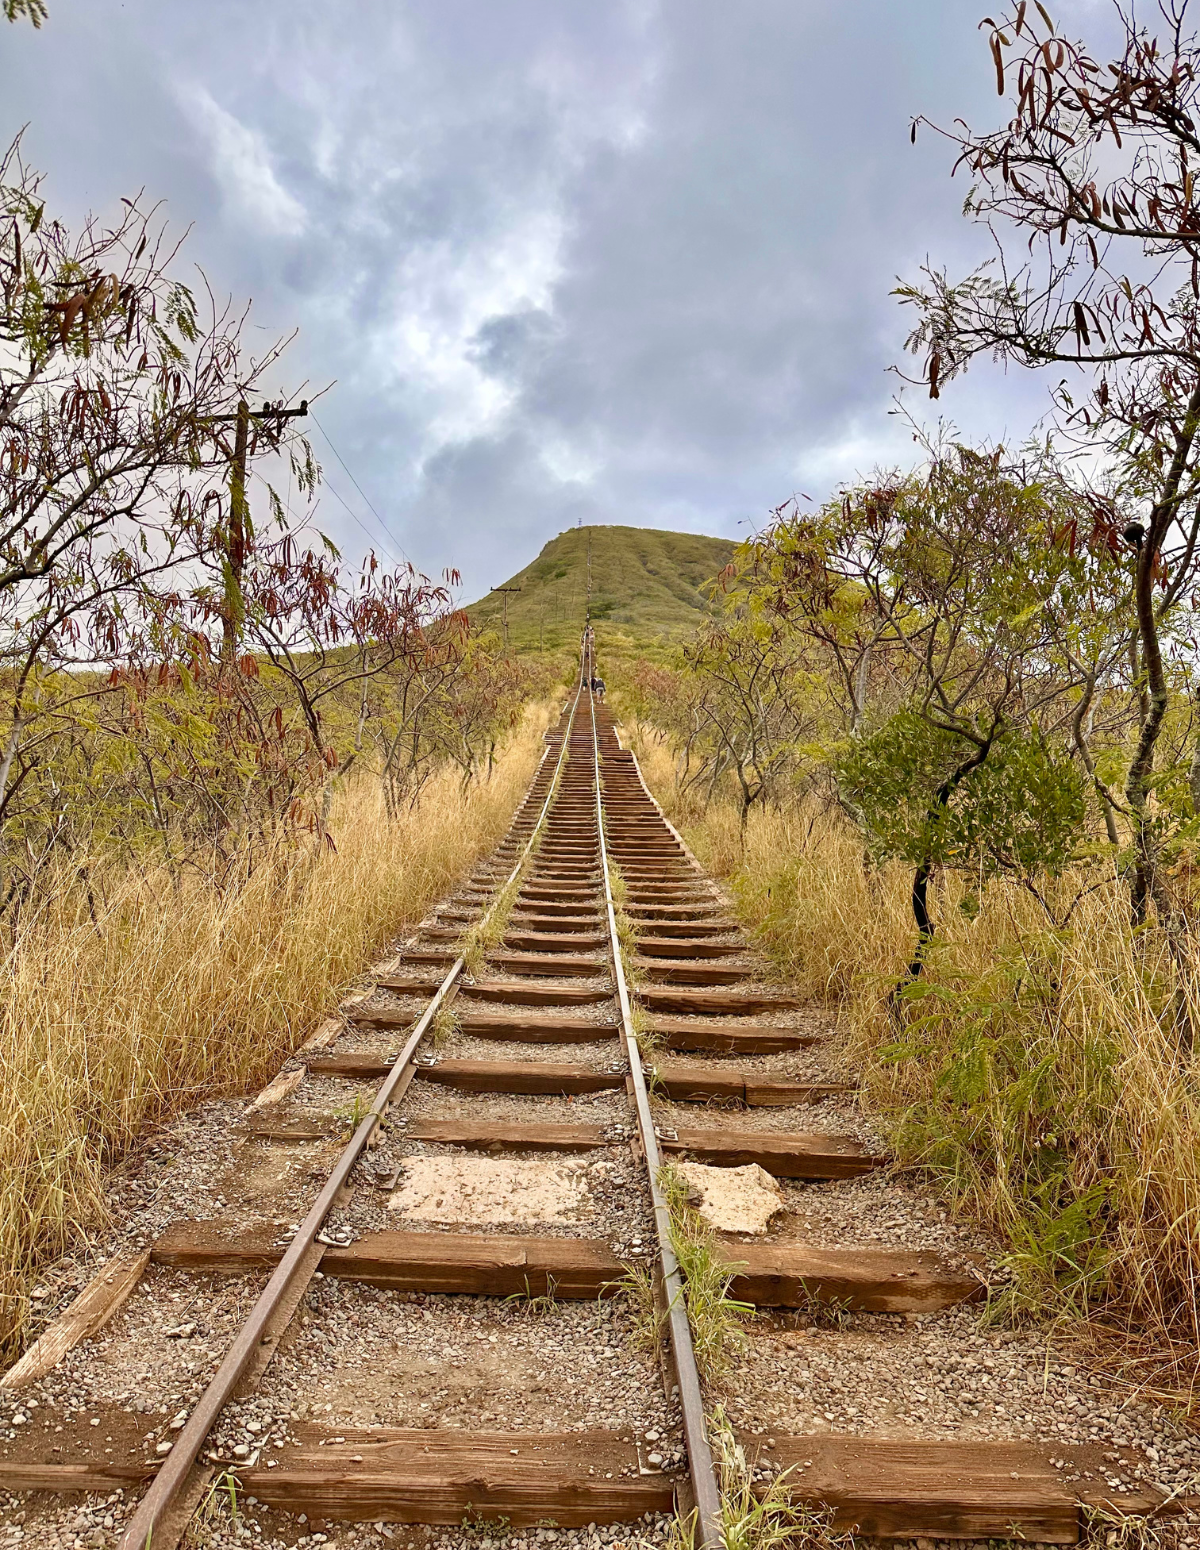
The trail is a WWII era railroad tram built by the army in the 1940s.
The hike couldn’t be more straightforward, but it’s also about as challenging as they come.
Koko Head is popular with locals who use it as a regular fitness challenge, visitors who want to see if they can complete the challenge, and anyone who wants a hike with some of the best views on the island.
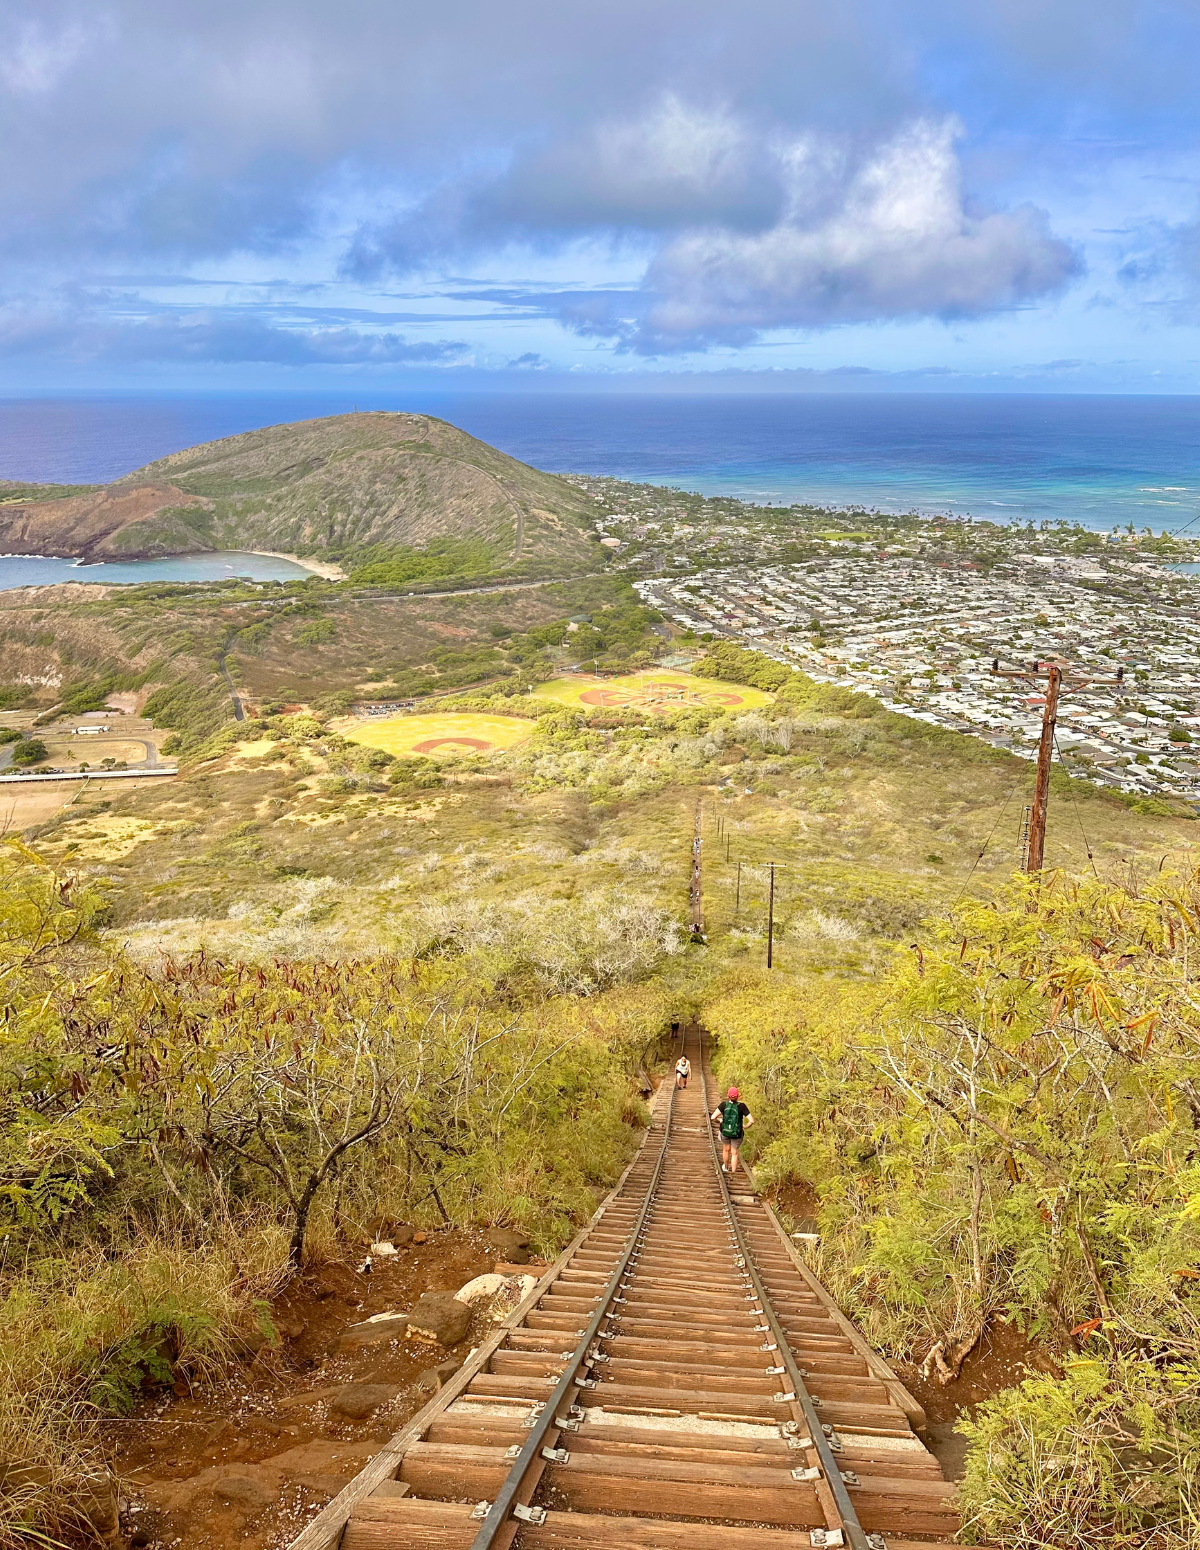
I’ve wanted to climb Koko Head for years now, but I was always worried my (fairly moderate) fear of heights/vertigo/anxiety would make it difficult. But I finally did it earlier this year and honestly it didn’t bother me much at all.
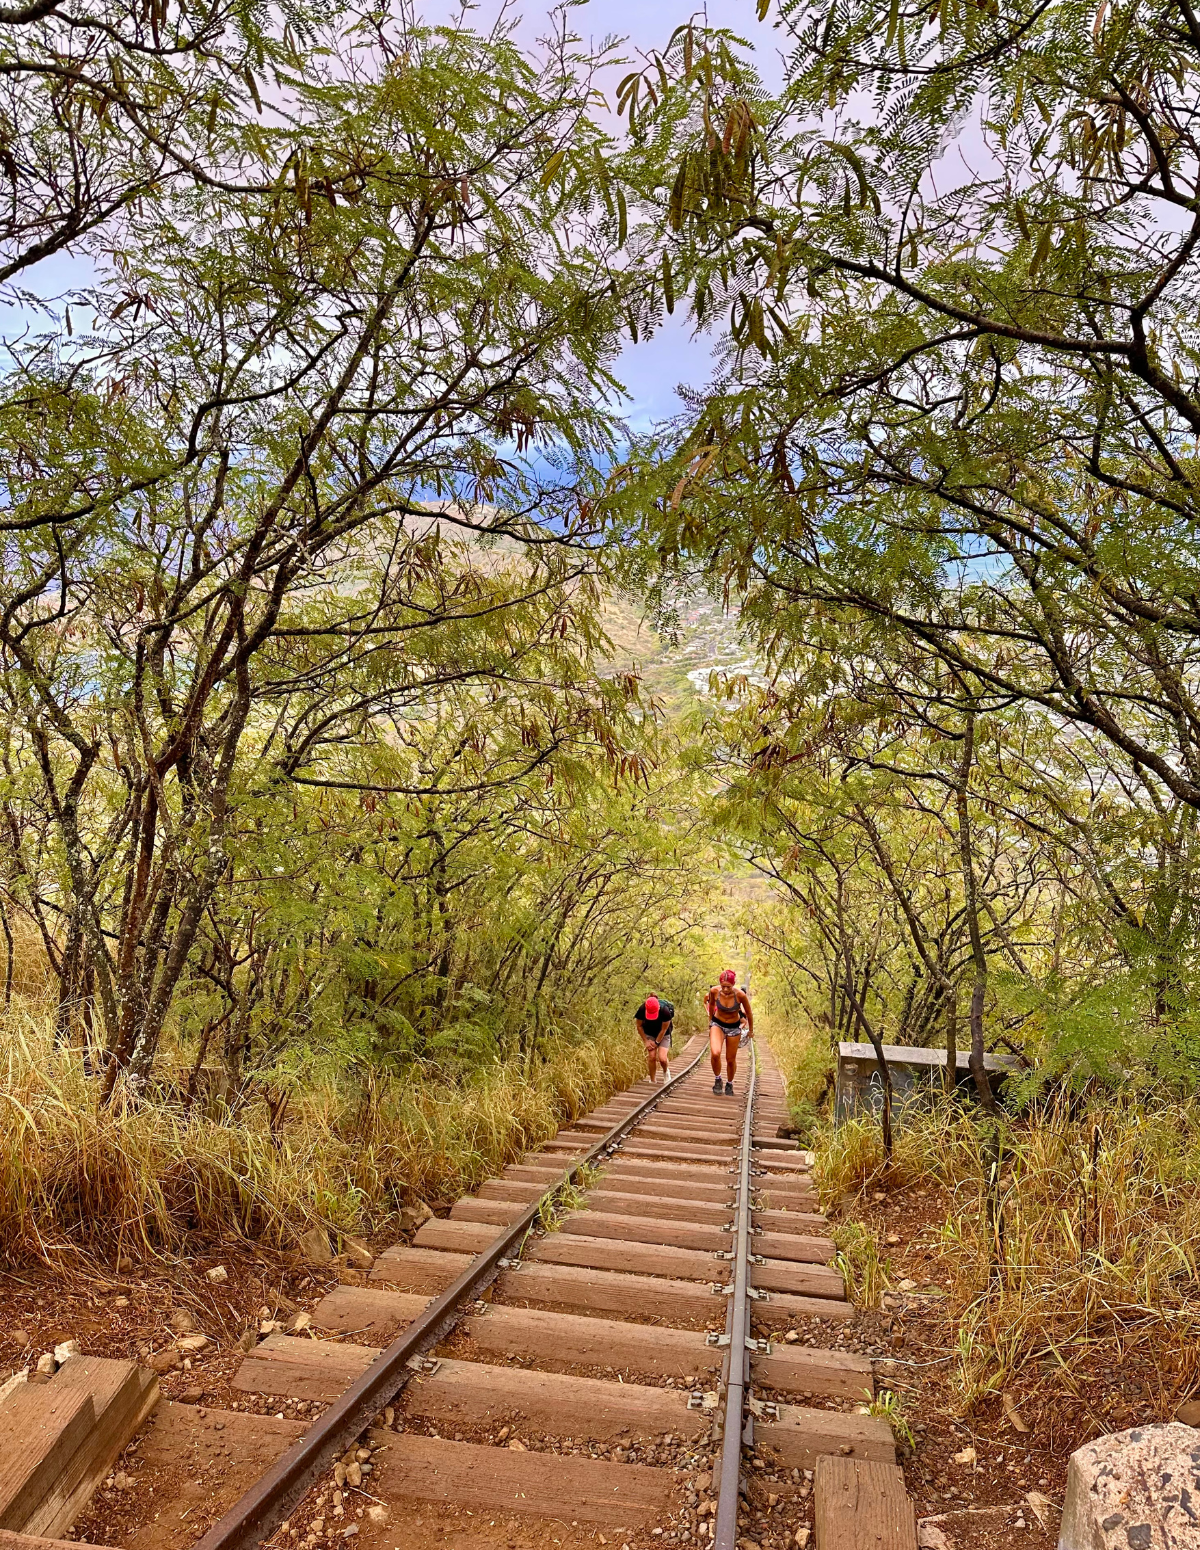
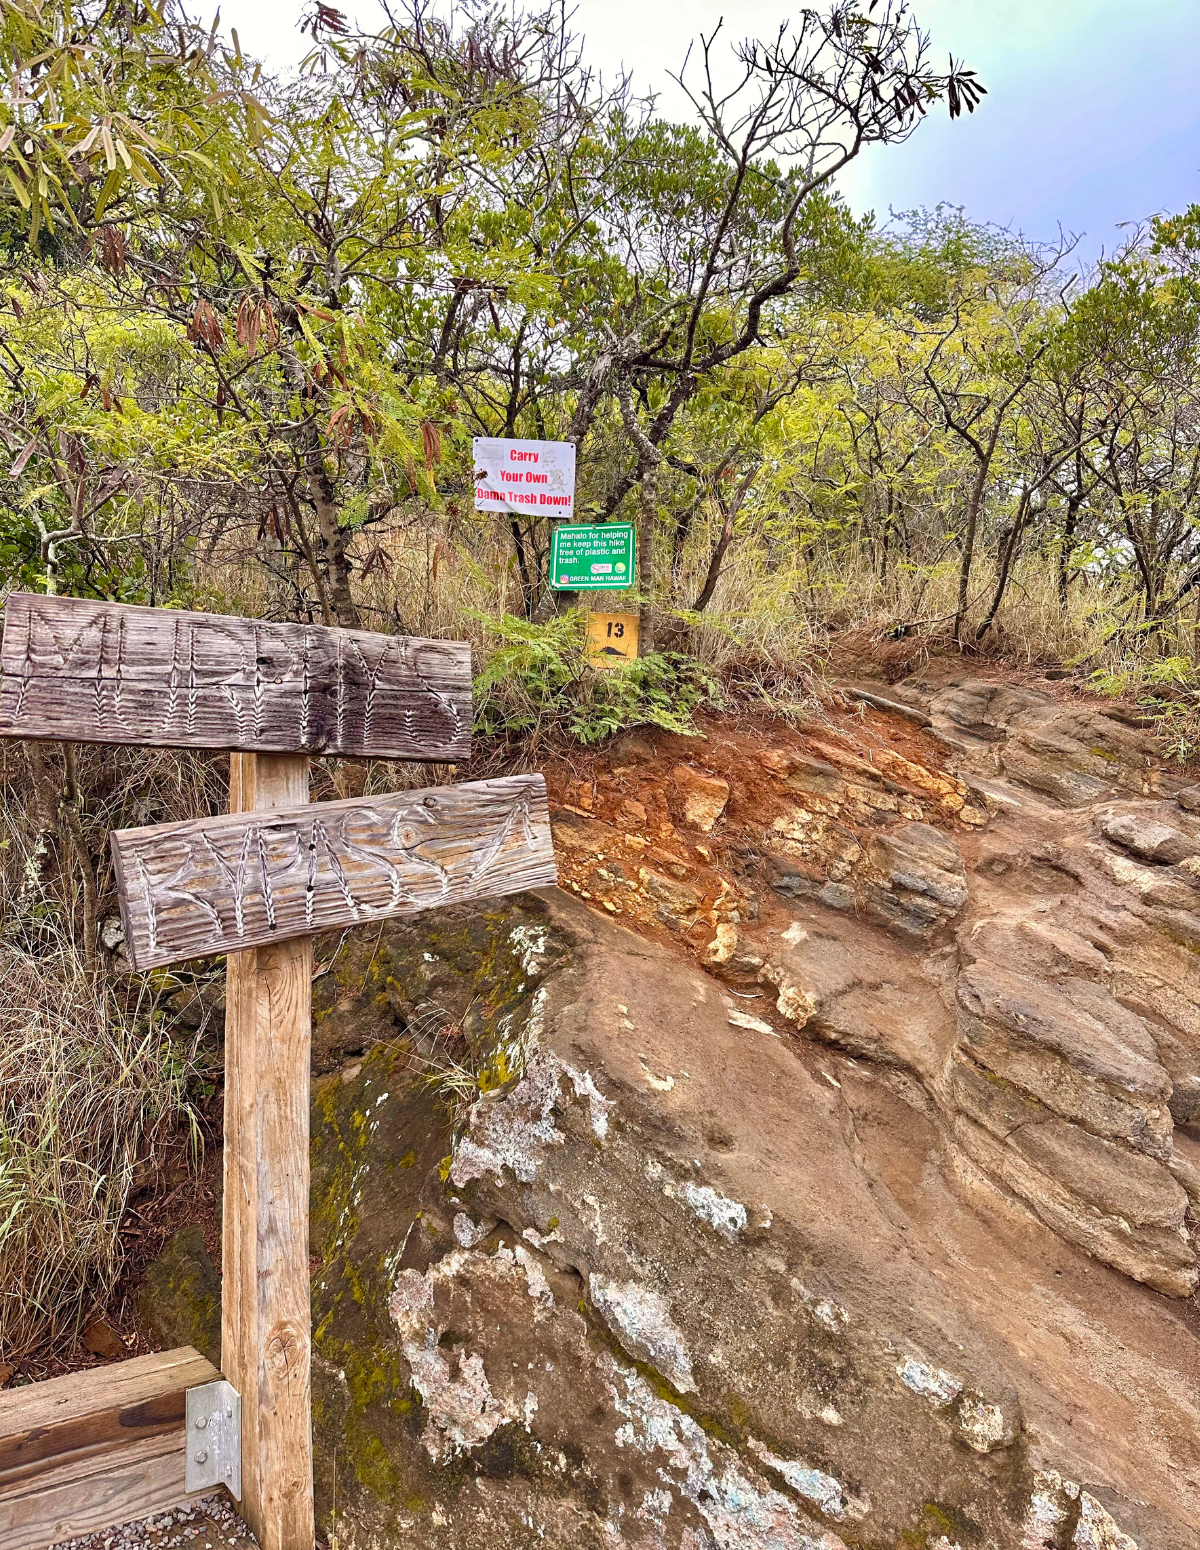
Yes, it gets very steep at the top, but there are trees on both sides of the stairs with places you can step aside. Plus there’s a bypass for the YouTube infamous “bridge.”
It took about an hour and a half to go up and down with plenty of breaks.
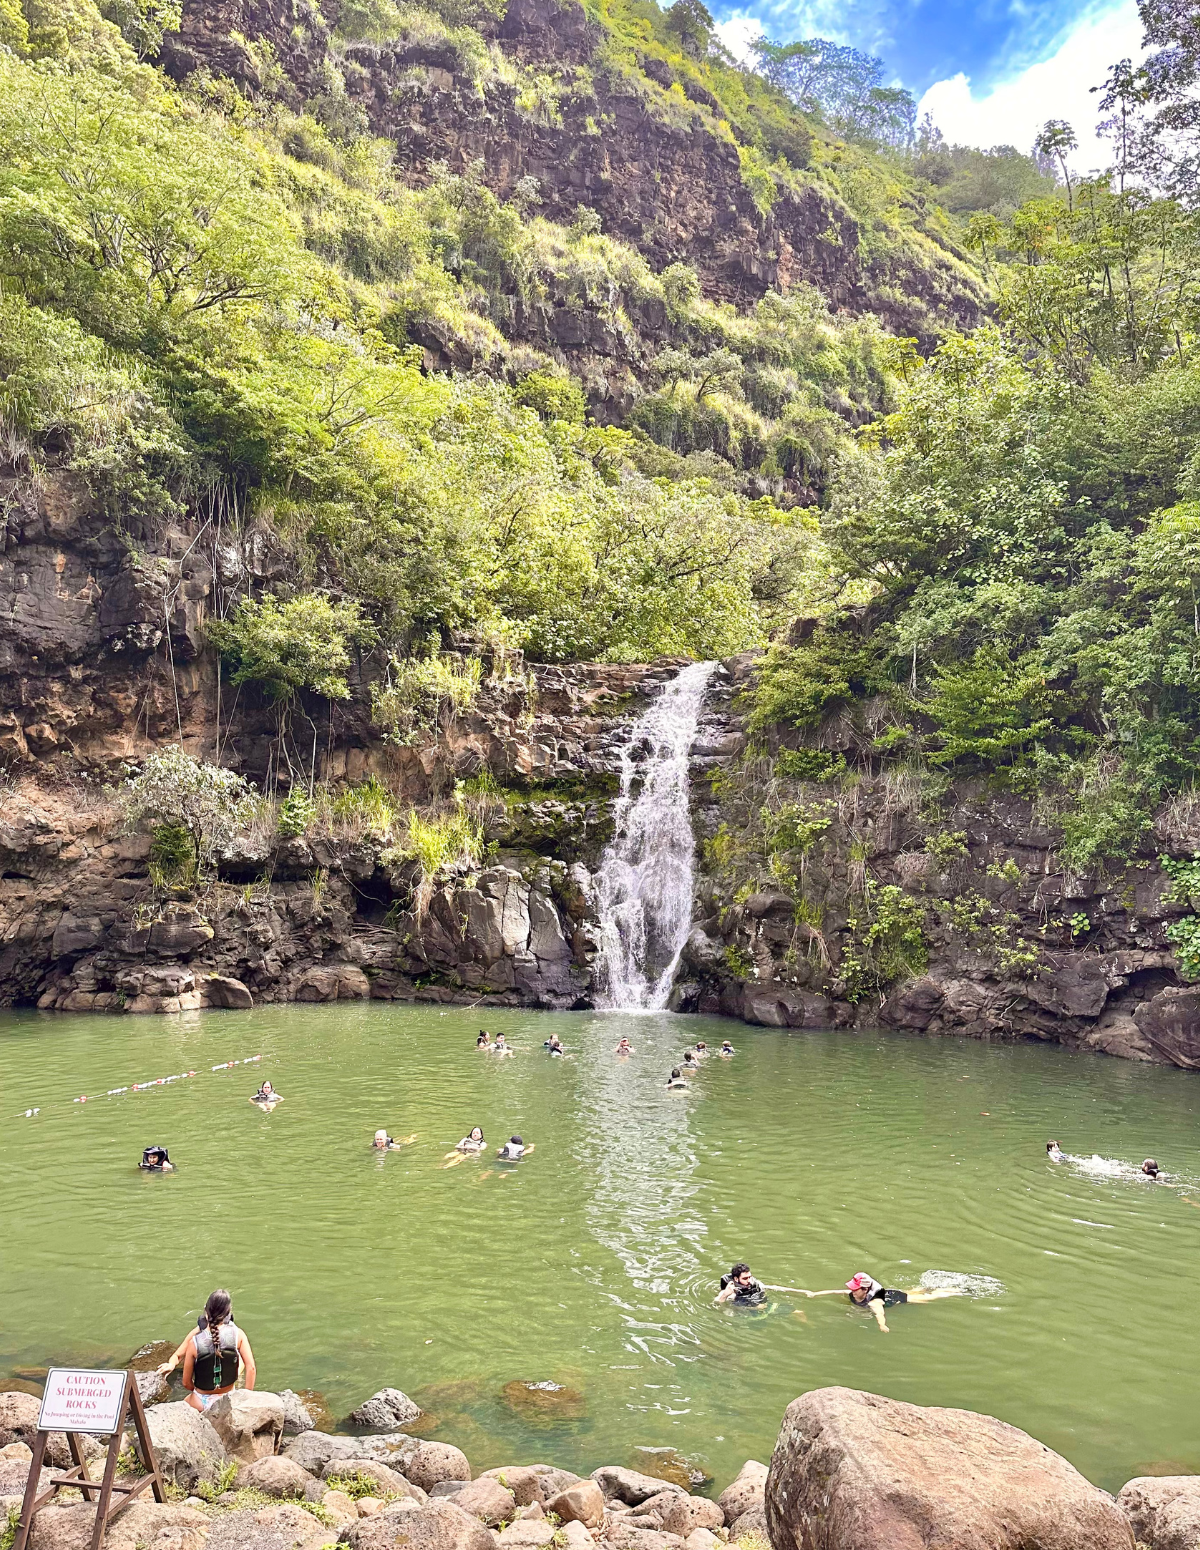
Waimea Falls
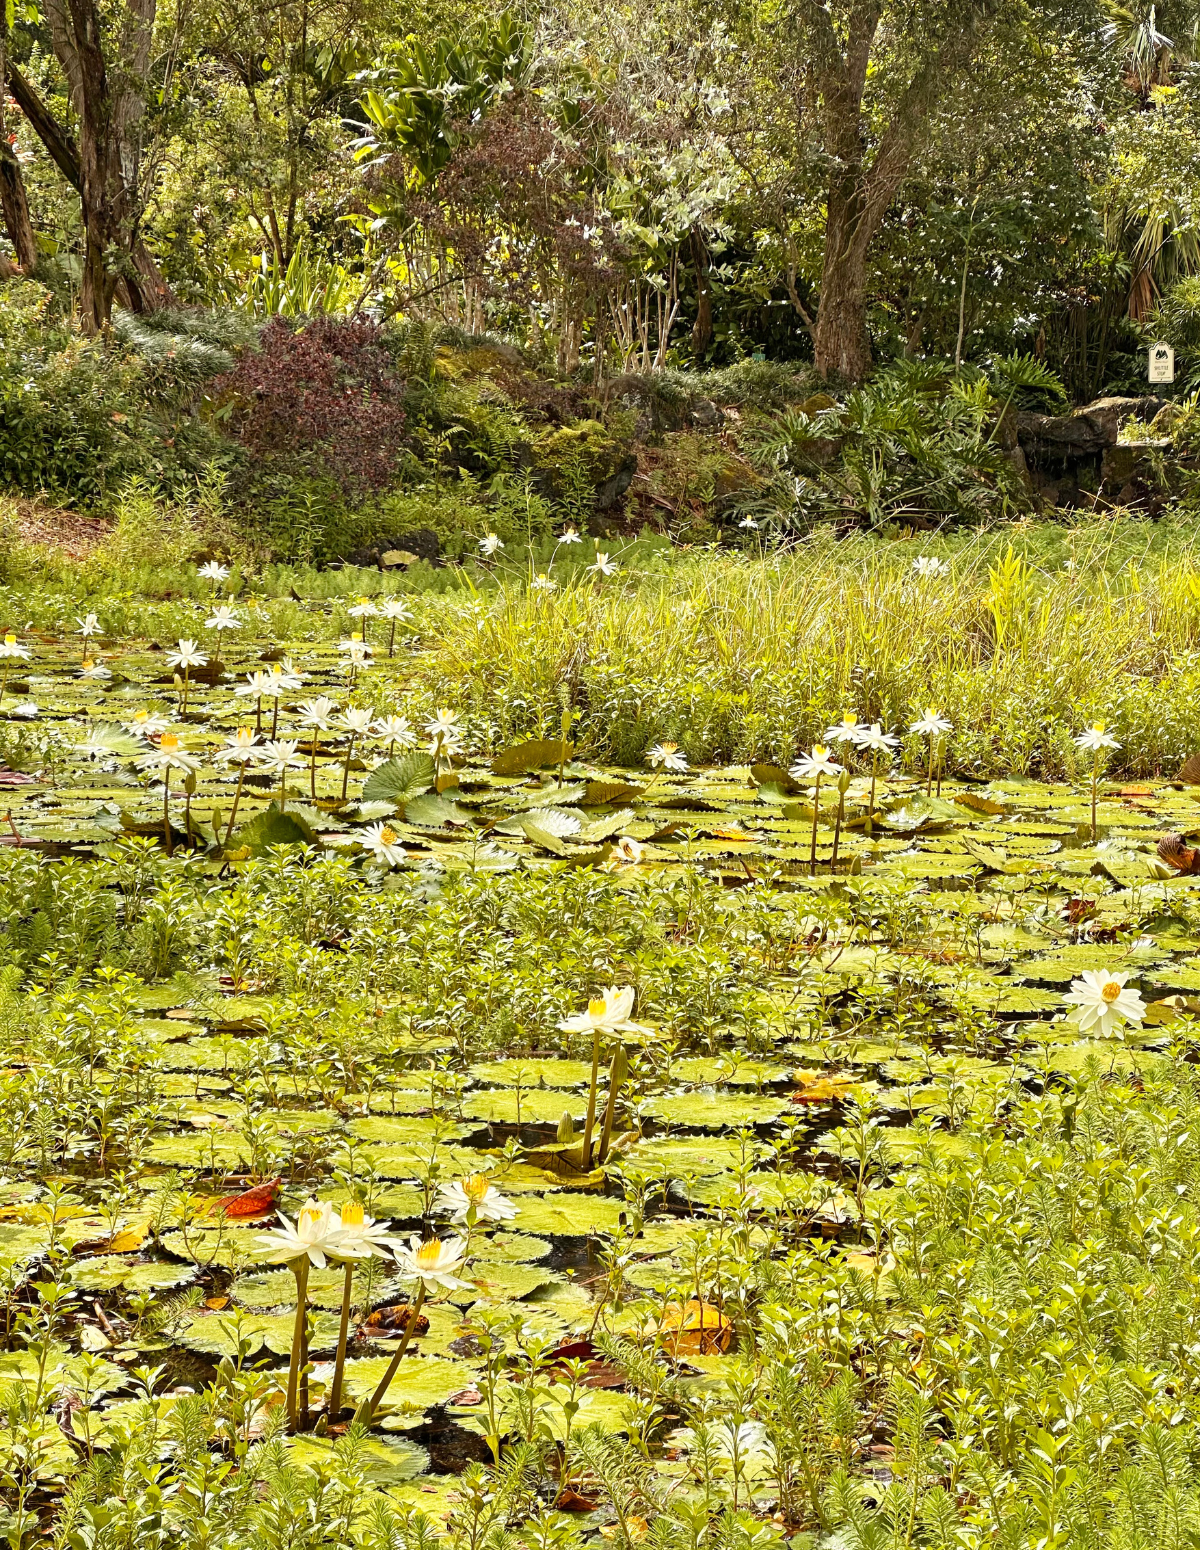
Waimea Falls gets suggested often as an easy waterfall hike on Oahu, but it’s really a lot more than that.
It’s more like a beautiful botanical garden that happens to have a waterfall at the end of the trail ; )
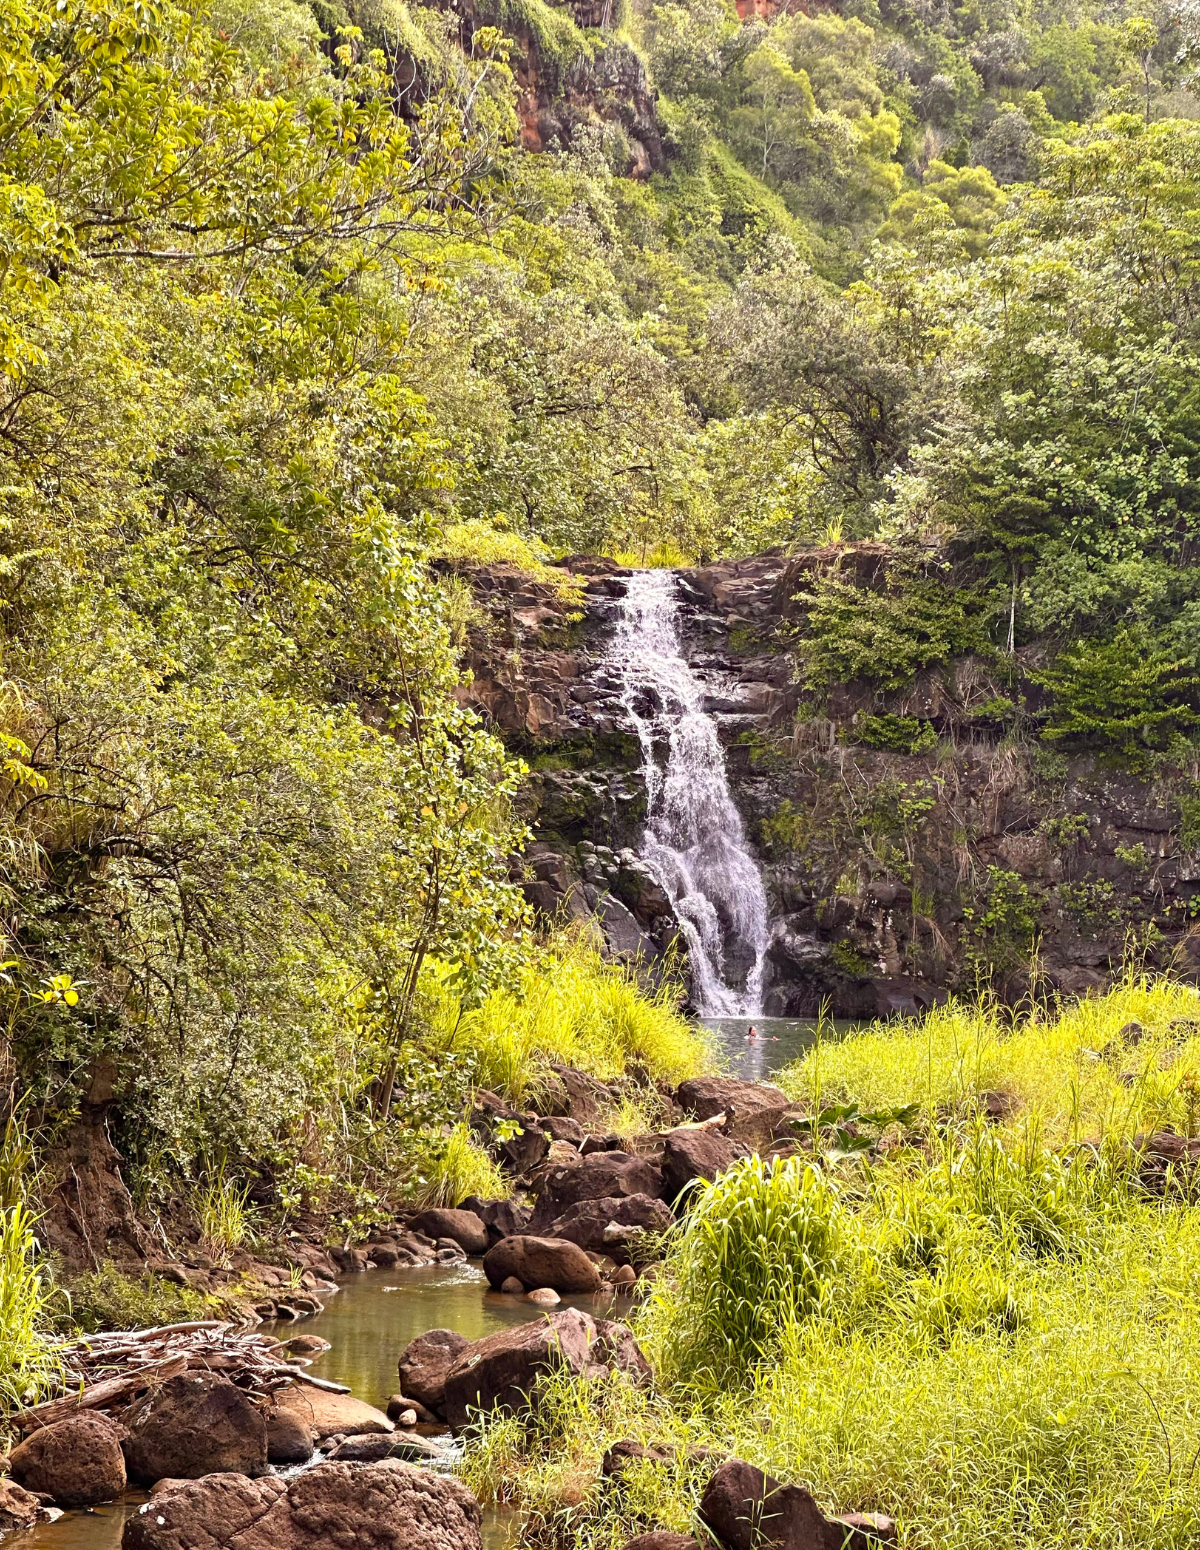
The walk back into the valley is beautiful and an easy (less than a mile) stroll through the botanical gardens along a waved walkway. There’s also a shuttle/tram you can take.
You can swim at the bottom of the waterfall (life jackets are provided and required) and there are life guards on duty. If you’re set on swimming in a waterfall pool in Hawaii, this is probably your safest bet.
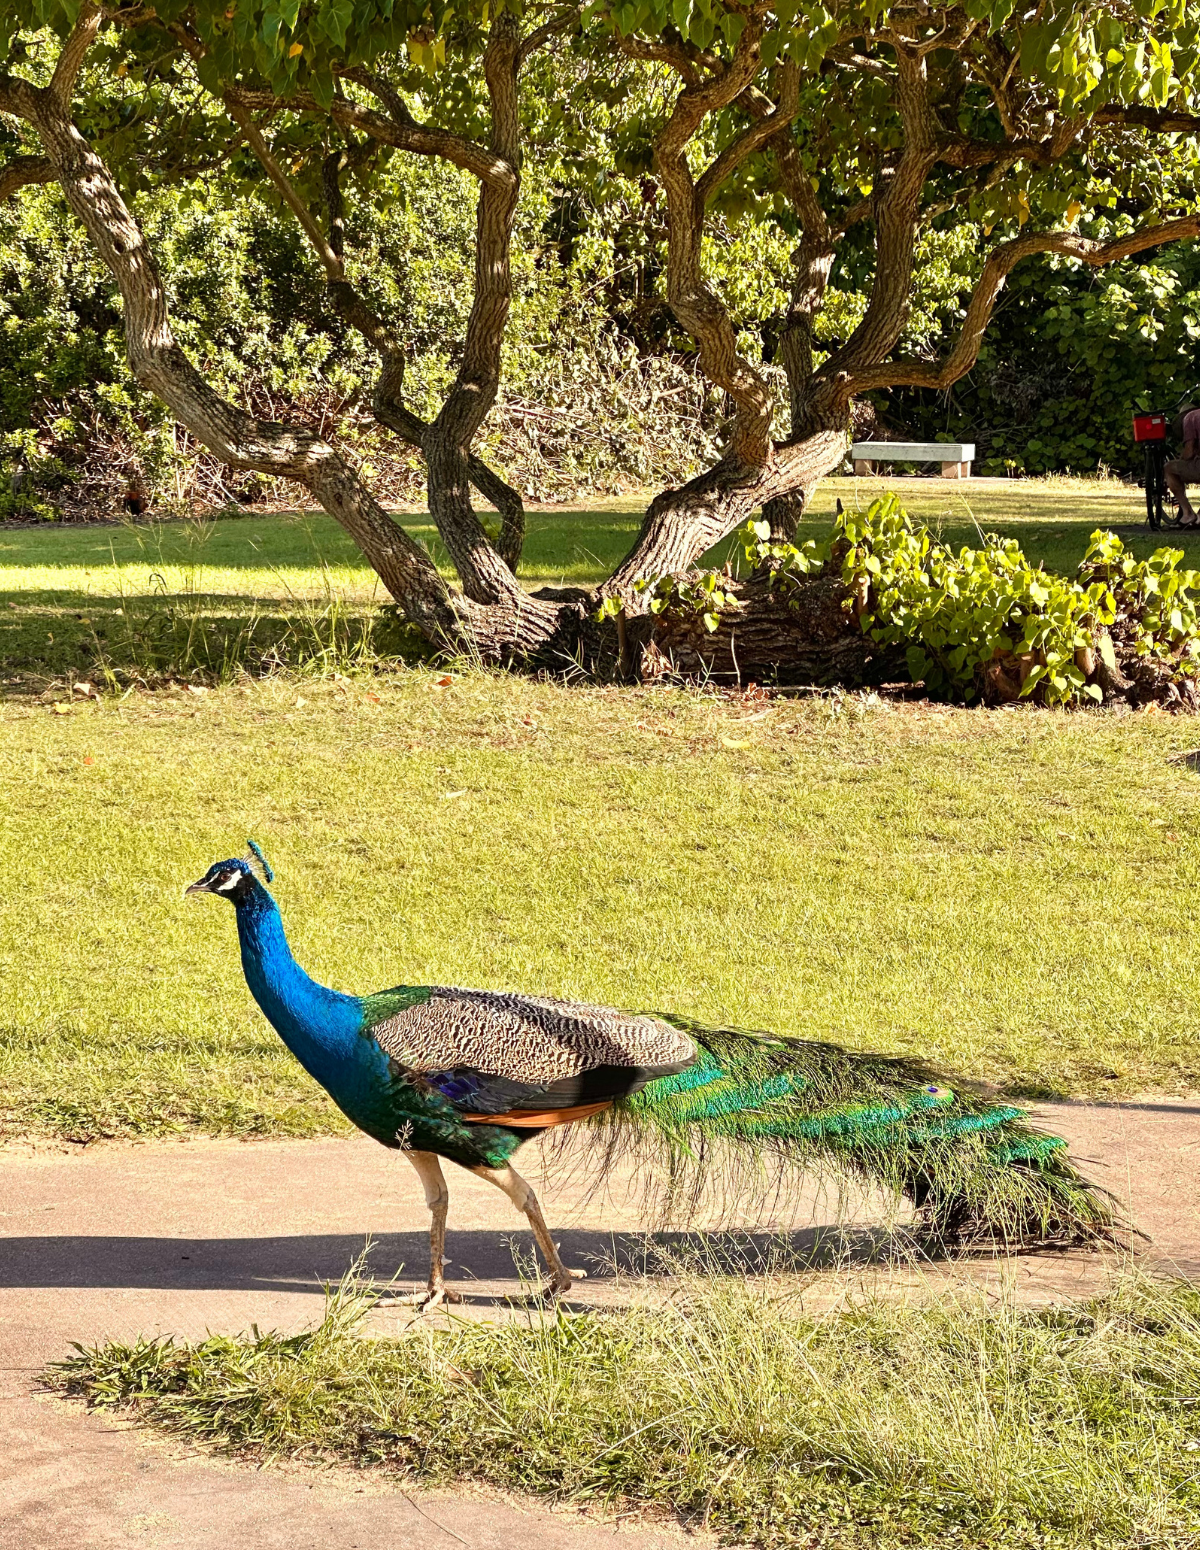
There are usually some cultural activities and educational workshops going on plus they have an afternoon and an evening luau here. $25 for adults and $15 for children. Closed on Mondays.
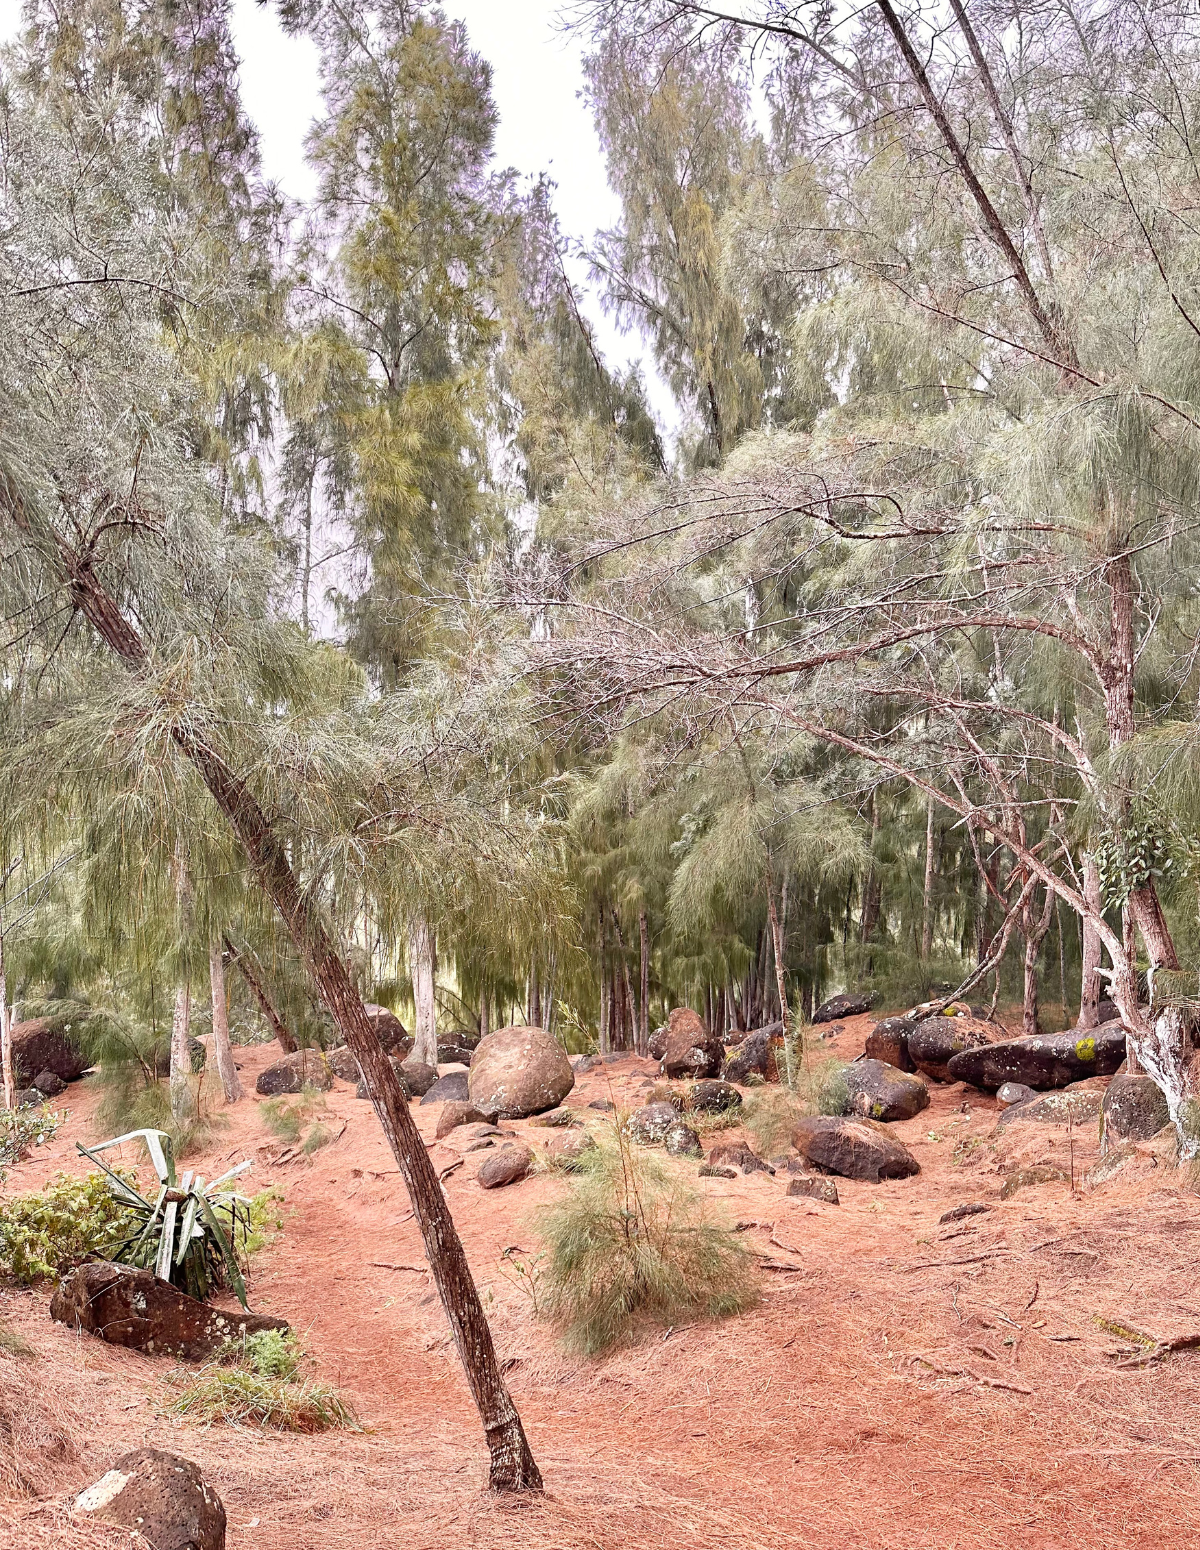
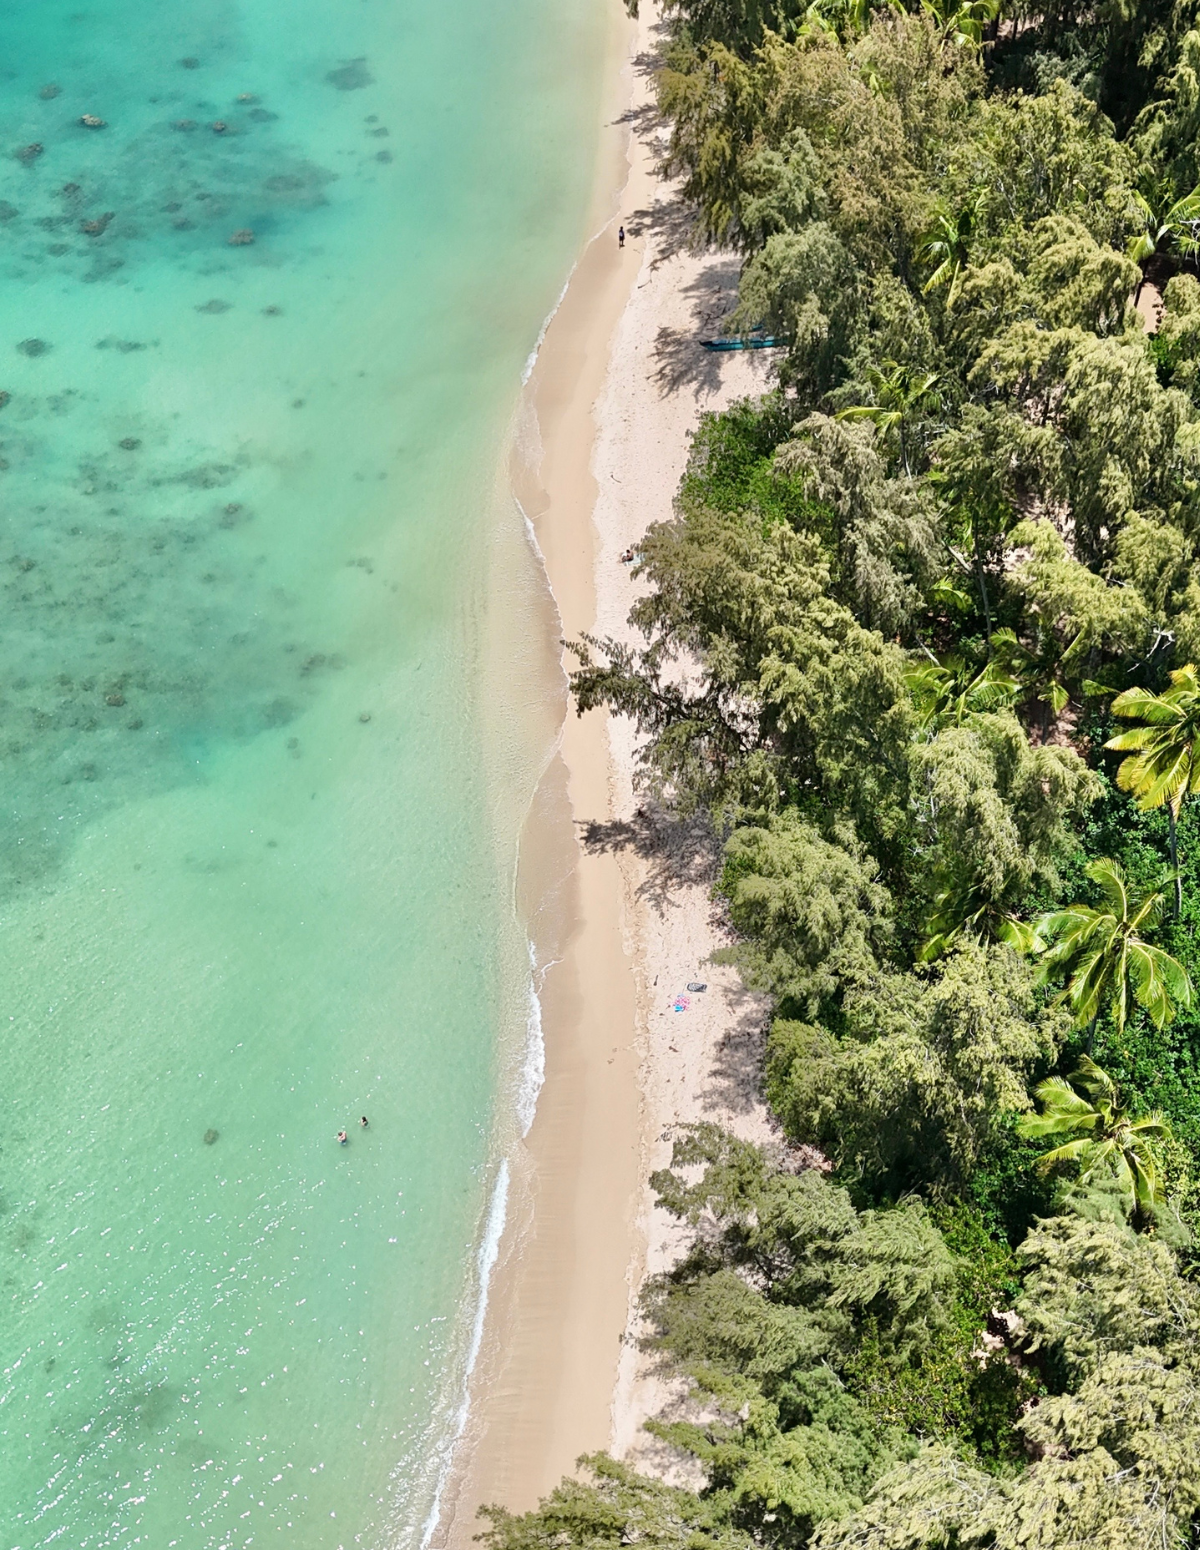
Turtle Bay
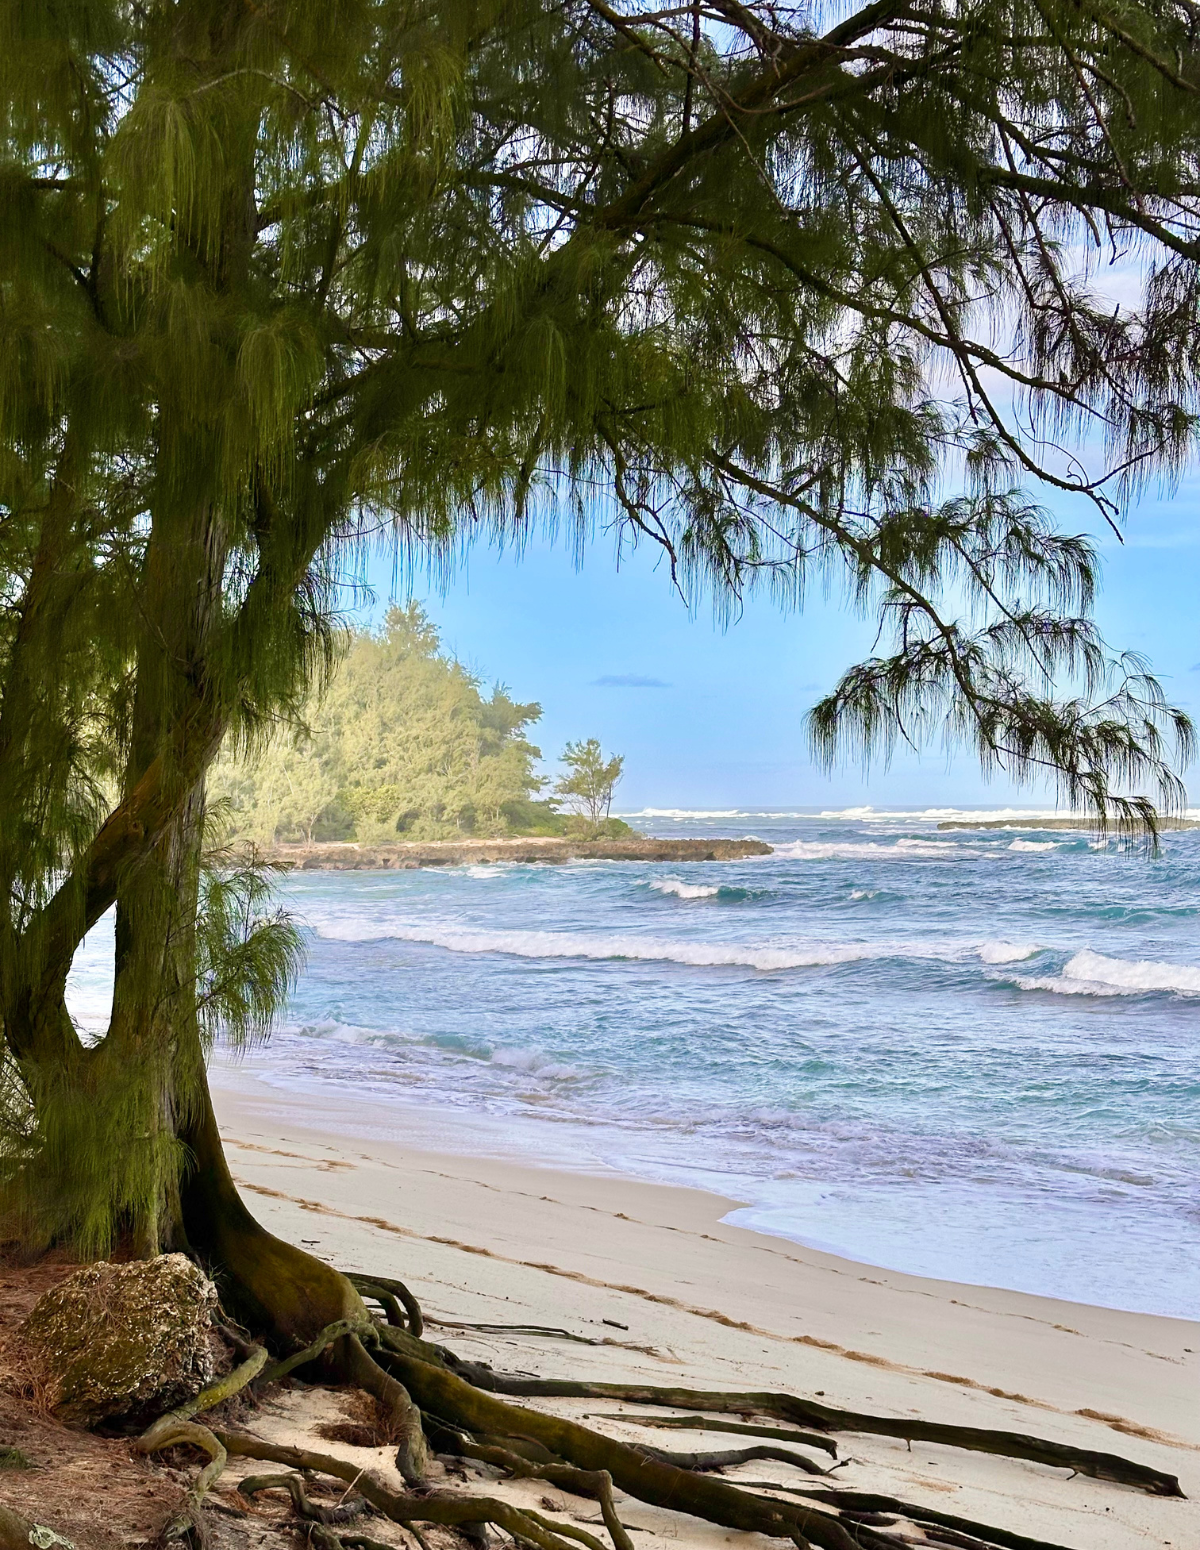
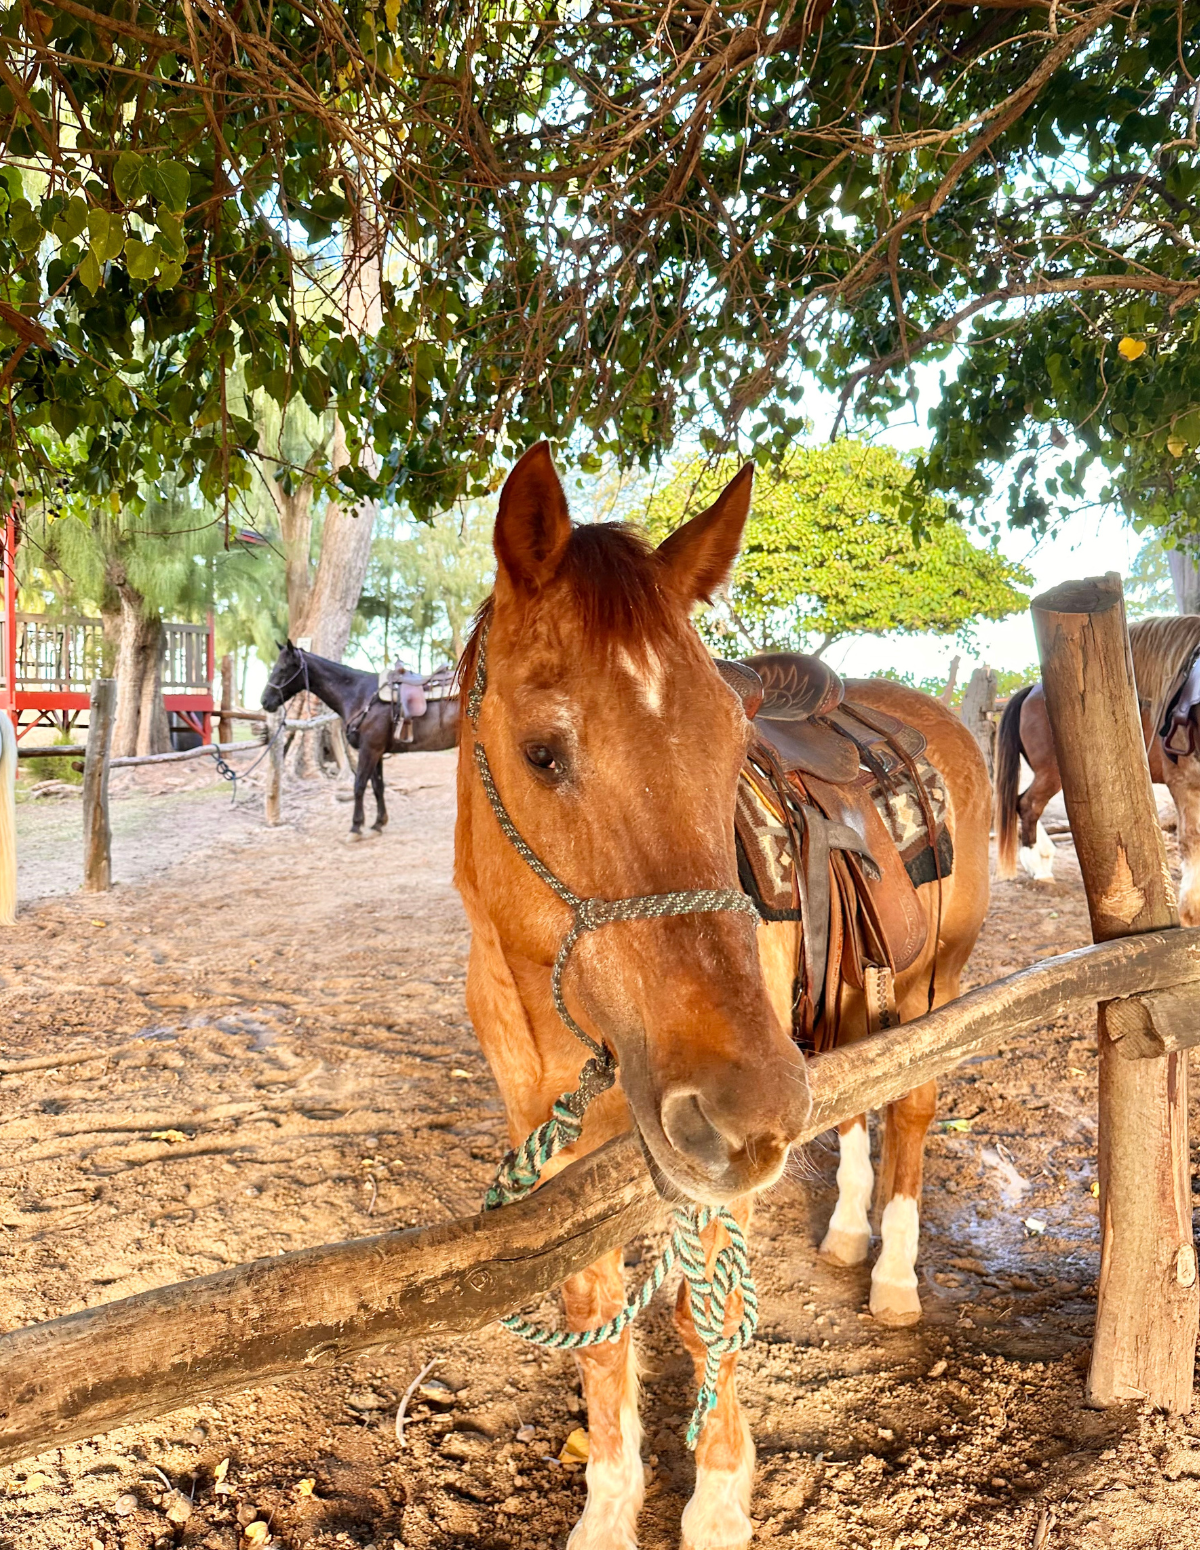
Whether or not you’re staying at Turtle Bay (it’s my favorite place to stay on Oahu!), the beaches, stables, and hiking trails around the property are one of my favorite spots to explore.
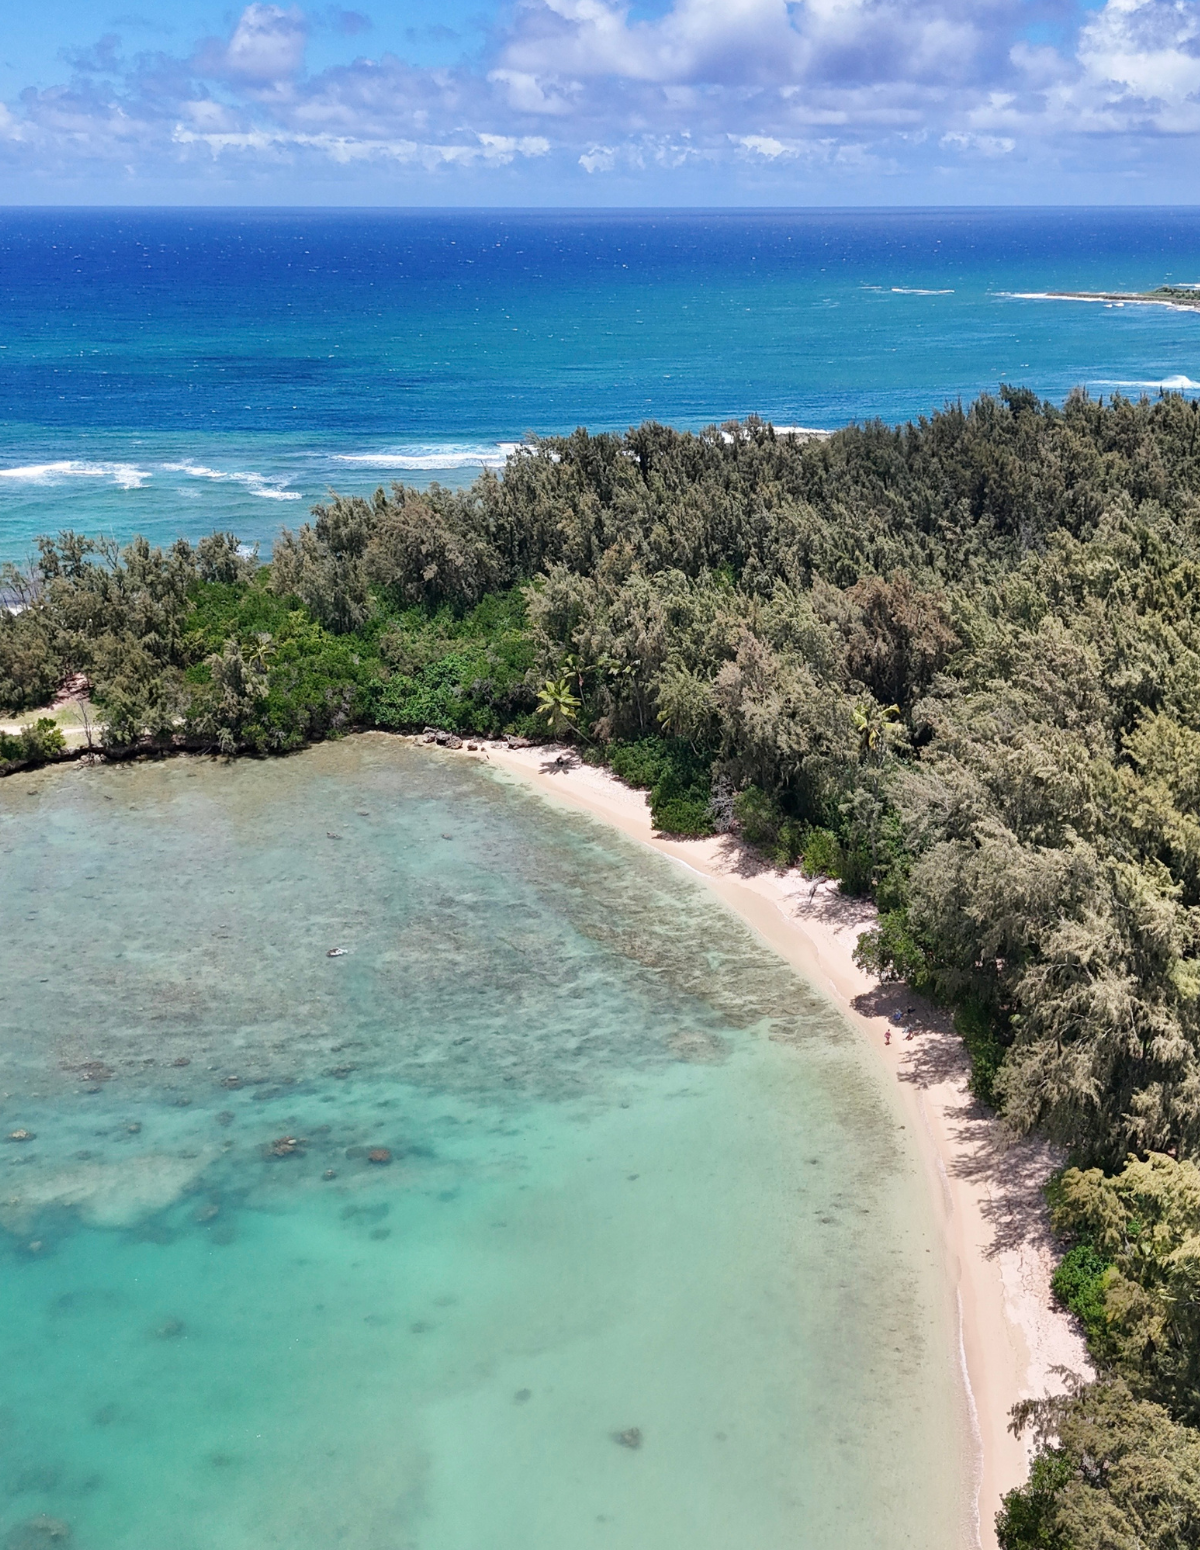
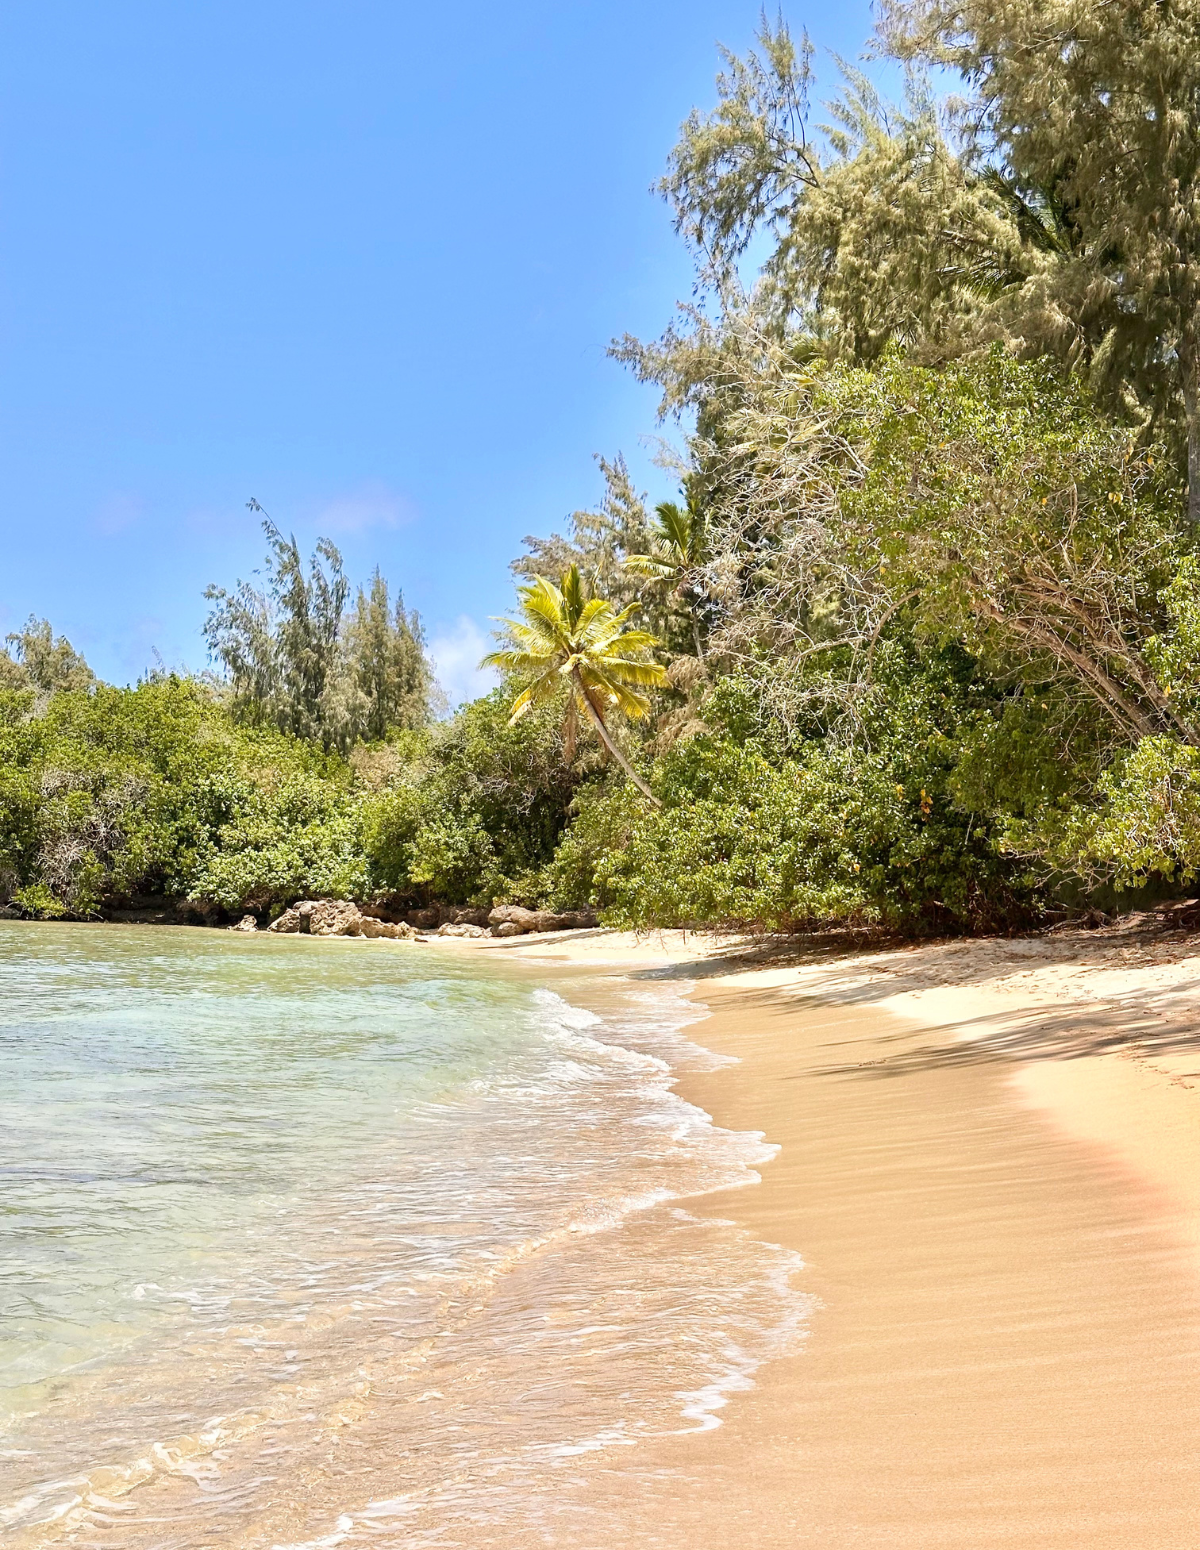
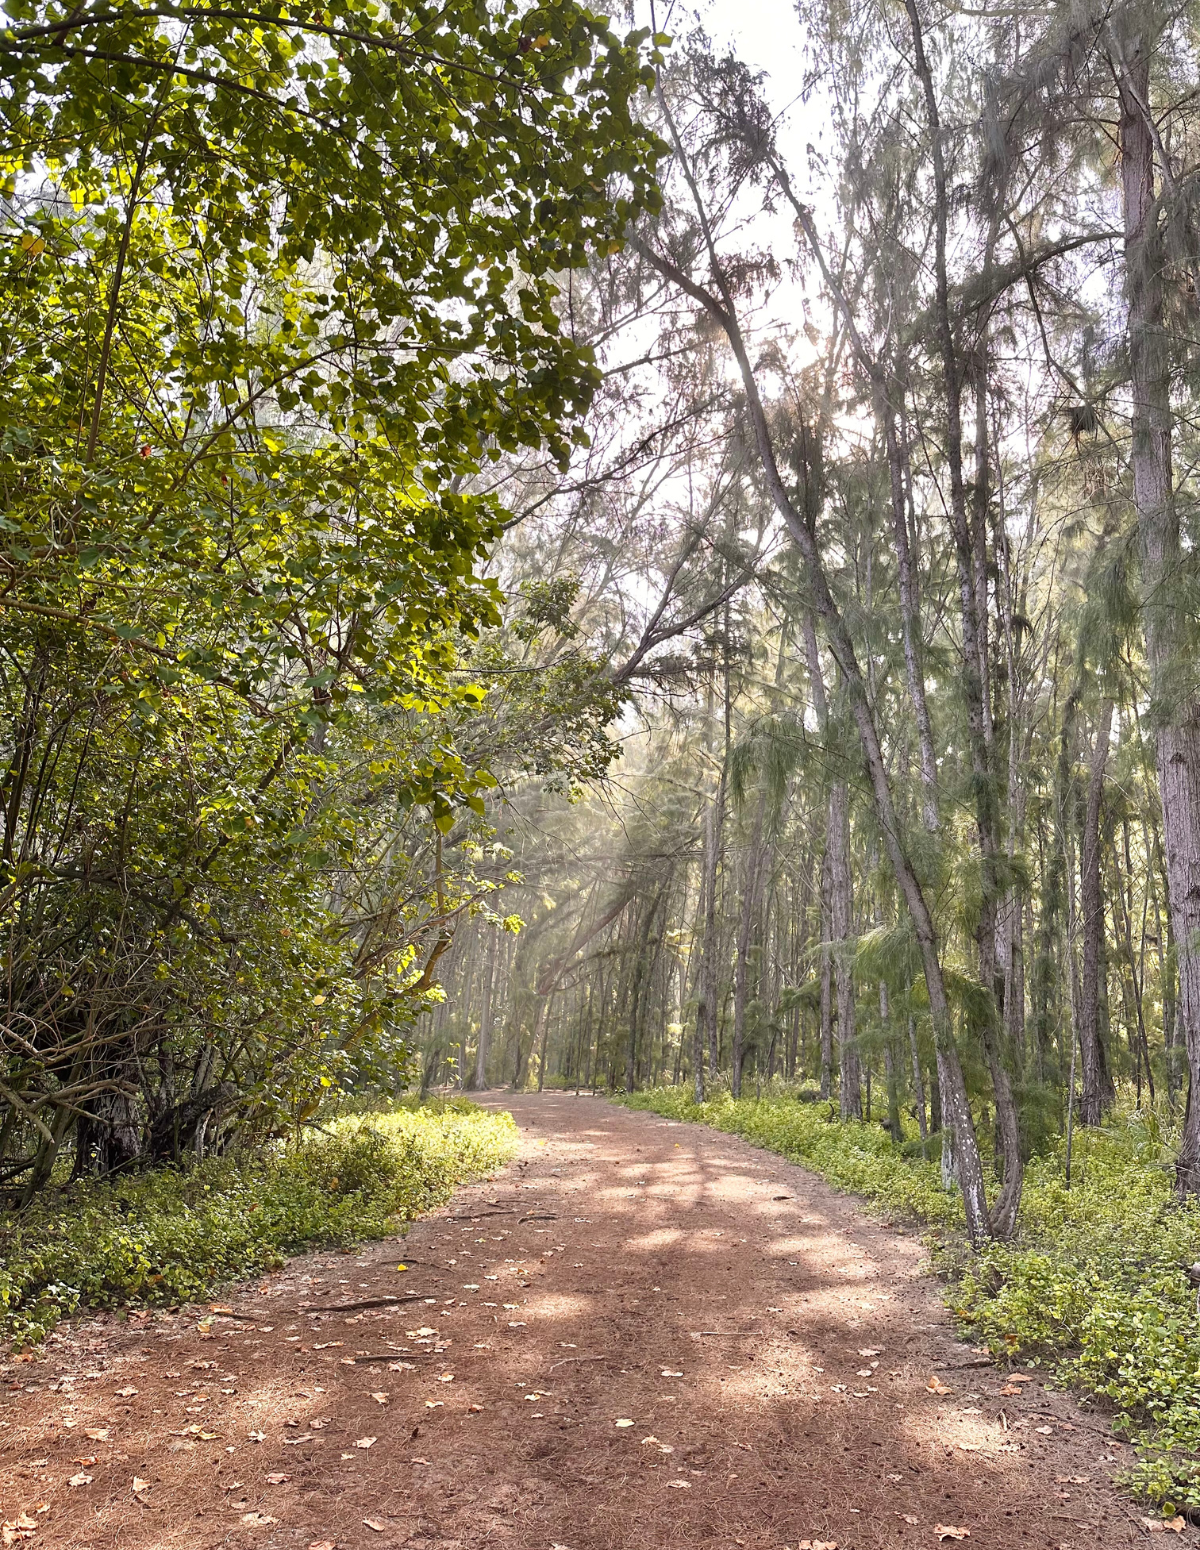
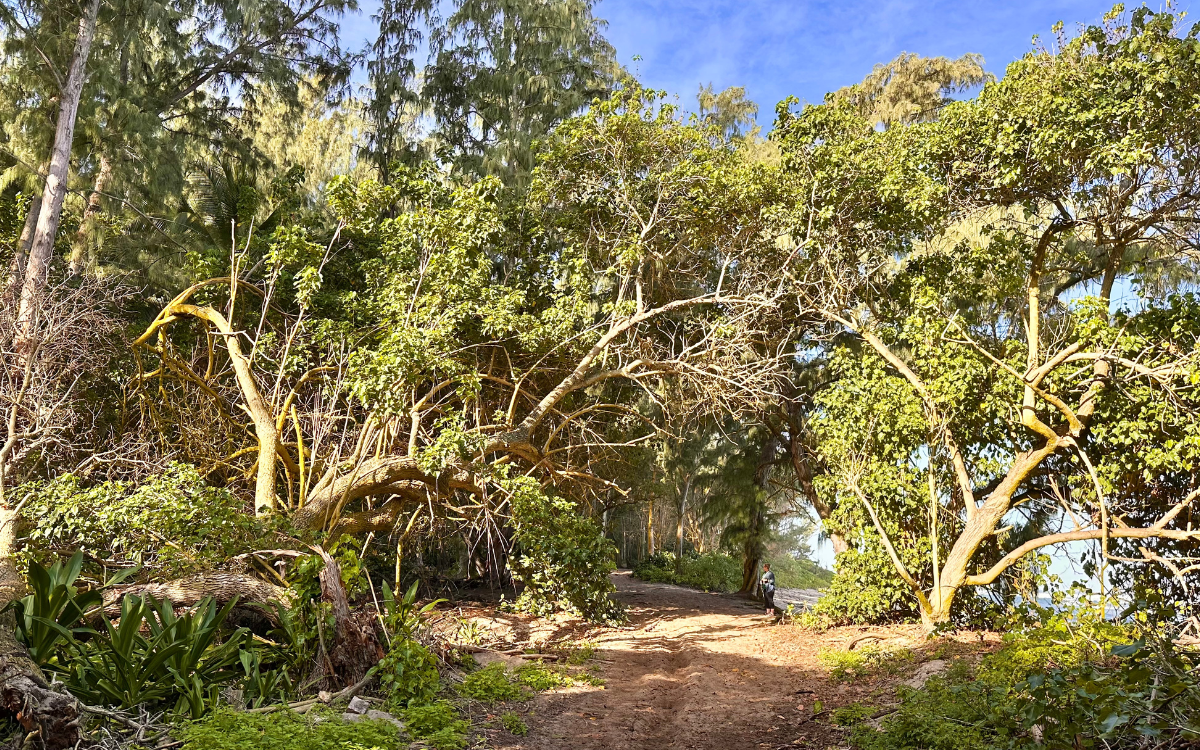
Visit the Stables at Turtle Bay…it’s such a great spot. There are miles of hiking trails along the beach and through the forest leading to the “hidden” Kawela Bay (a great spot to find turtles in the afternoons).
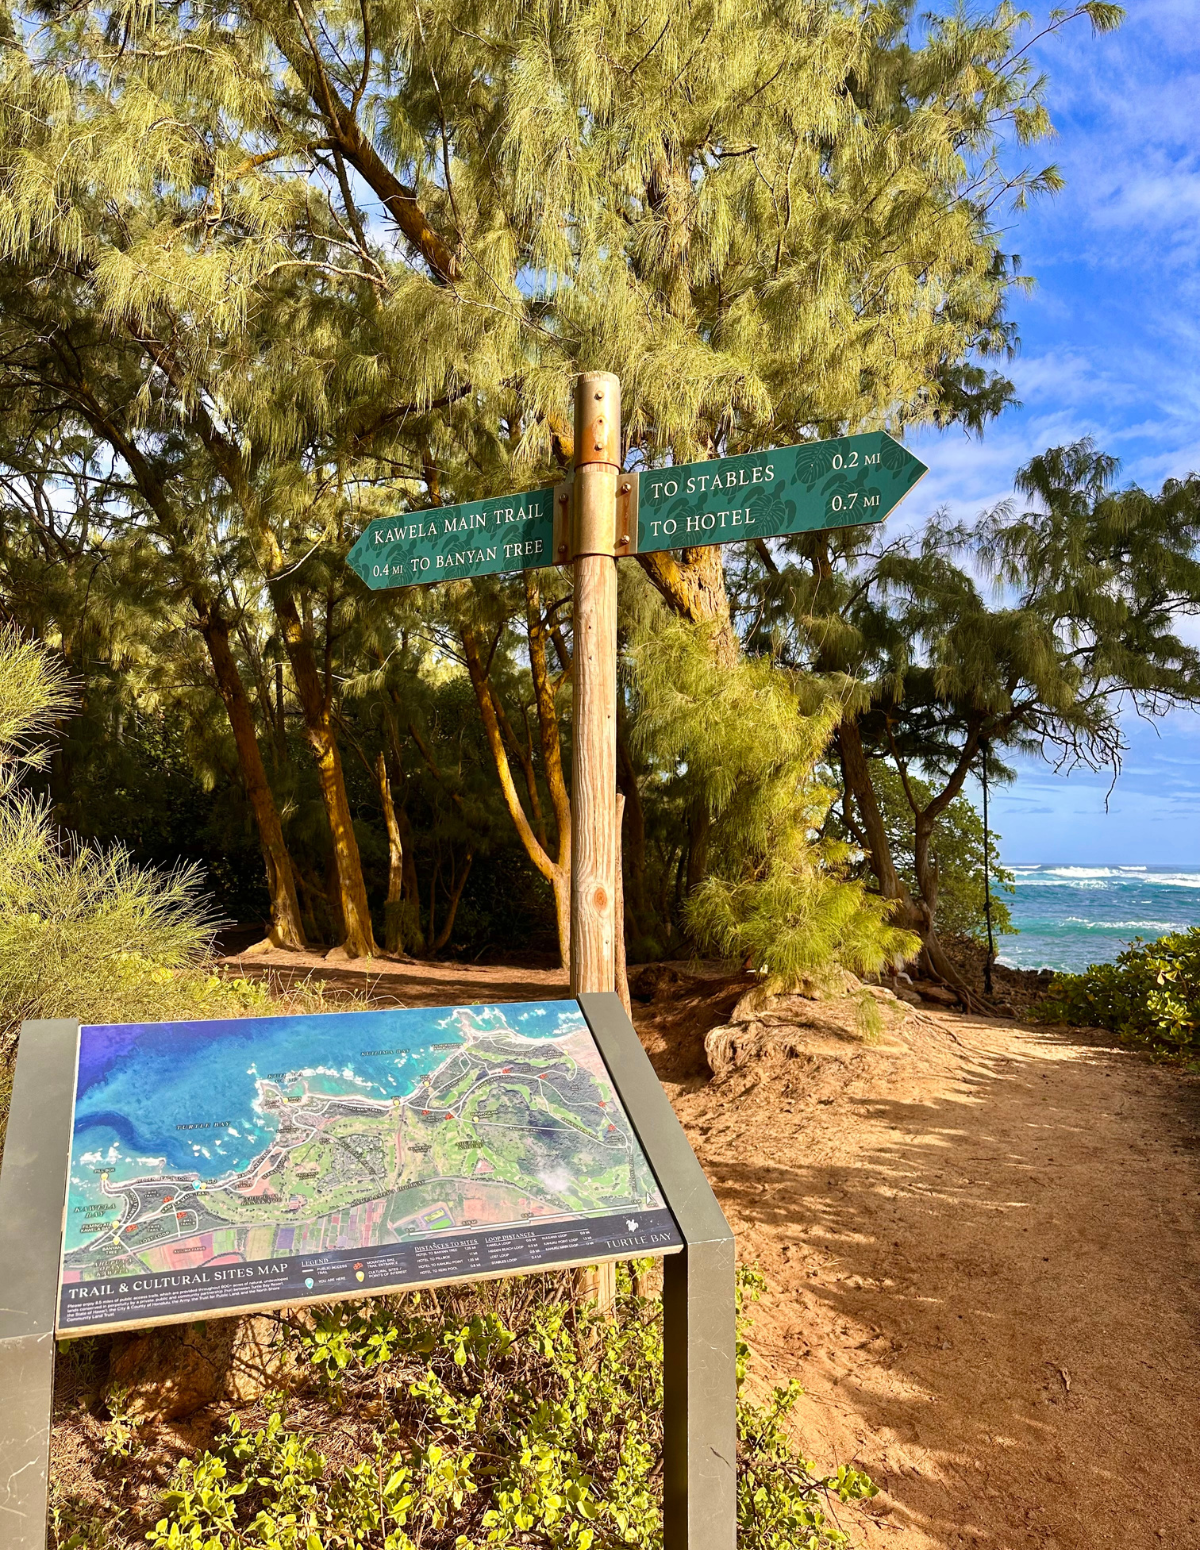
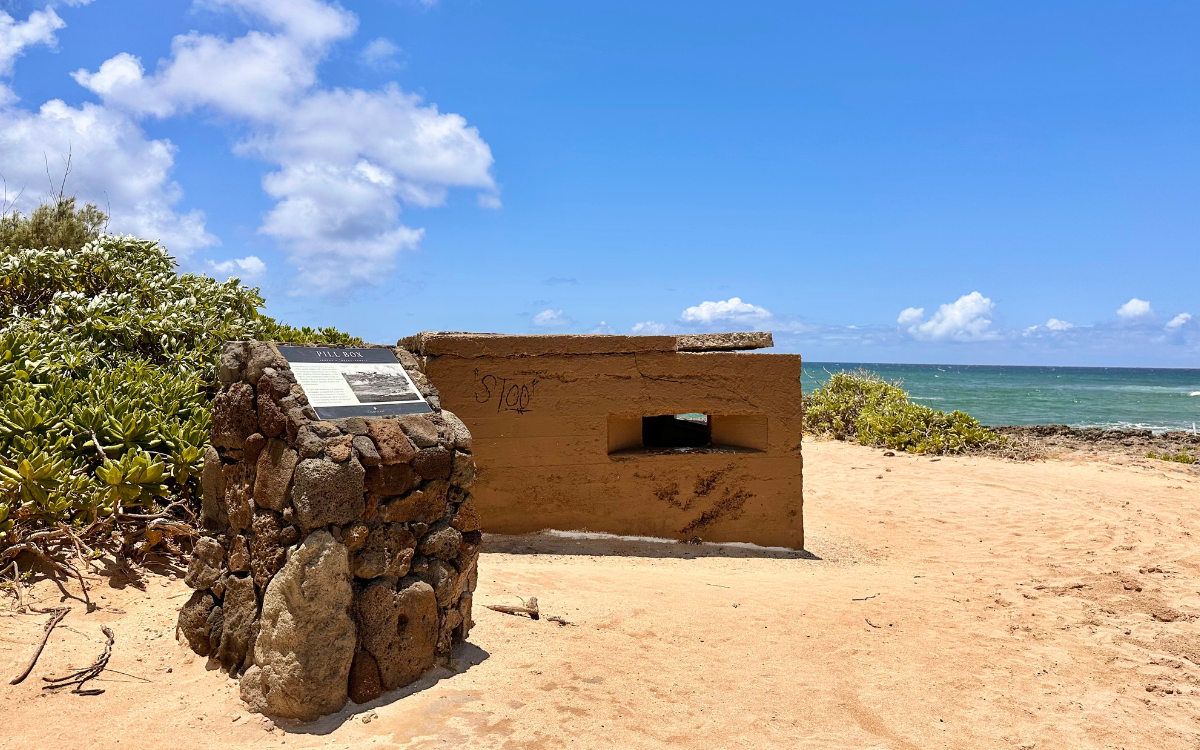
If you’re staying at the resort, follow the signs towards the Stables and from there you can pick your trail along the beach or through the forest. There’s a pillbox on the point you can explore too.
If you’re not staying at the resort, there’s quite a bit of public beach parking plus parking around the stables. And you can also park off the street near Kawela Bay.

I’ve made it my job for the last 10 years to explore Maui.
And after hundreds of beach days, rainforest hikes, snorkeling trips, and reconnaissance missions to find the best hotels… and mai tais… I put everything I know into one place.
This is my Maui Digital Map — hundreds of my favorite spots. Beaches, snorkeling spots, hikes, farm tours, scenic drives, places to eat.
Yes, I share hidden spots I don’t talk about so much on social media…but also—tourist doesn’t have to be a dirty word. Popular places are popular for a reason.
So I break down what’s worth it, what’s not, where to spend your money, where to save it, and how to avoid crowds at some of Maui’s most popular (and best) places so you actually enjoy your time.
I’m also sharing all of my travel guides on when to go, where to stay, detailed hotel reviews…
plus dozens of itinerary options based on where you’re staying and what you love to do.
It’s everything you need to see the best of Maui and actually relax. A Vacation in a box…all YOU need to do is pack your suitcase.
Get access to my Maui digital map and itineraries here.